Training Management
Create a Class
This guide will walk you through all the features of our class builder. It’s a long guide and we would suggest you watch the video as well. If you are a training officer for multiple departments, you will only need to create a class once and you can then share it with your other departments. Classes that are added here can only be seen by users in your account.
Class Take Types
Whether you are creating a Live course and only using Prodigy for tracking, a Live or Virtual Live course that you are using Prodigy for registration, or a distributive course. You will use this class builder to create the class for all of these scenarios.
What can class registration and creation handle?
- Offer a distributive class that is created on Prodigy.
- Offer a virtual live class where users register on Prodigy and complete a quiz once complete.
- Run a class that is available as in person live, where users register through Prodigy. After which you can choose to either require a quiz or simply mark the user as complete if they attend.
- Use Prodigy as a roster system only for a live class, registration can be handled off the sites and the attendance and completion is simply tracked in Prodigy.
- Run a class live which is recorded and later offered as a distributive class.
- Any combination of distributive/virtual live/in person live where you either require a quiz or not and where registration is either handled by Prodigy or a different system.
Creating a Class
There are lots of options when creating a class but our goal was to make the process simple and only require you to use the features that you need. We are not using a standard class authoring tool like SCORM, frankly, those tools are outdated and don’t allow the same level of functionality and flexibility as our tool. They also don’t handle video well which makes building a modern class difficult.
To add a class, start off by going to the Classes menu and choosing Manage from your training officer account and click Add Class.

Editing a Class
If you need to edit a published class or complete a class in draft, you can click the Organization Class tab. Once there, click on the name of a course and you will be brought in to the editor.
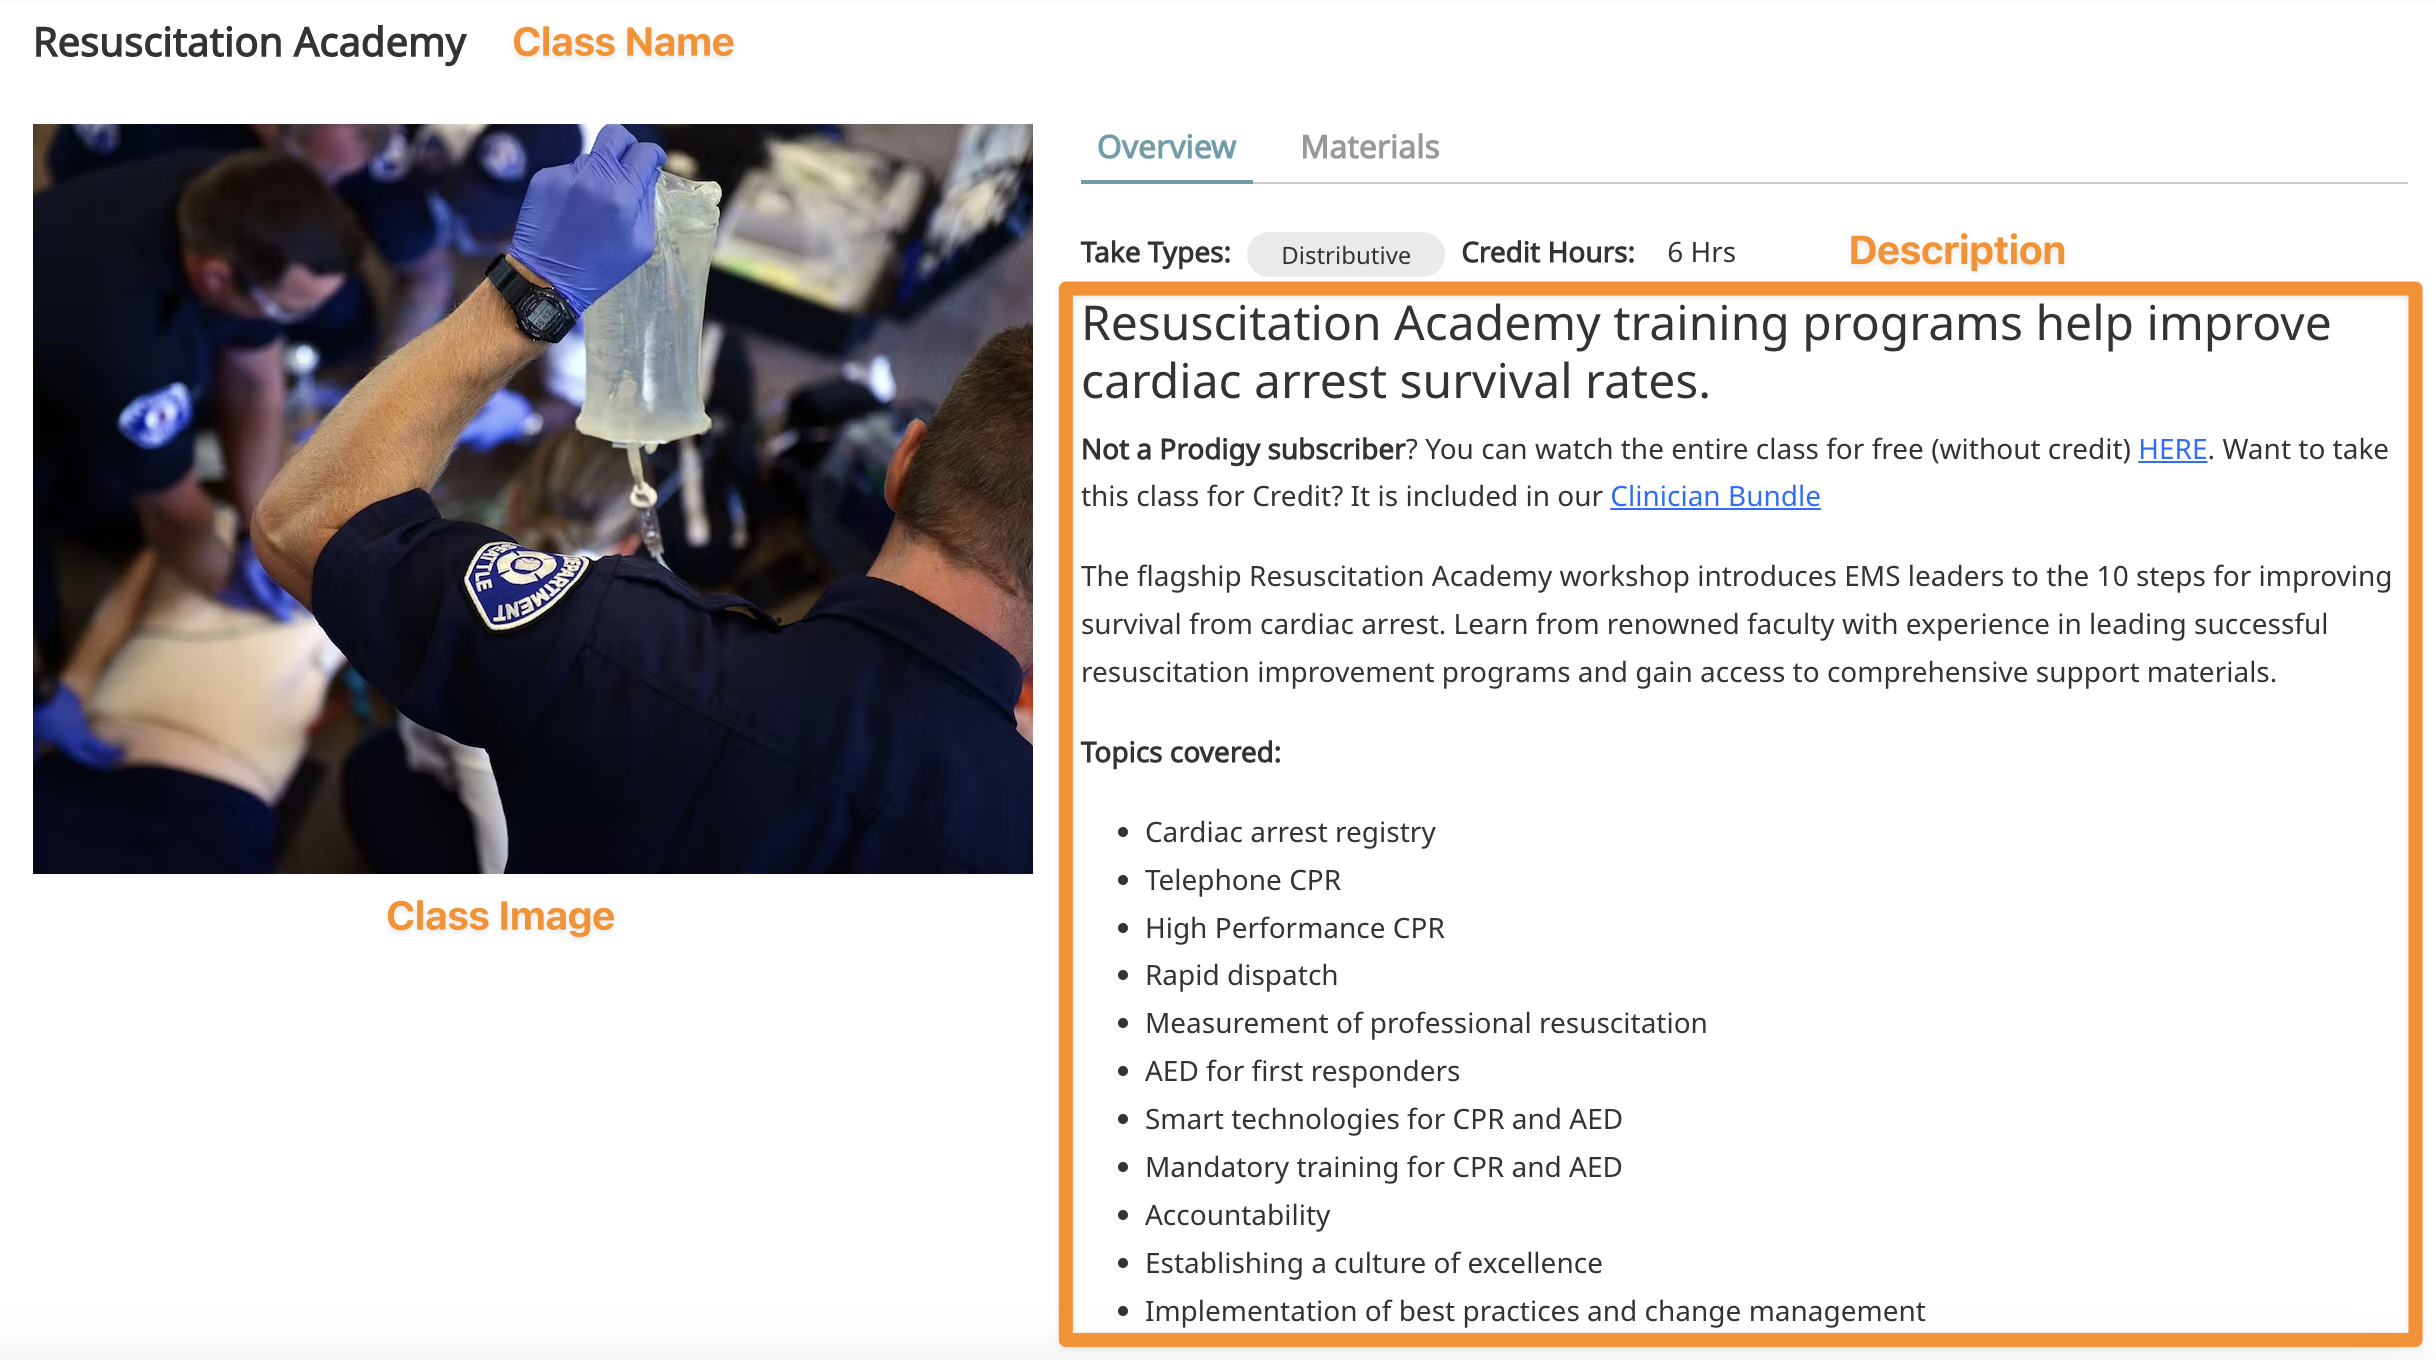
Class Details Page
This page is where you will set basic information such as name, description, and image. You will also choose what type of class you are offering and the duration.
Basic Information

- Class Name - This will be what shows up in the catalog, transcripts, certificates, and training plans. The character limits are listed below the input.
- Headline - This is the short description that shows up in the class catalog..
- Description - The description is what shows up on the class page. There is no character limit, this allows for rich text editing. You can add links, text styling, images, and more to give this section a landing page feel.
- Class Image - This will show up on both the class page and catalog. The image will be scaled to fit both areas, but the recommended size is listed below the input. You can drag and drop an image or click the box to upload.

Departments Authorized
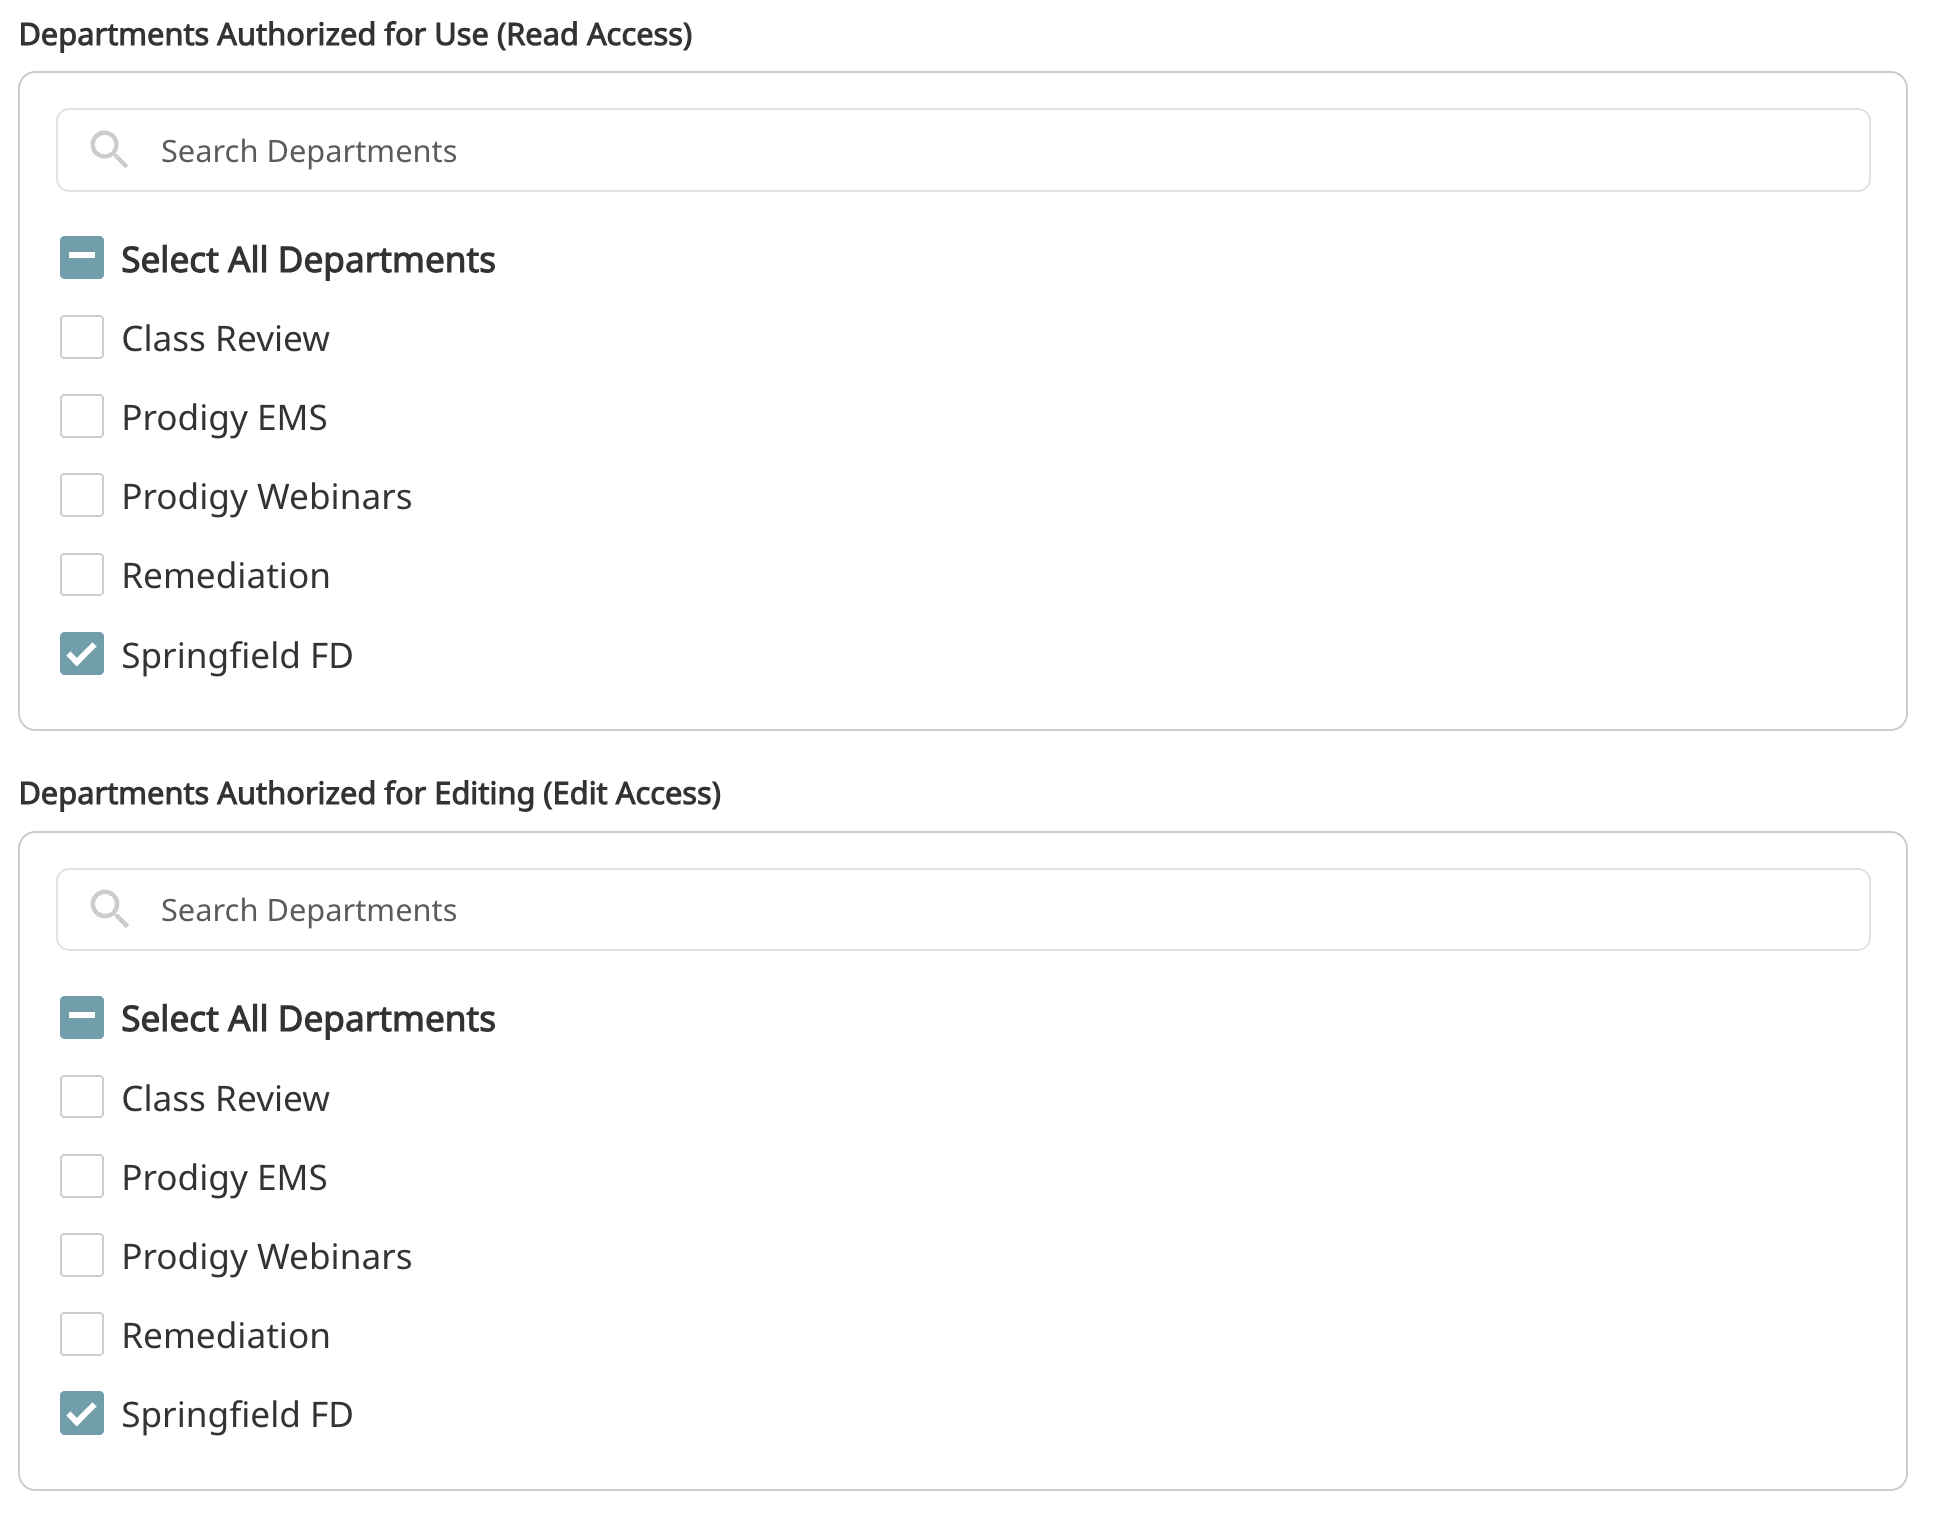
This section is for users who are training officers in more than one department or for organizations. Departments with Read Access can view and assign the course. Departments with Edit Access have full control over the class.
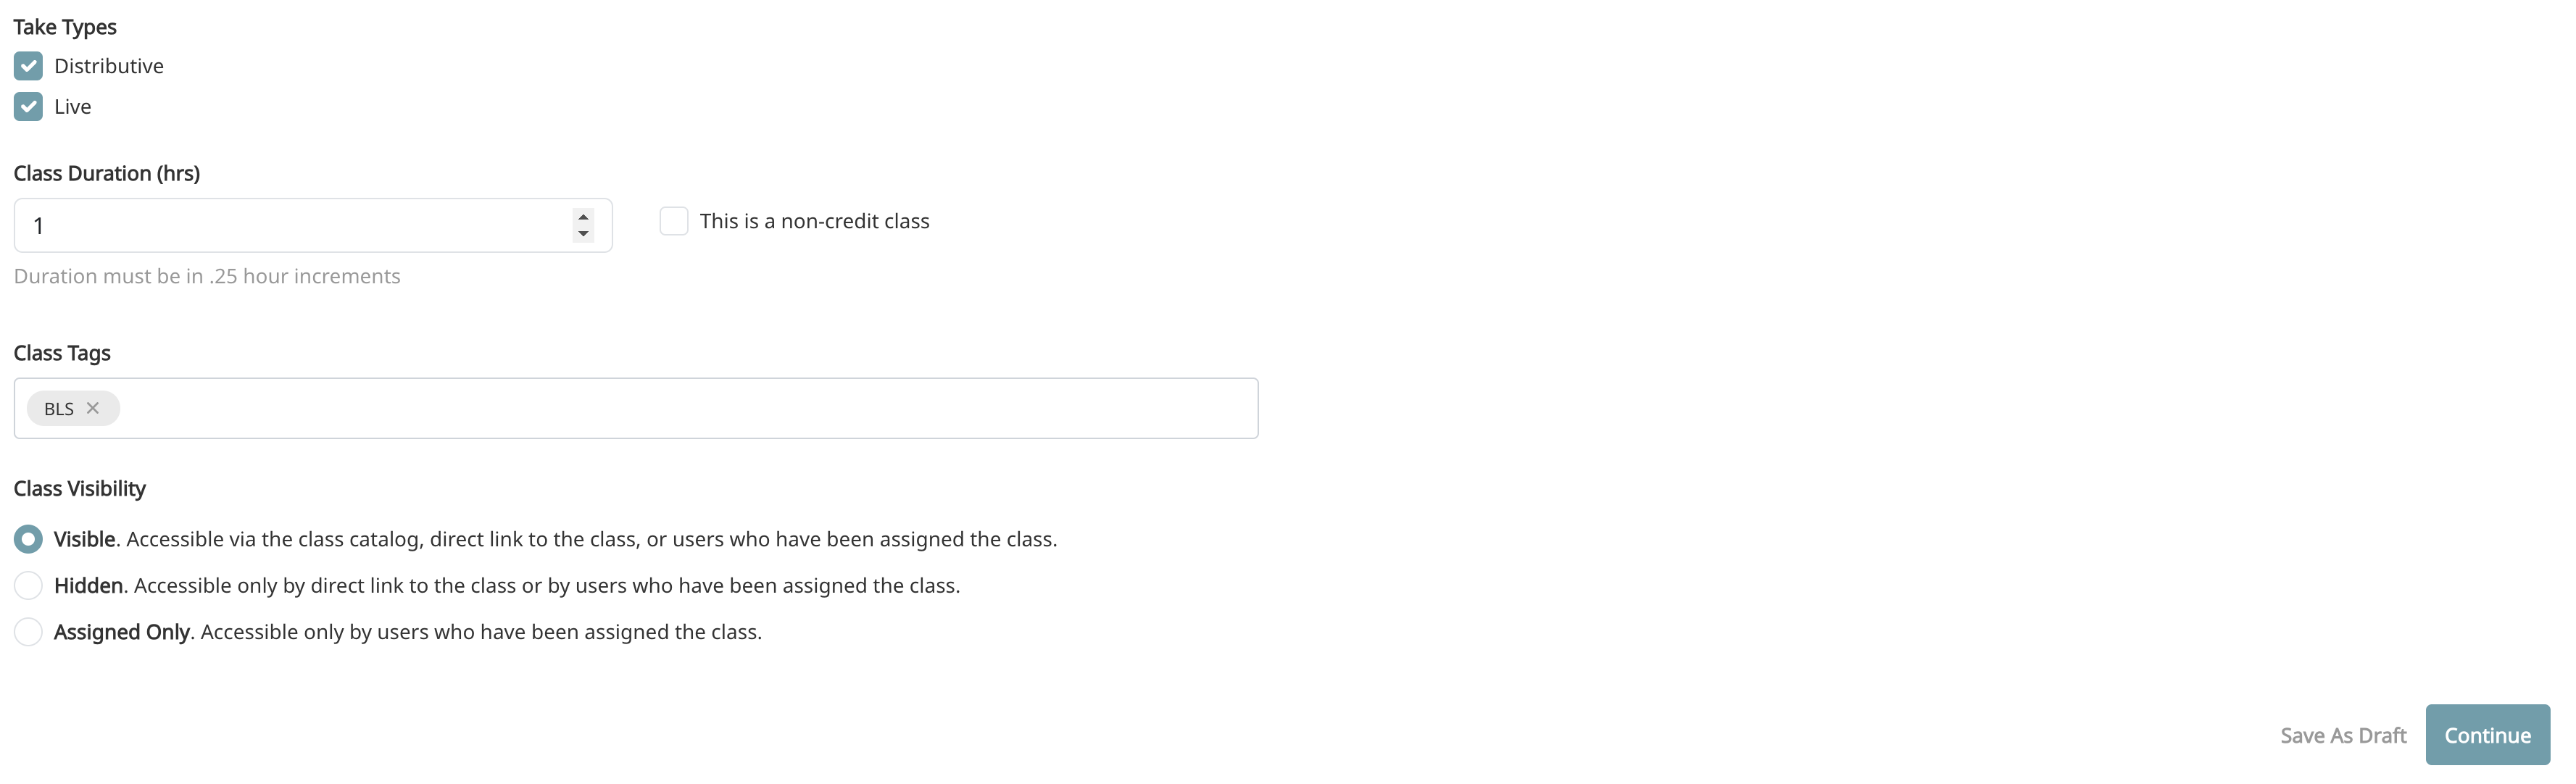
Take Types
The take type allows you to choose how you will be offering this class. You can choose either one or both of the take types.
- Distributive - Traditional online class, if selected you will be able to add different segments to the class as well as a post-class test.
- Live - Live is used for both traditional live classes as well as virtual live classes.
Editing Take Types
You can always come back and add additional take types. You may run a live class and record it; you can come back after and make the class distributive and add that video to the class. All the options on the class builder can be edited after a class is released.
Class Duration
Set the total length of the class. This is what is displayed on the class page and counted on training plans, we also calculate each segment length and list the true duration of a class for distributive classes. If building a distributive class, you can come back and edit this number after the class segments are added and calculated. If you select a class as Non-Credit, it will not be counted as an elective class on recertification plans, but can be added to custom training plans.
Class Tags
Class tags are a great way to organize your classes. They become part of the free text search in the catalog and are displayed on the class page. The most common use is to add a search term to a class that may not be in the name or description. For instance, you may tag all BLS classes with BLS and EMT, this allows users to more easily find classes appropriate to their scope of practice.
Class Visibility
This section allows you to control when users are able to see your class and give you three options.
- Visible - This is a standard class that can be seen by all users in the class catalog and is the default.
- Hidden - The class is technical open but is not in the catalog. The most common use case for this option is to have a class that is on a training plan but you don't want it in the class catalog. You can also send a direct link for the class.
- Assigned Only - When this is selected, only users who have been assigned the class by a training officer can view it. They must be assigned the class directly and not a training plan with the class.
Distributive Class Content
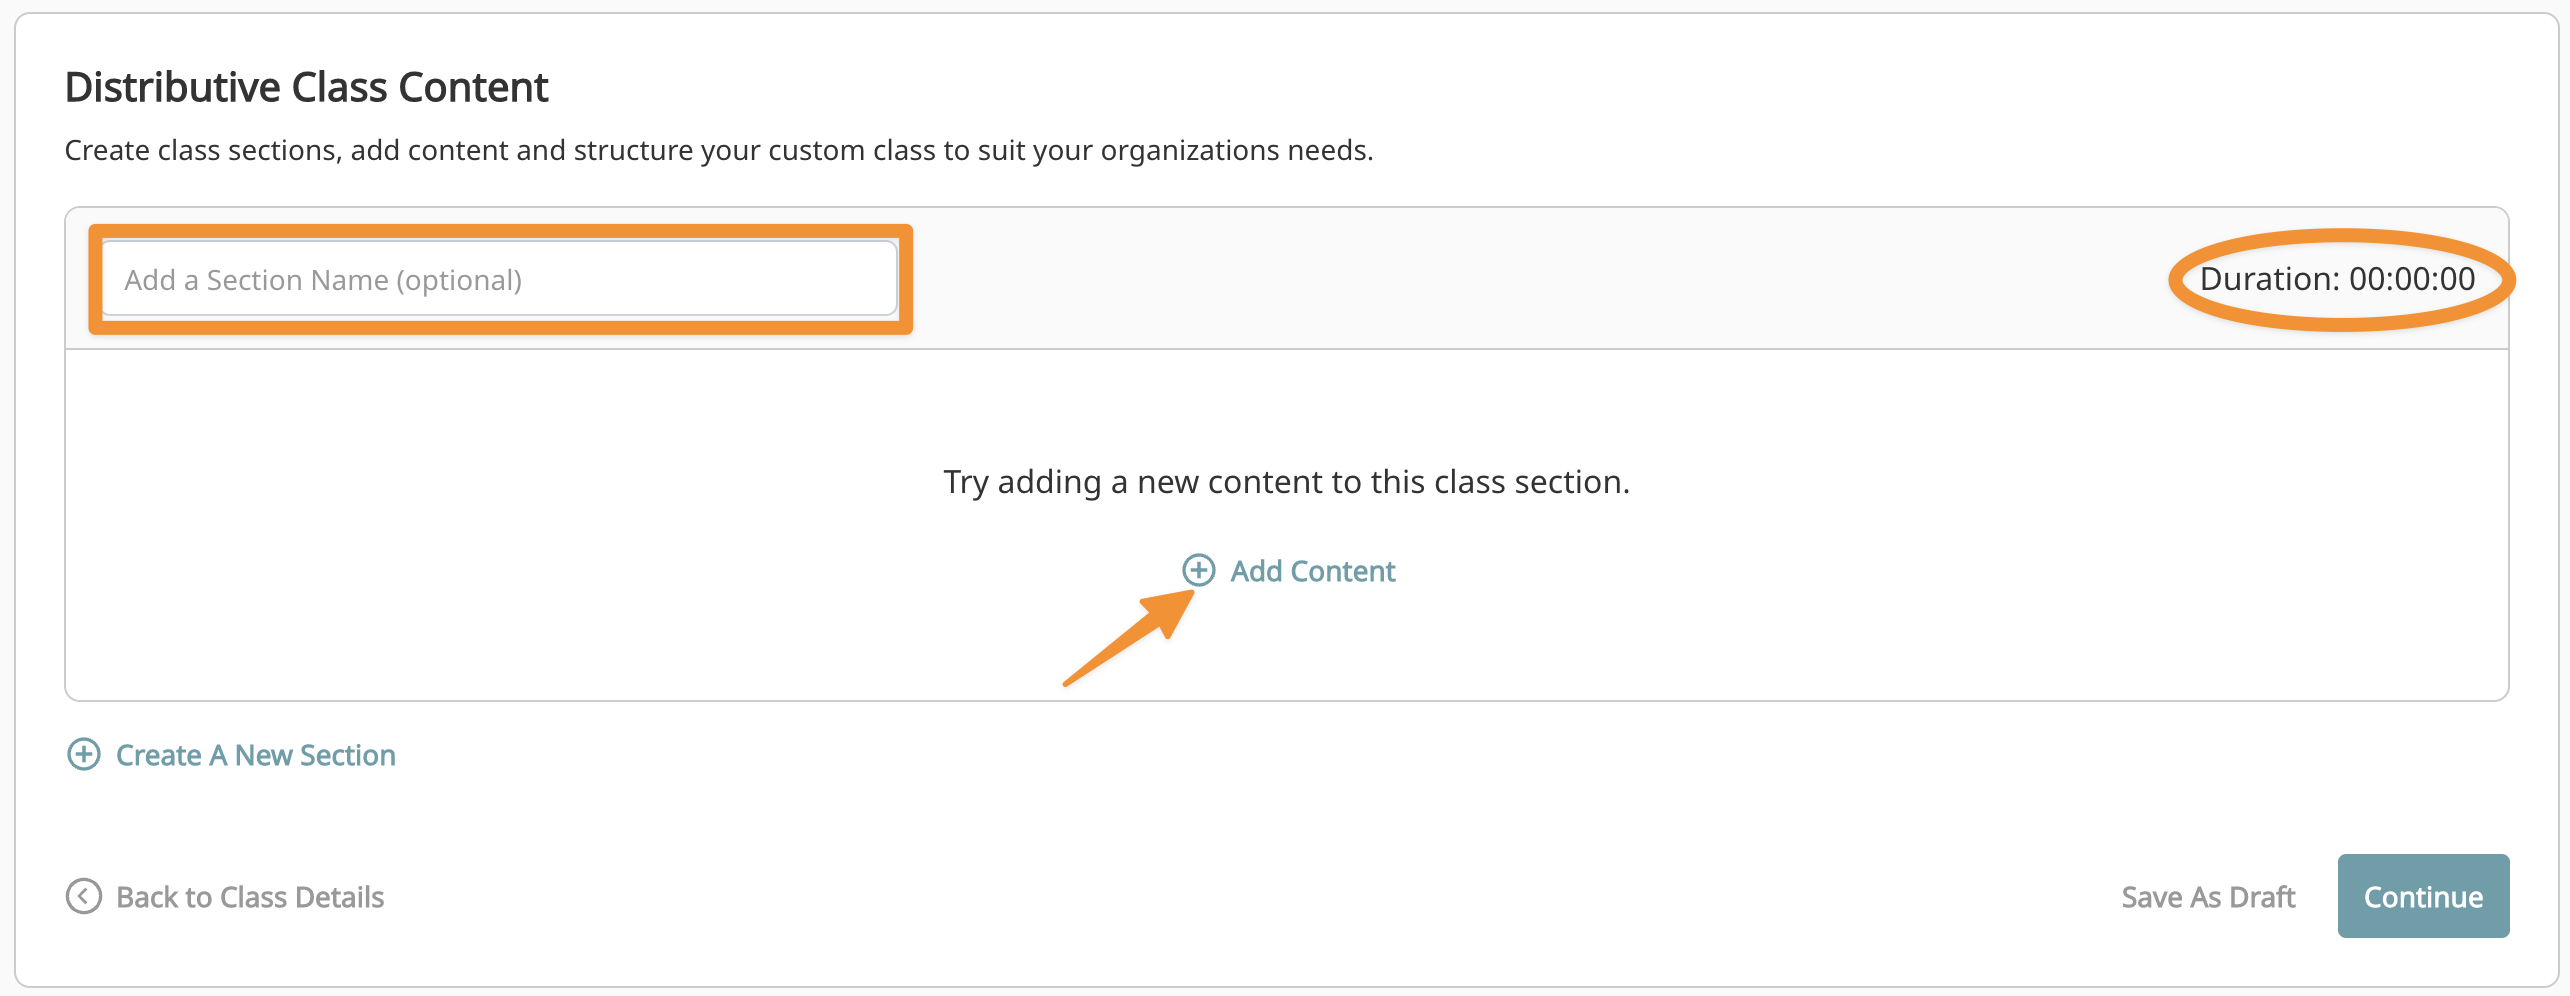
From this section, you will create sections and add segments. Sections are a way to organize content and help your users understand the class flow. A section will automatically calculate duration. To add a section, click the Add Section button. To add a segment click Add Content. The duration of the class is calculated based on the duration of each segment.
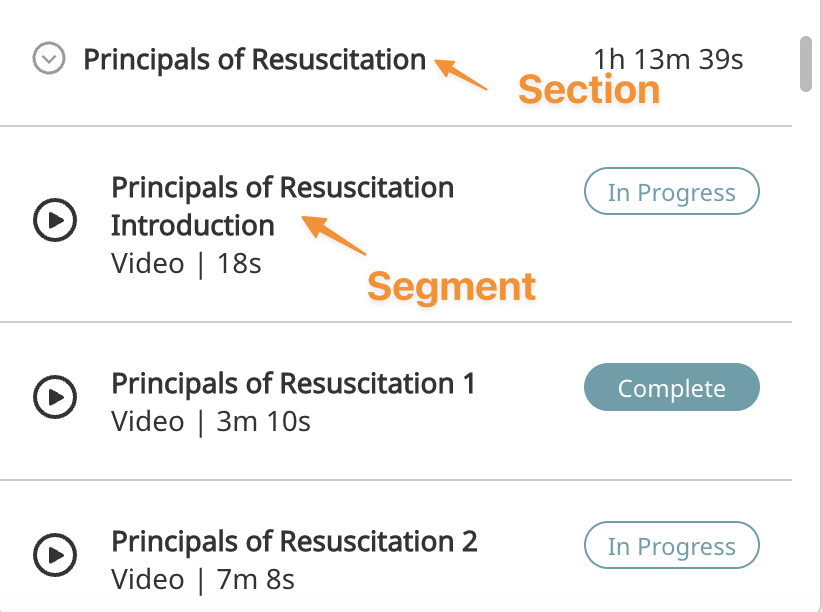
Once you click Add Content, the list of segment types will come up, select your segment type from here.
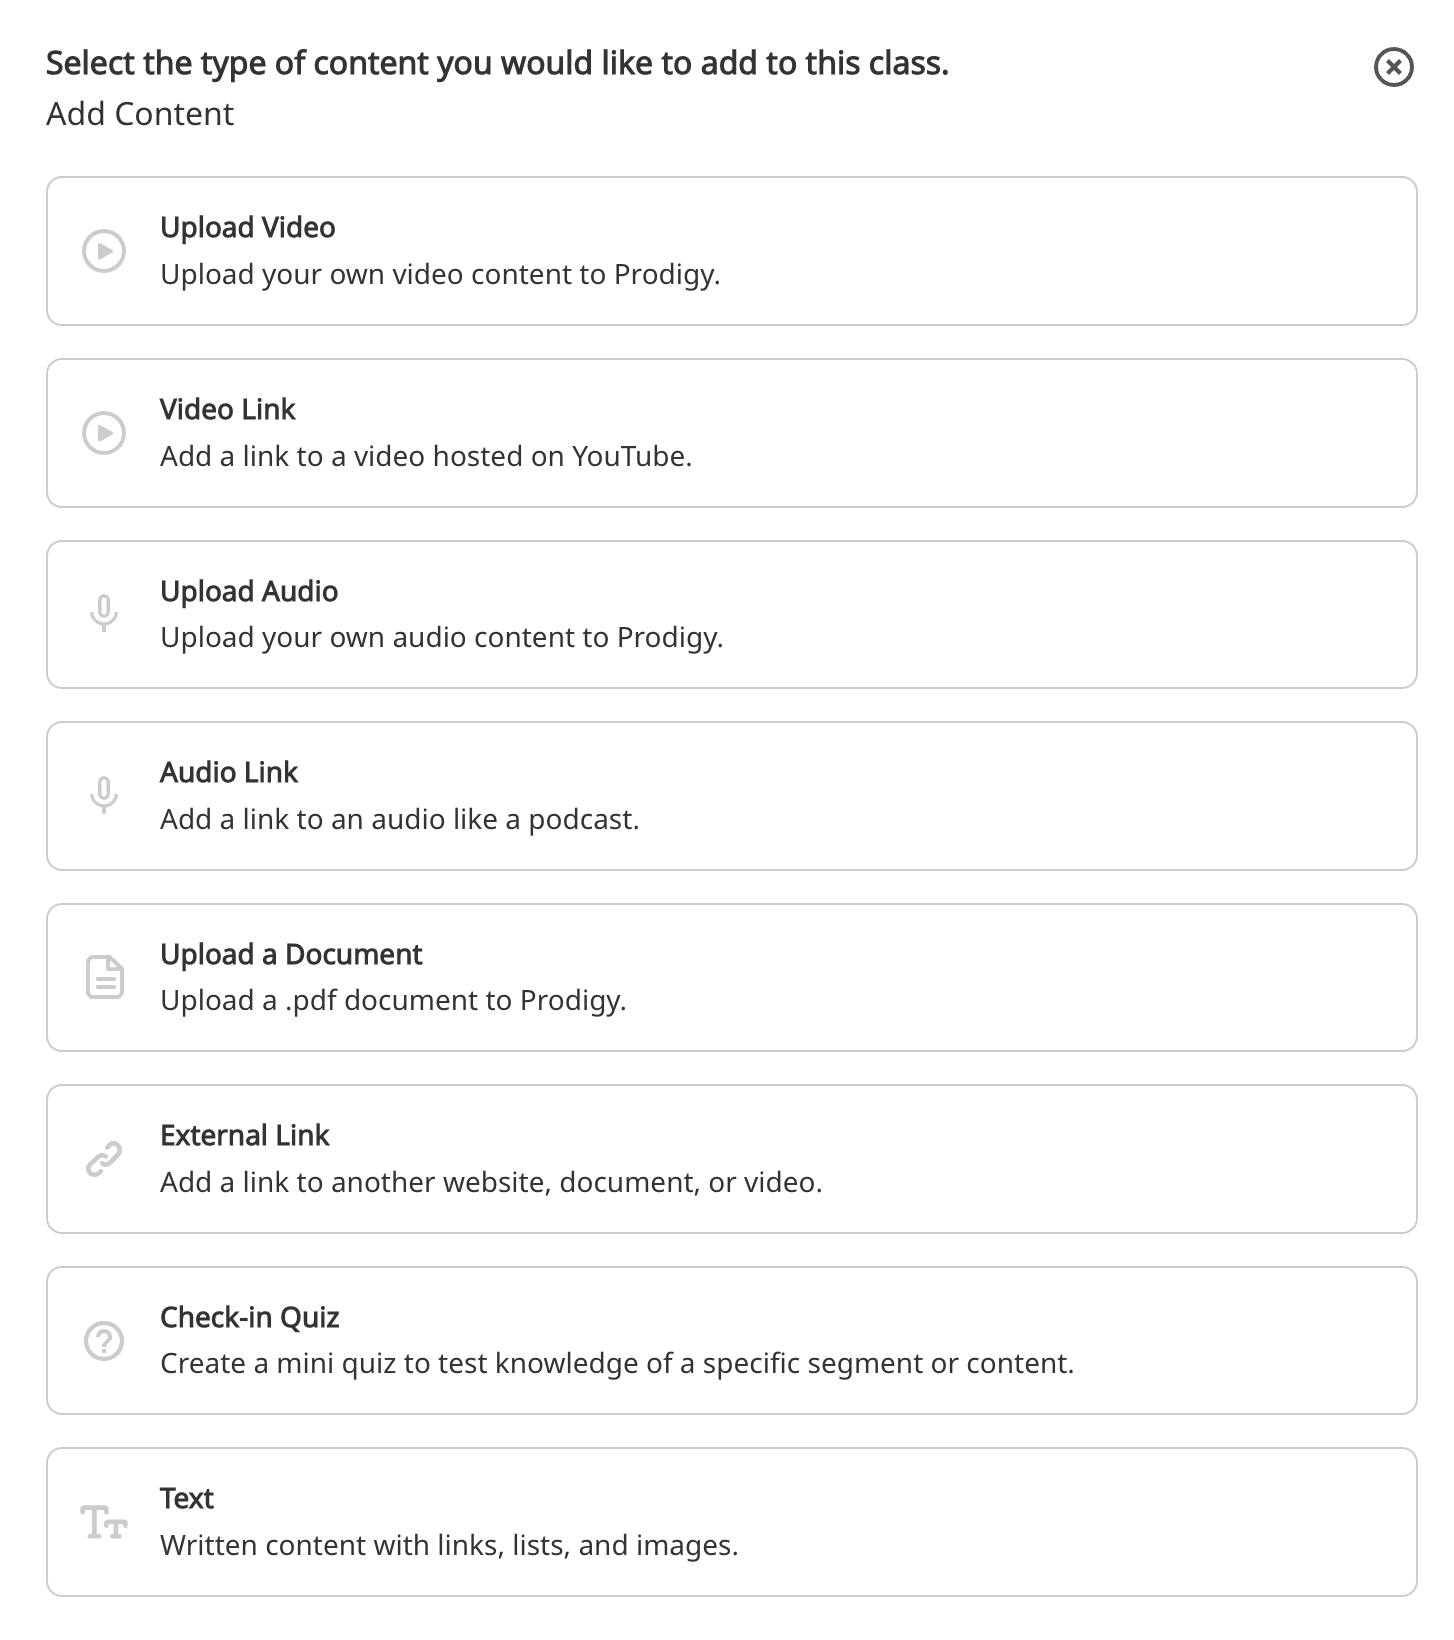
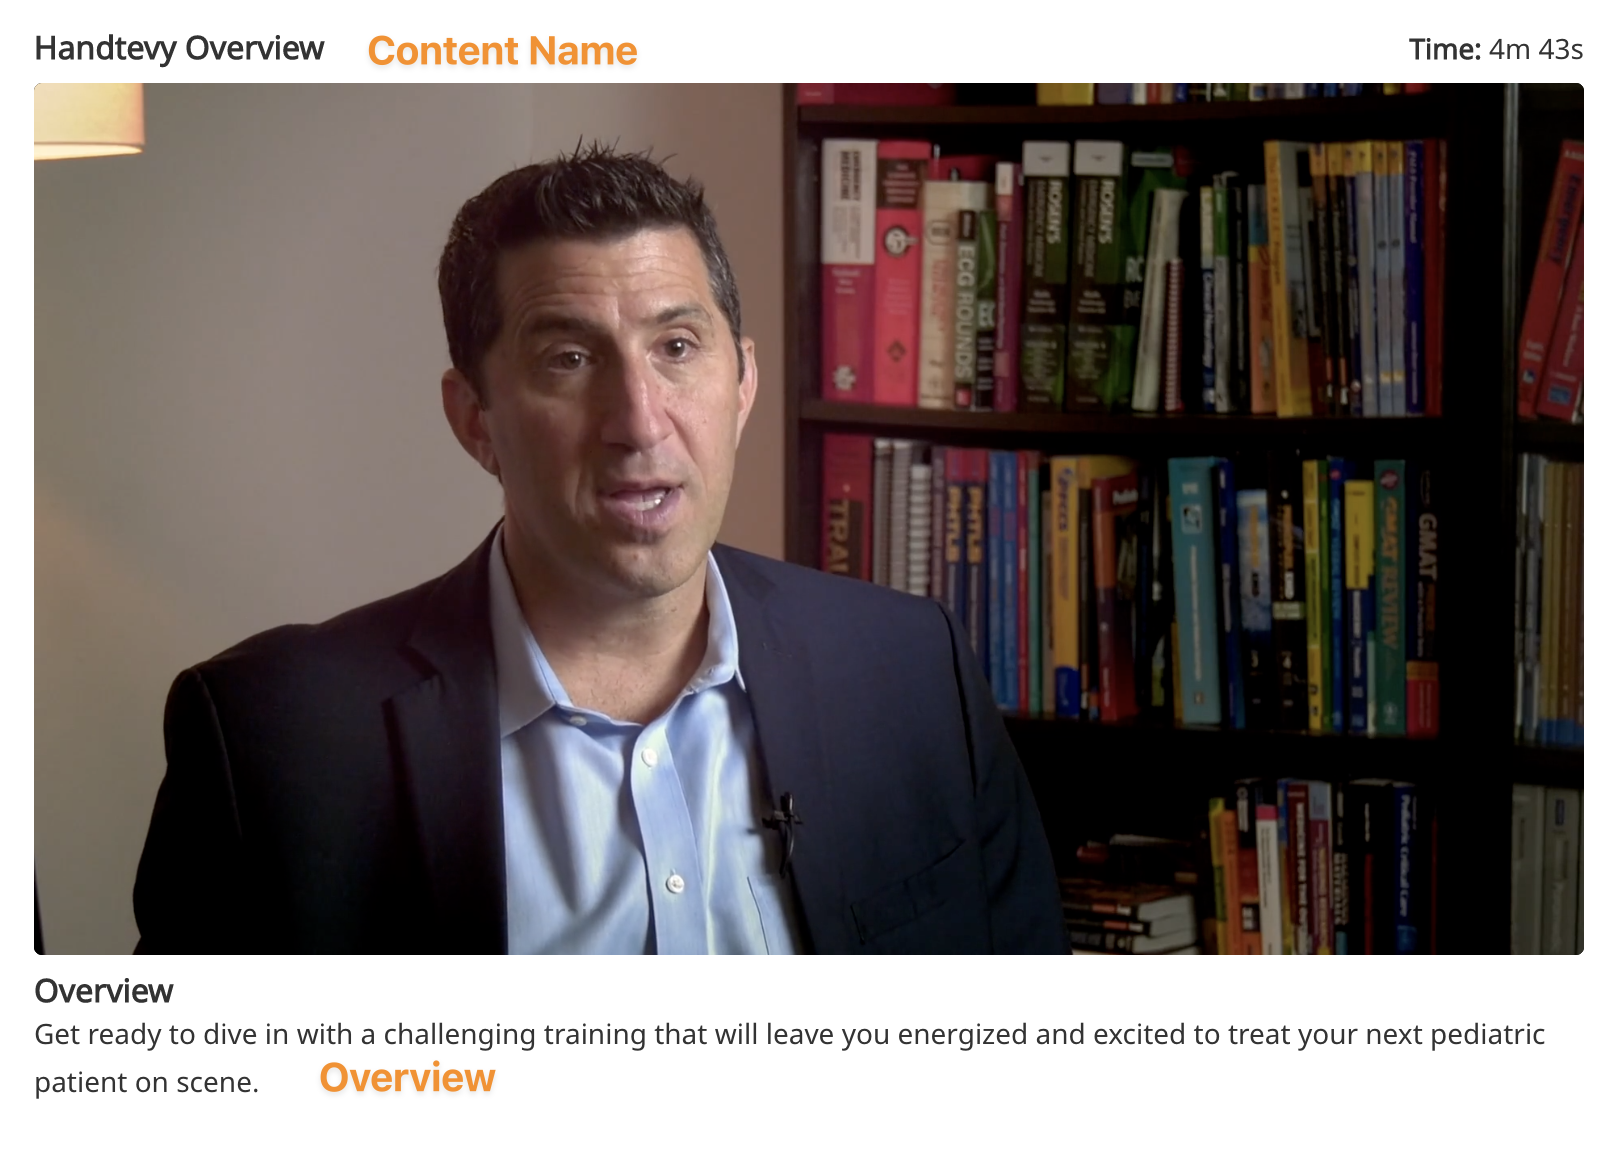
Upload Video
This allows you to upload a video that is hosted on the Prodigy site. Uploading to Prodigy will give you more video options as well as take advantage of our powerful content delivery network which creates a modern video experience for your users. The duration of an uploaded video segment is automatically calculated.
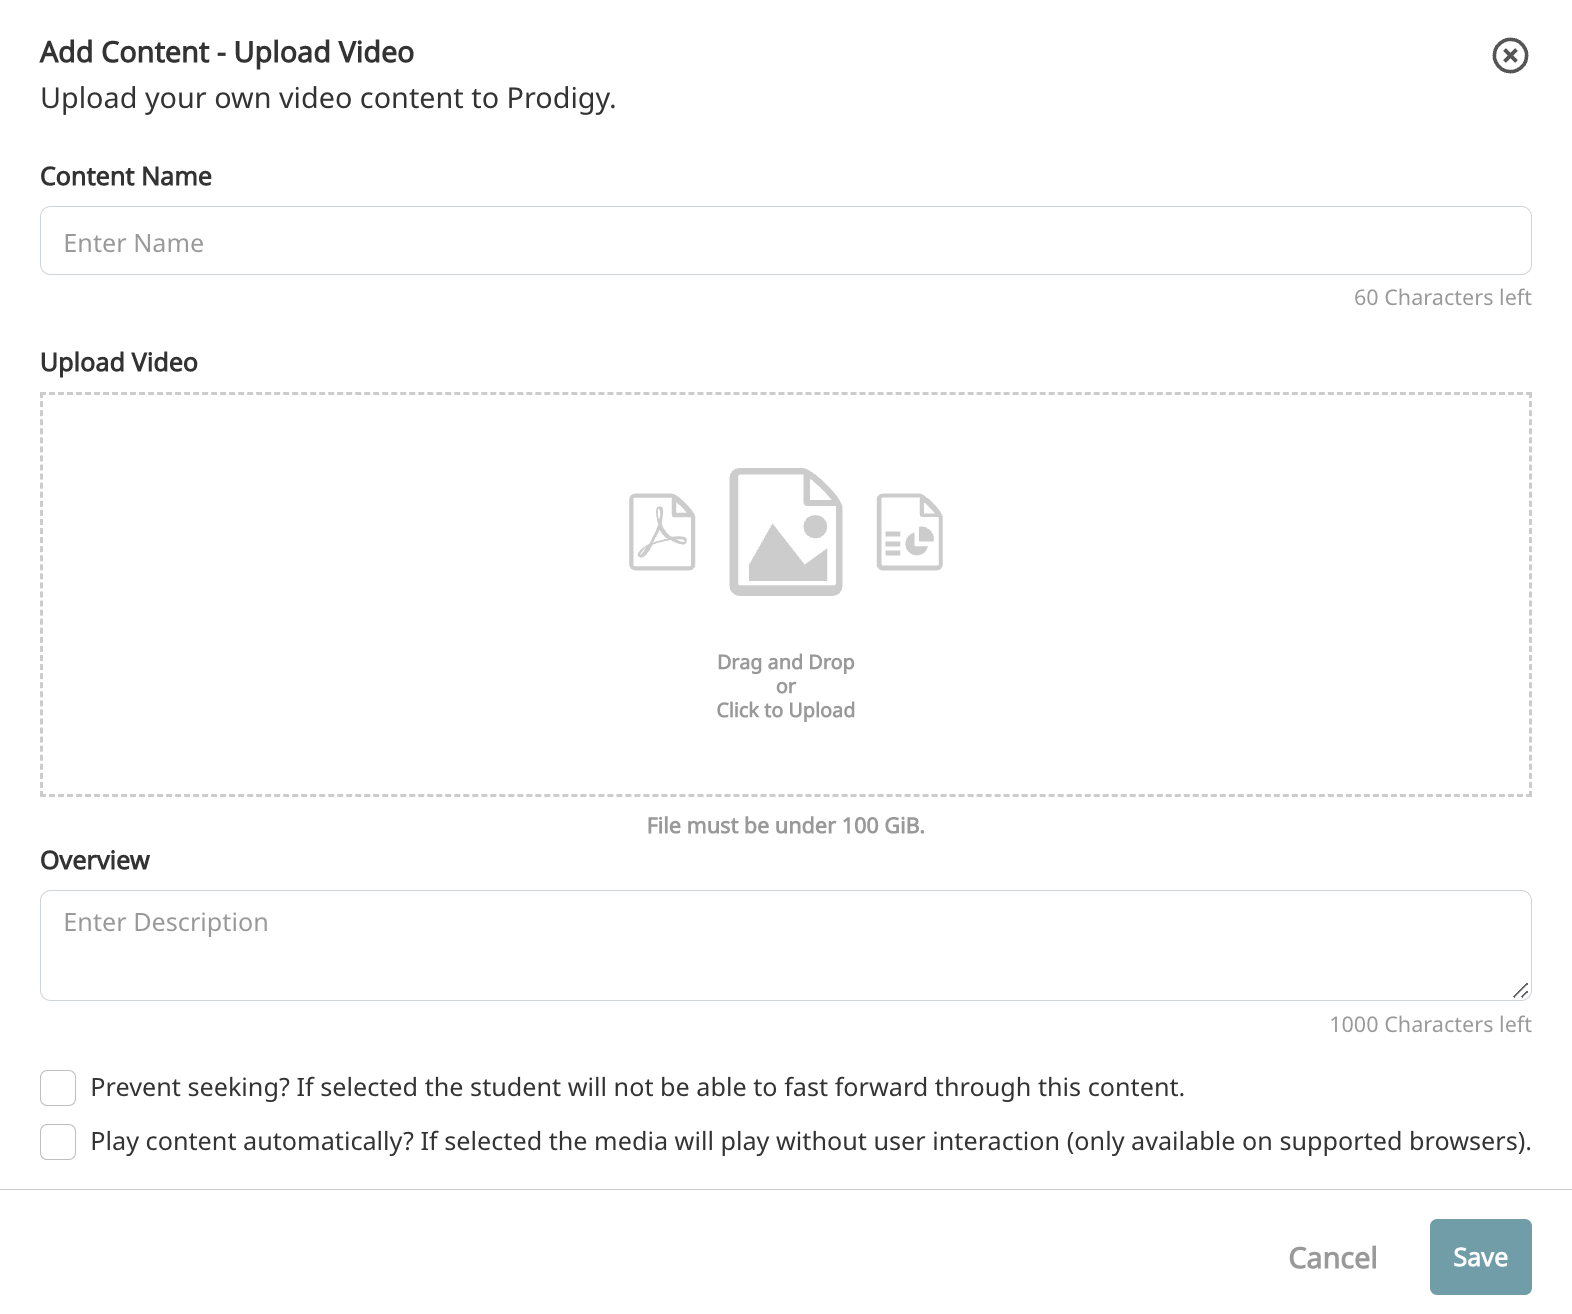
- Content Name - This is the segment name and will show up on the class player page
- Upload Video - Drag and drop your video or click the box to find it.
- Overview - Description that appears under the video
- Prevent Seeking - If checked, users will be required to watch the complete video. If unchecked, users can scrub through the video to complete
- Play Content Automatically - If checked, videos will auto play. When one video ends, the next will immediately start. If unchecked, the user will need to press play for each video.
Auto-play
Auto-play is not supported by all browsers, but if you leave it unchecked, the user will always have to hit play. It is only the auto-play feature that is not supported.
Video Link
Add a link to a video hosted on YouTube. Because the video is hosted externally, you lose the ability to prevent seeking and prevent auto-play. The duration of a video link segment is automatically calculated.
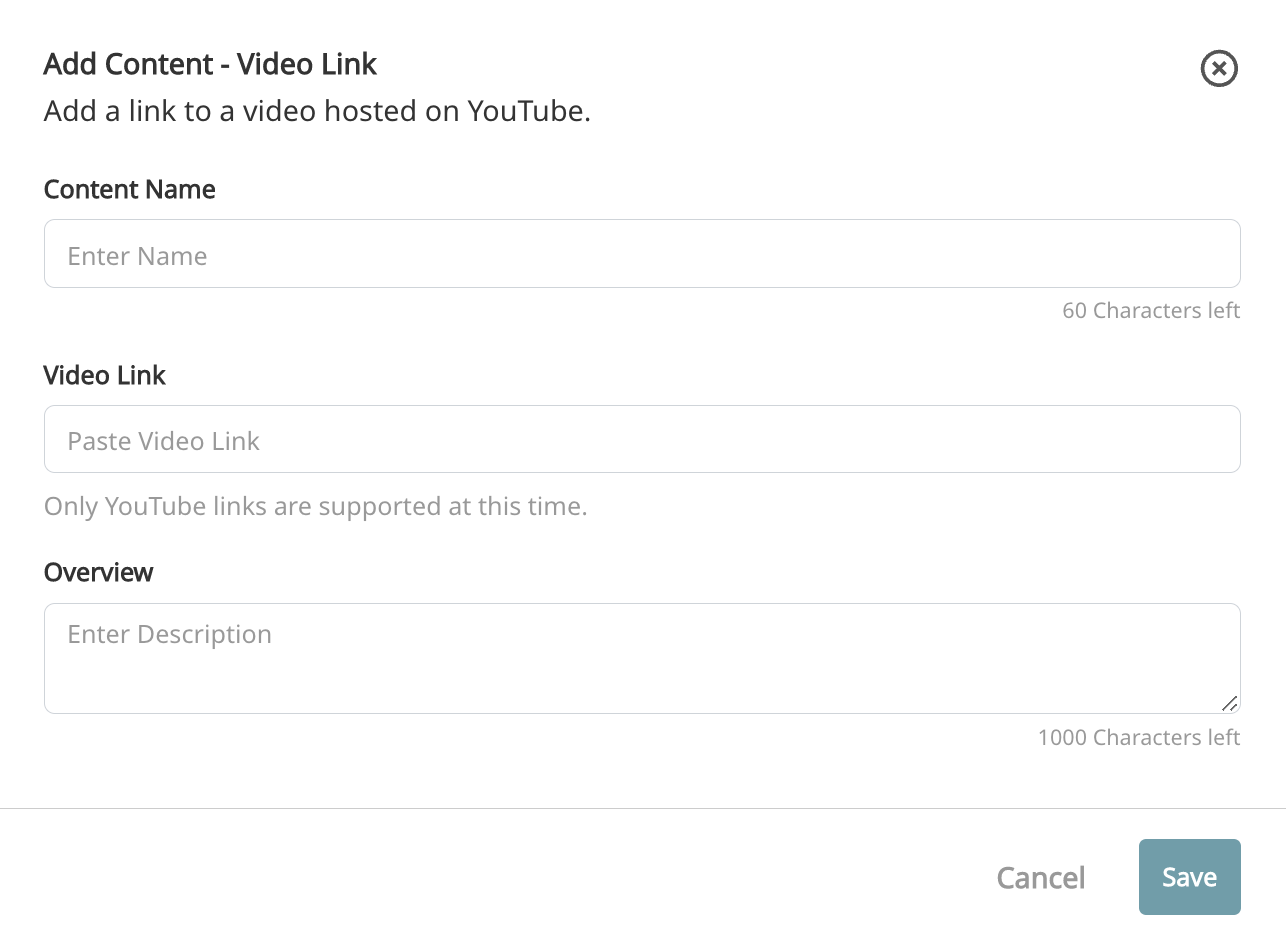
- Content Name - This is the segment name and will show up on the class player page
- Video Link - This needs to be the full proper URL to the video.
- Overview - Description that appears under the video
Posting External Videos
Only post links to videos that are either public or private videos that you have specific permission to post.
Upload Audio
The options in this segment are the same as uploaded videos and are designed to upload auto files to be used within a class. This includes the options to prevent seeking and auto-play. The duration of an uploaded audio segment is automatically calculated.
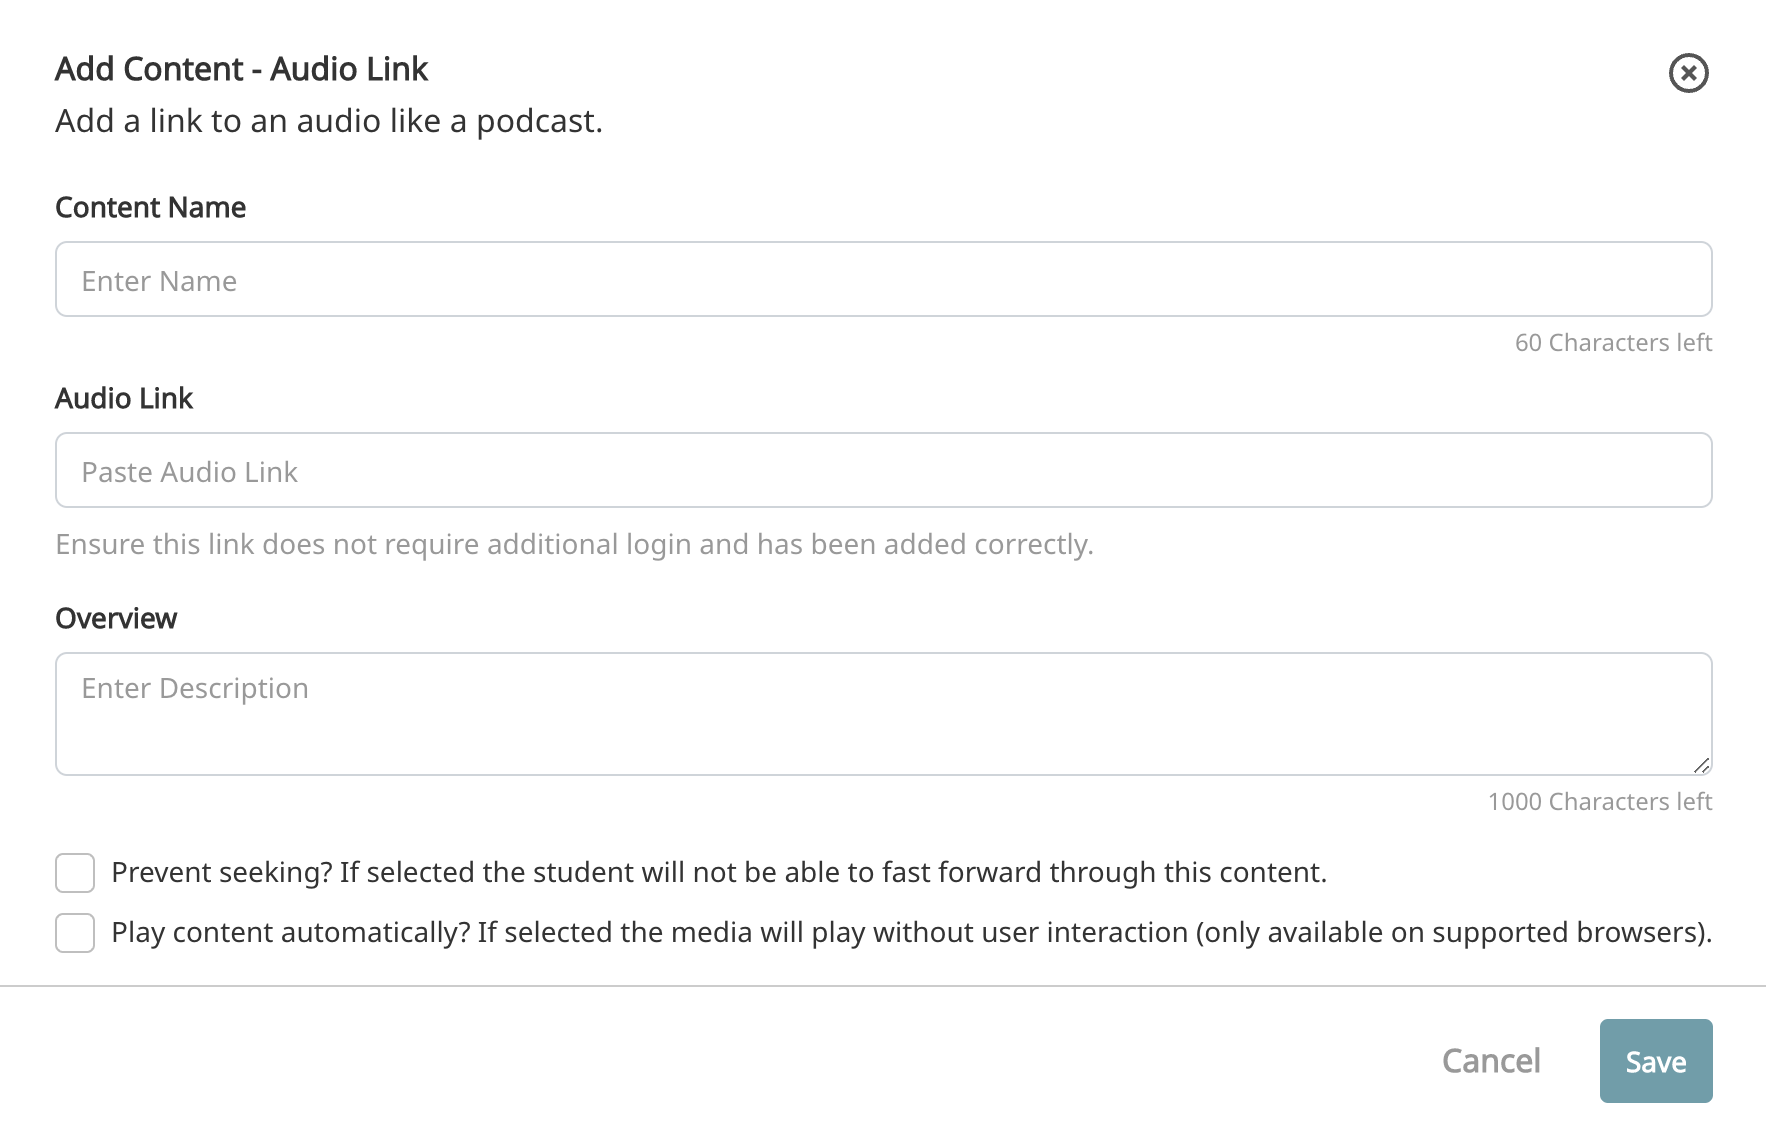
Audio Link
This segment type is similar to an outside video. You can set prevent seeking and have the option to set auto-play. The common use for this segment type is to add a podcast directly into a class. If prevent seeking is unchecked, the user will have the option to click a button attesting to listening to the podcast off the site and bypassing listening on Prodigy. The duration of an audio link segment is automatically calculated.

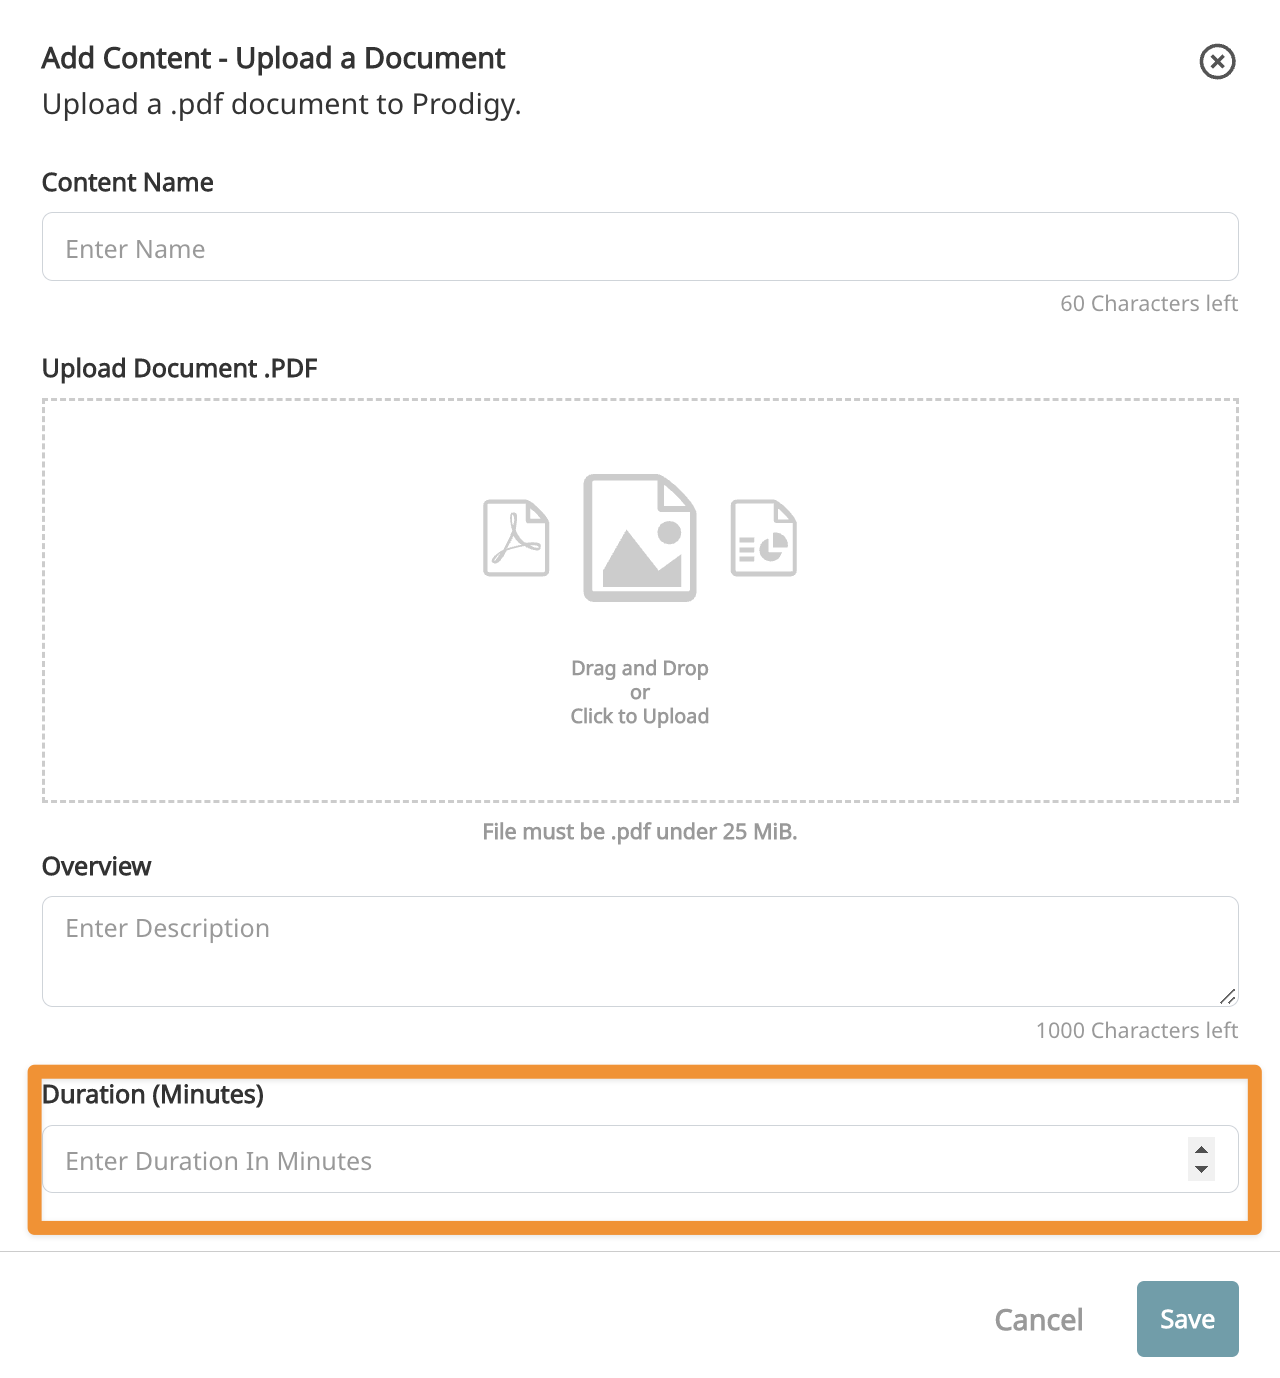
Upload a Document
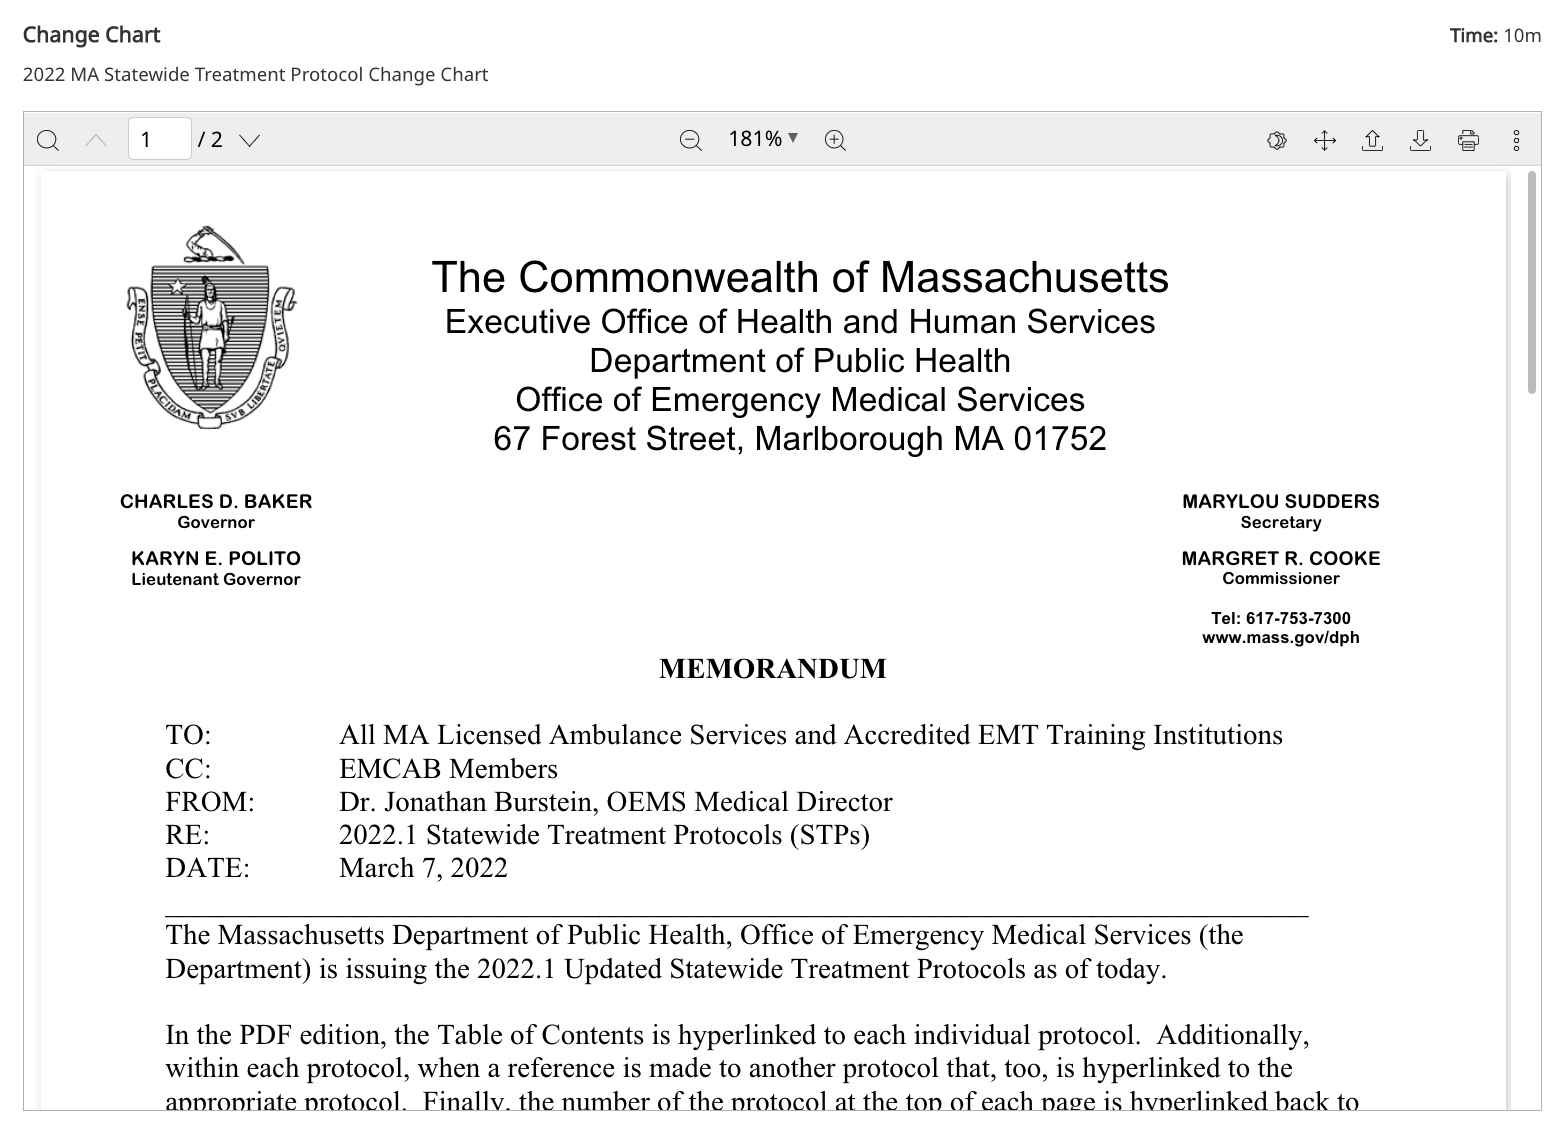
This segment type allows you to upload a PDF document into a Prodigy class. Once uploaded, it will be presented in a full PDF viewer which also allows the users to export or print it. A document segment type is considered complete when the user scrolls through the entire document. You will manually set the duration of a document segment.
External Link
Adding an external link will require that your user goes to that link as part of the class. An external link segment is considered complete once the link has been clicked. Ensure that you add the complete proper link in the External Link box. You will manually set the duration for this segment type.
Check-in Quiz
A Check-in Quiz is a quiz that can occur at any point in the class and is treated like any other segment. Once complete you receive credit, there is no passing score for a check-in quiz. These quizzes have all the features of a standard quiz which are discussed in depth later in the help article.
Live Classes

Prodigy supports scheduling both traditional in-person live classes as well as virtual live classes. The setting for both will largely be the same except for a few options. When registering, users will see the type of live class as well as remaining seats.
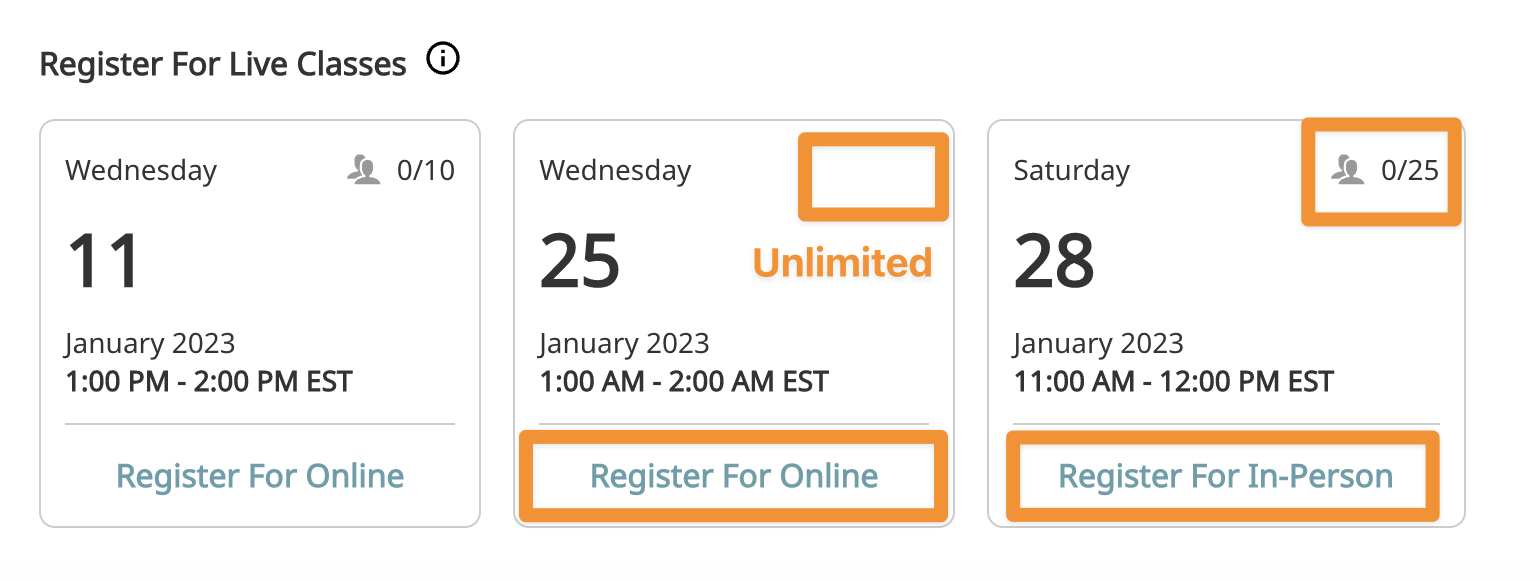
- Date - Date the class will be running
- Start - Start time of the class. The timezone will automatically be selected based on your local timezone. The users will see the class schedule in their local timezone as well.
- End - Automatically calculated based on the start time and class duration.
- Class Seats - Number of students allowed to register, the available seats will be displayed to the user. You can also allow for unlimited seats.
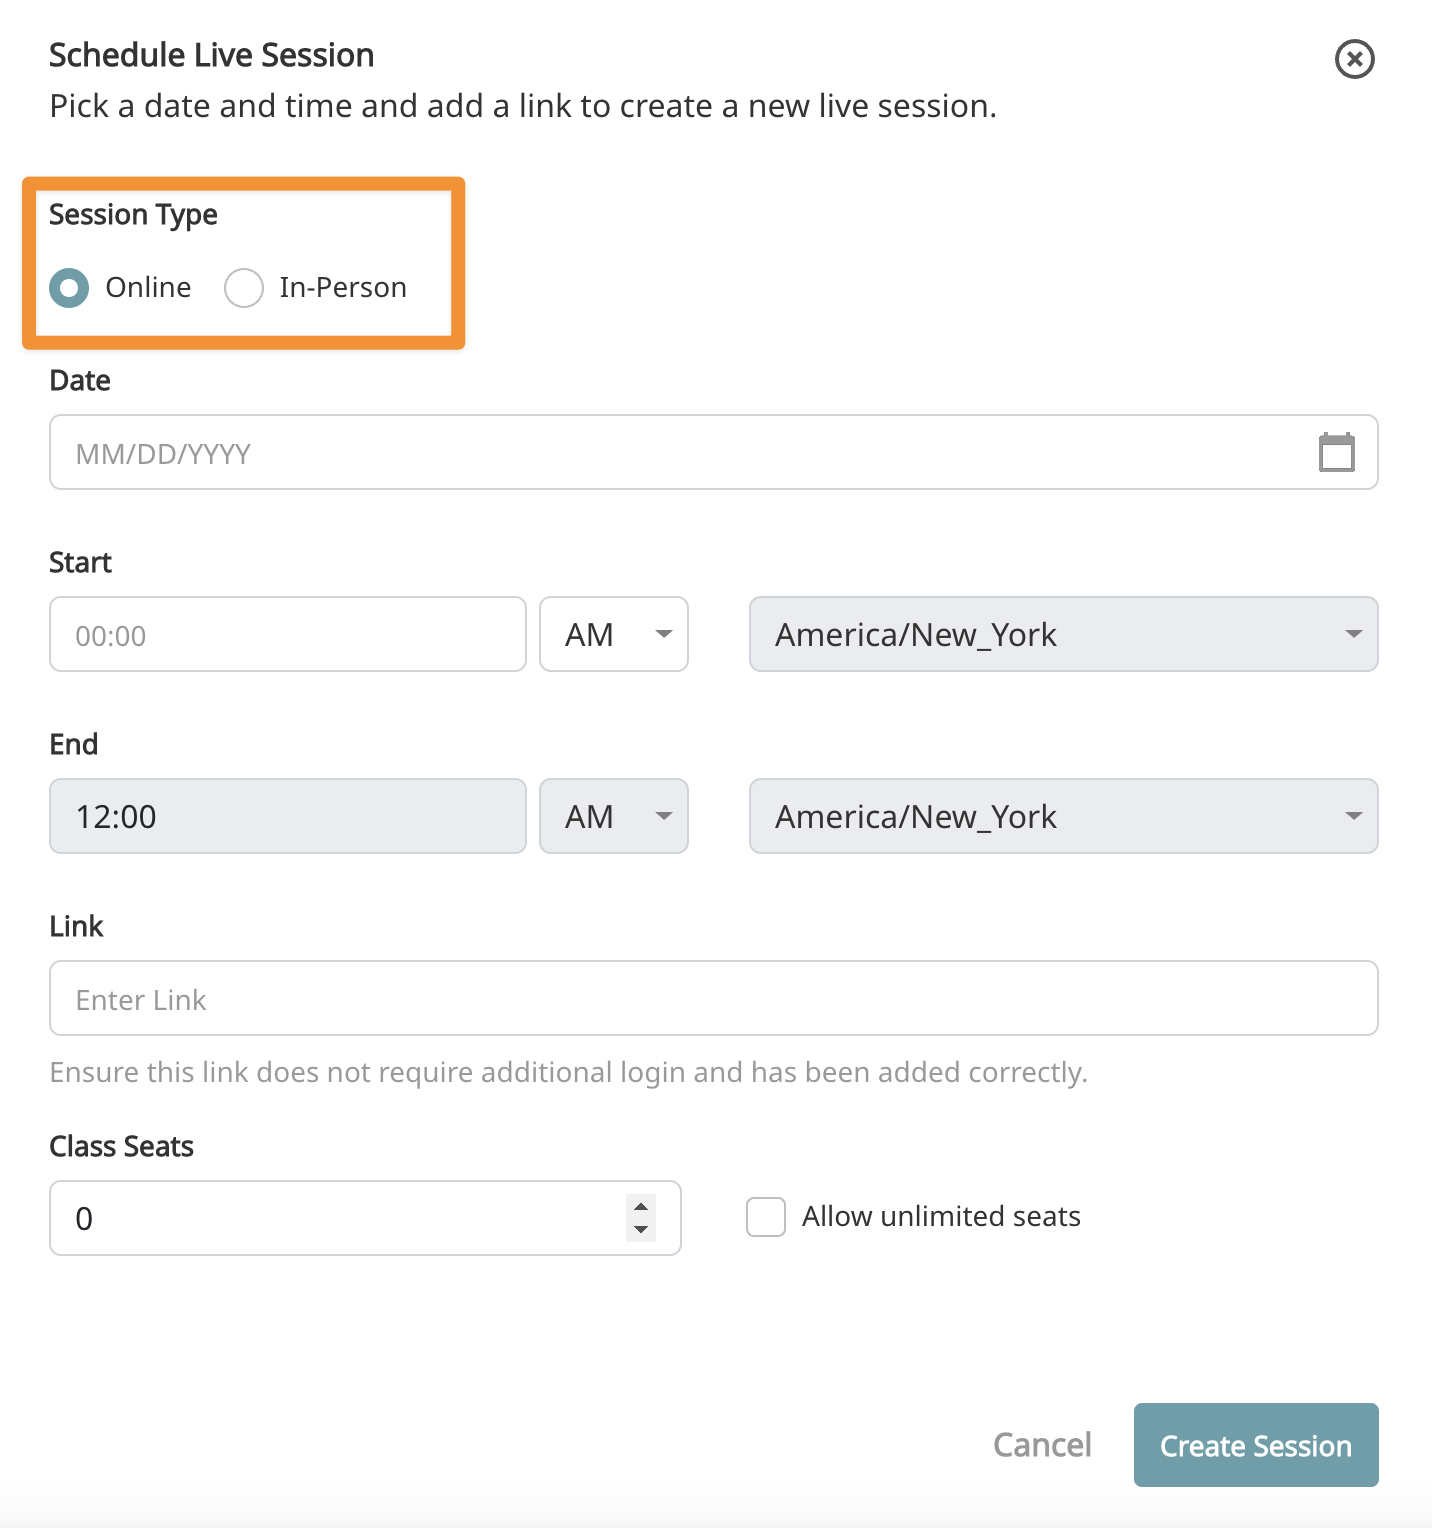
Online
A live online class allows you to schedule a virtual meeting or webinar through Prodigy. You will use your own virtual platform such as Zoom and paste the URL to the virtual meeting in the link section. The link will become available to the user 10 minutes before the class starts and will remain active for 5 minutes after the class starts. A countdown will be displayed for registered users on the class page.
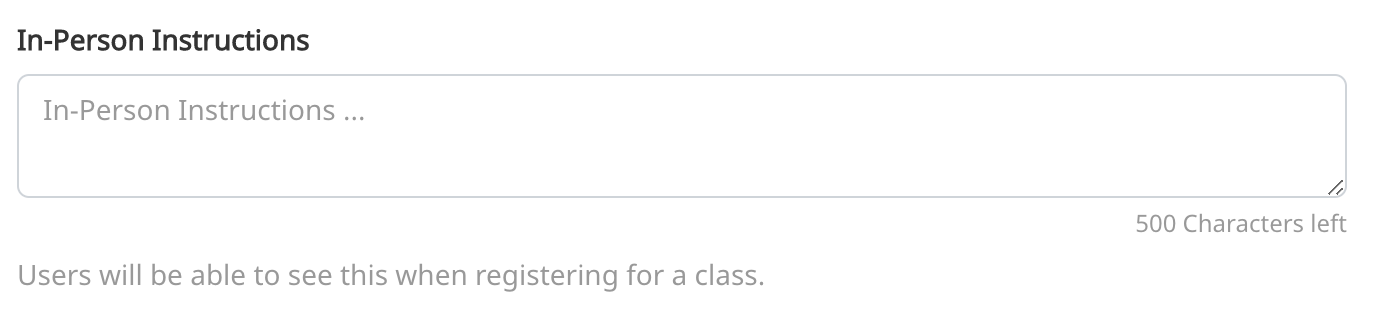
In-Person
When scheduling an in-person live class, the only change in options is the availability of an in-person instructions section and the elimination of the link section. The in-person instructions section can be used to give students instructions such as where the class is being held.
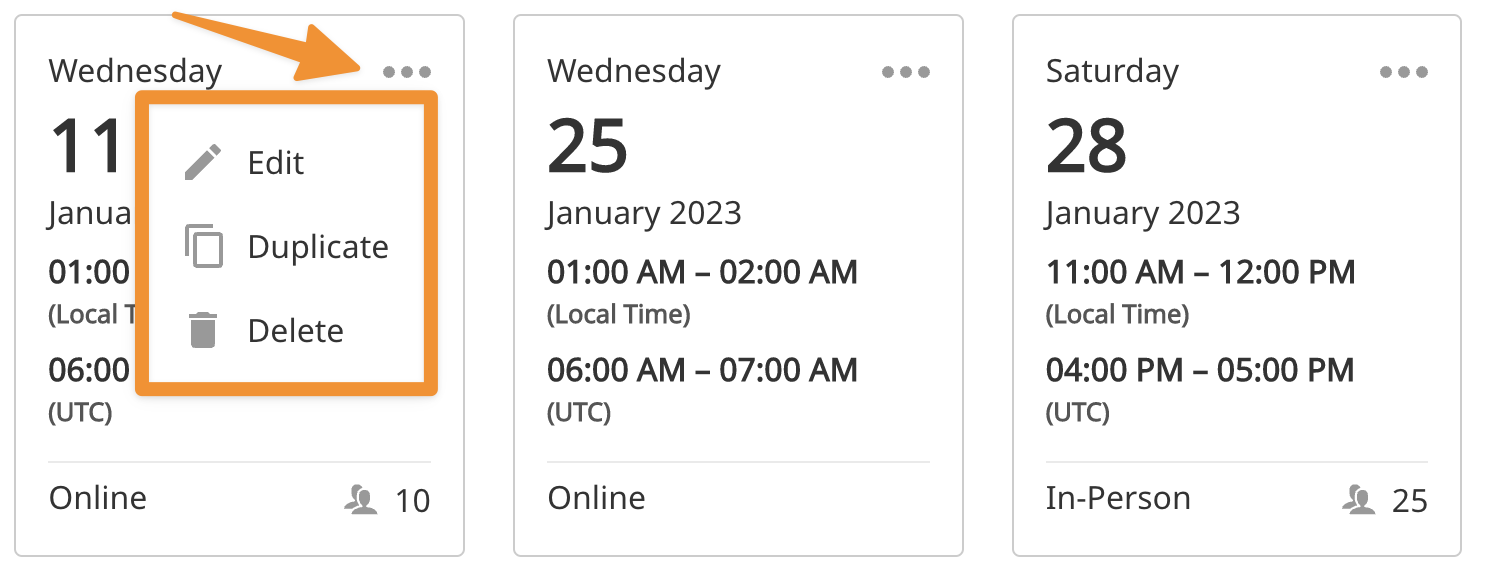
Editing Live Sessions
If you click the 3 dots on a live session card you will be given the option to edit, delete, or duplicate that session.
State Continuing Education Number
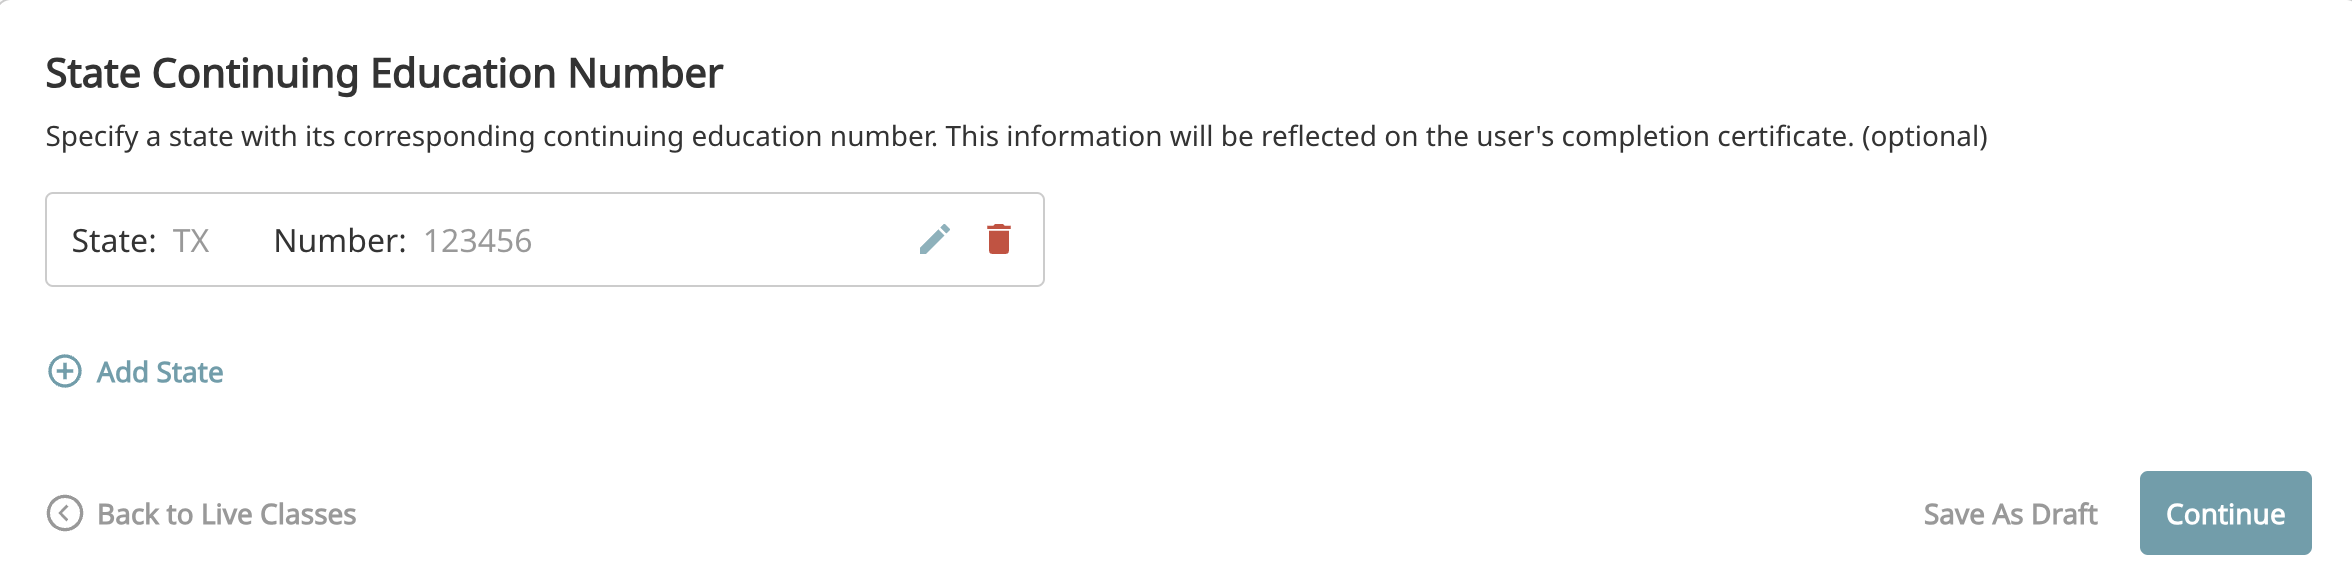
This section allows you to add state or local continuing education numbers to your class. You can also add numbers that you previously entered. Once added, these number will show up automatically on the certificates for your class.

You can add as many states and numbers as you need for each course. Select the state and add the corresponding number assigned to it.
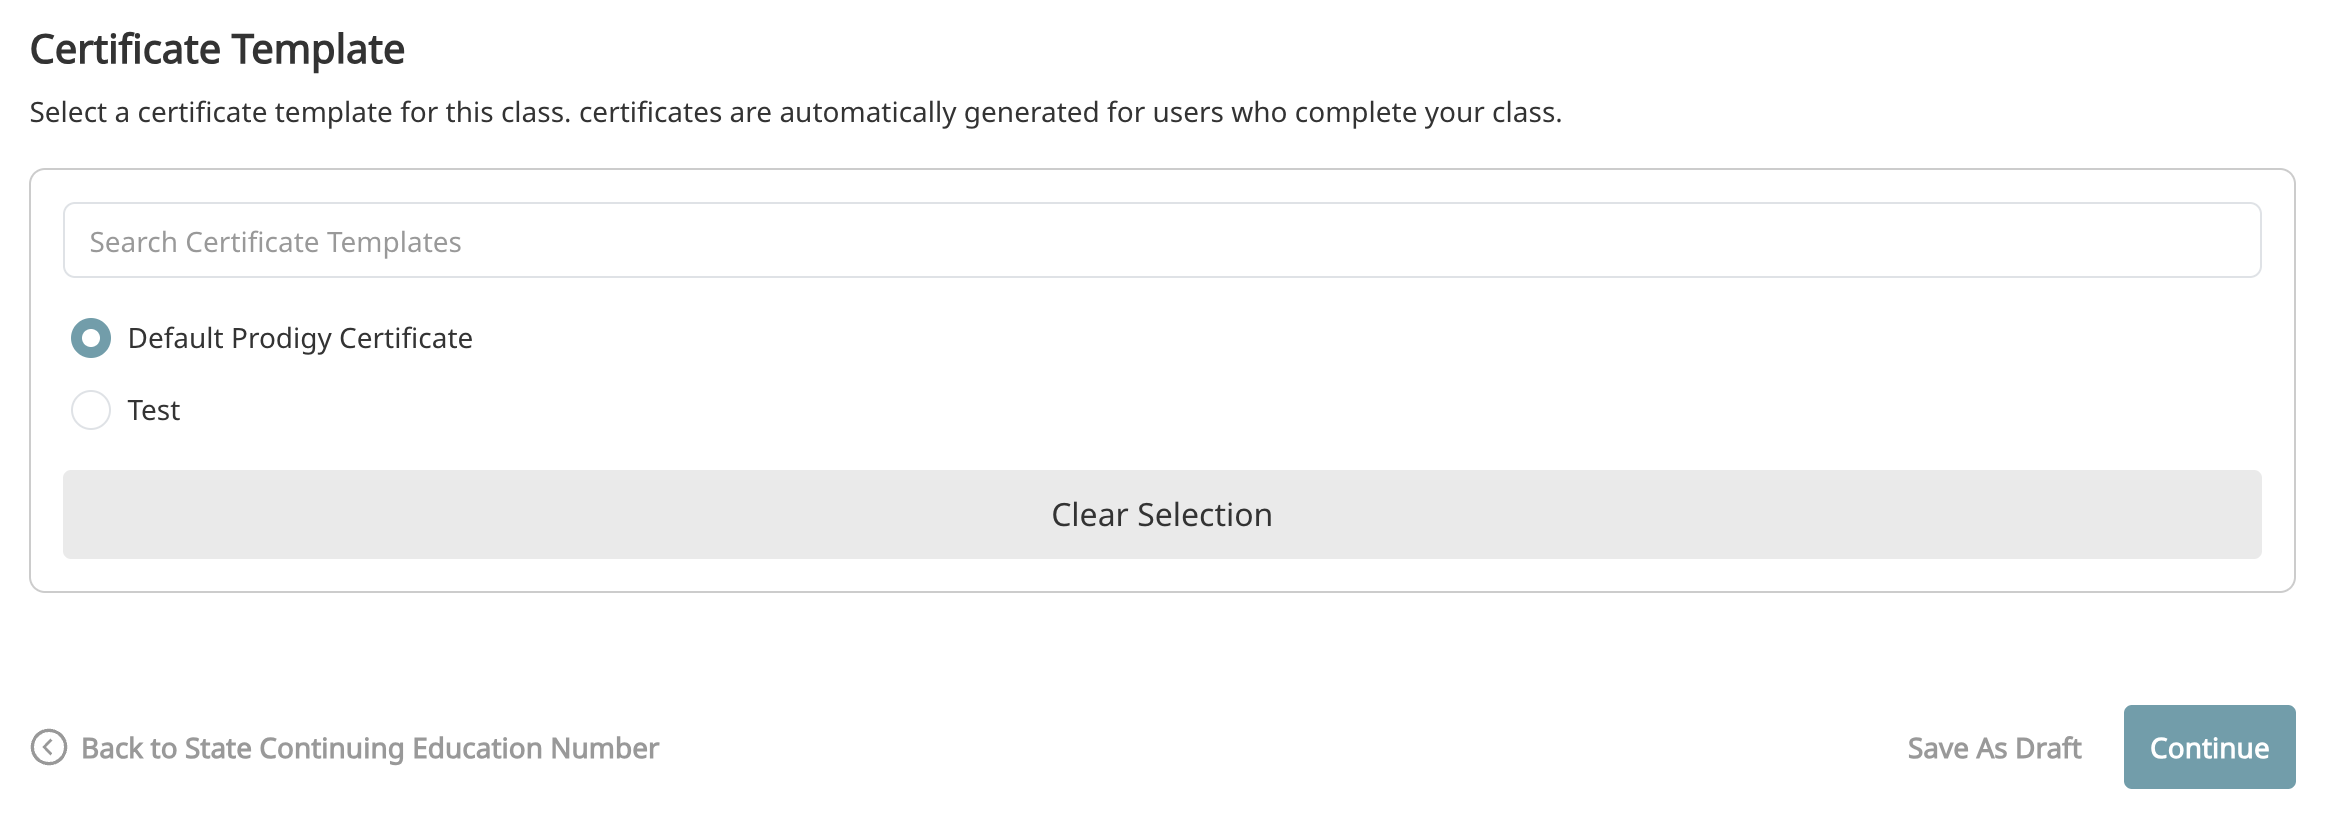
Certificate Template
This section allows you to select which certificate template to use for the class. If you don't have one created, you can use the default Prodigy certificate. Please review this article on creating class certificate templates.
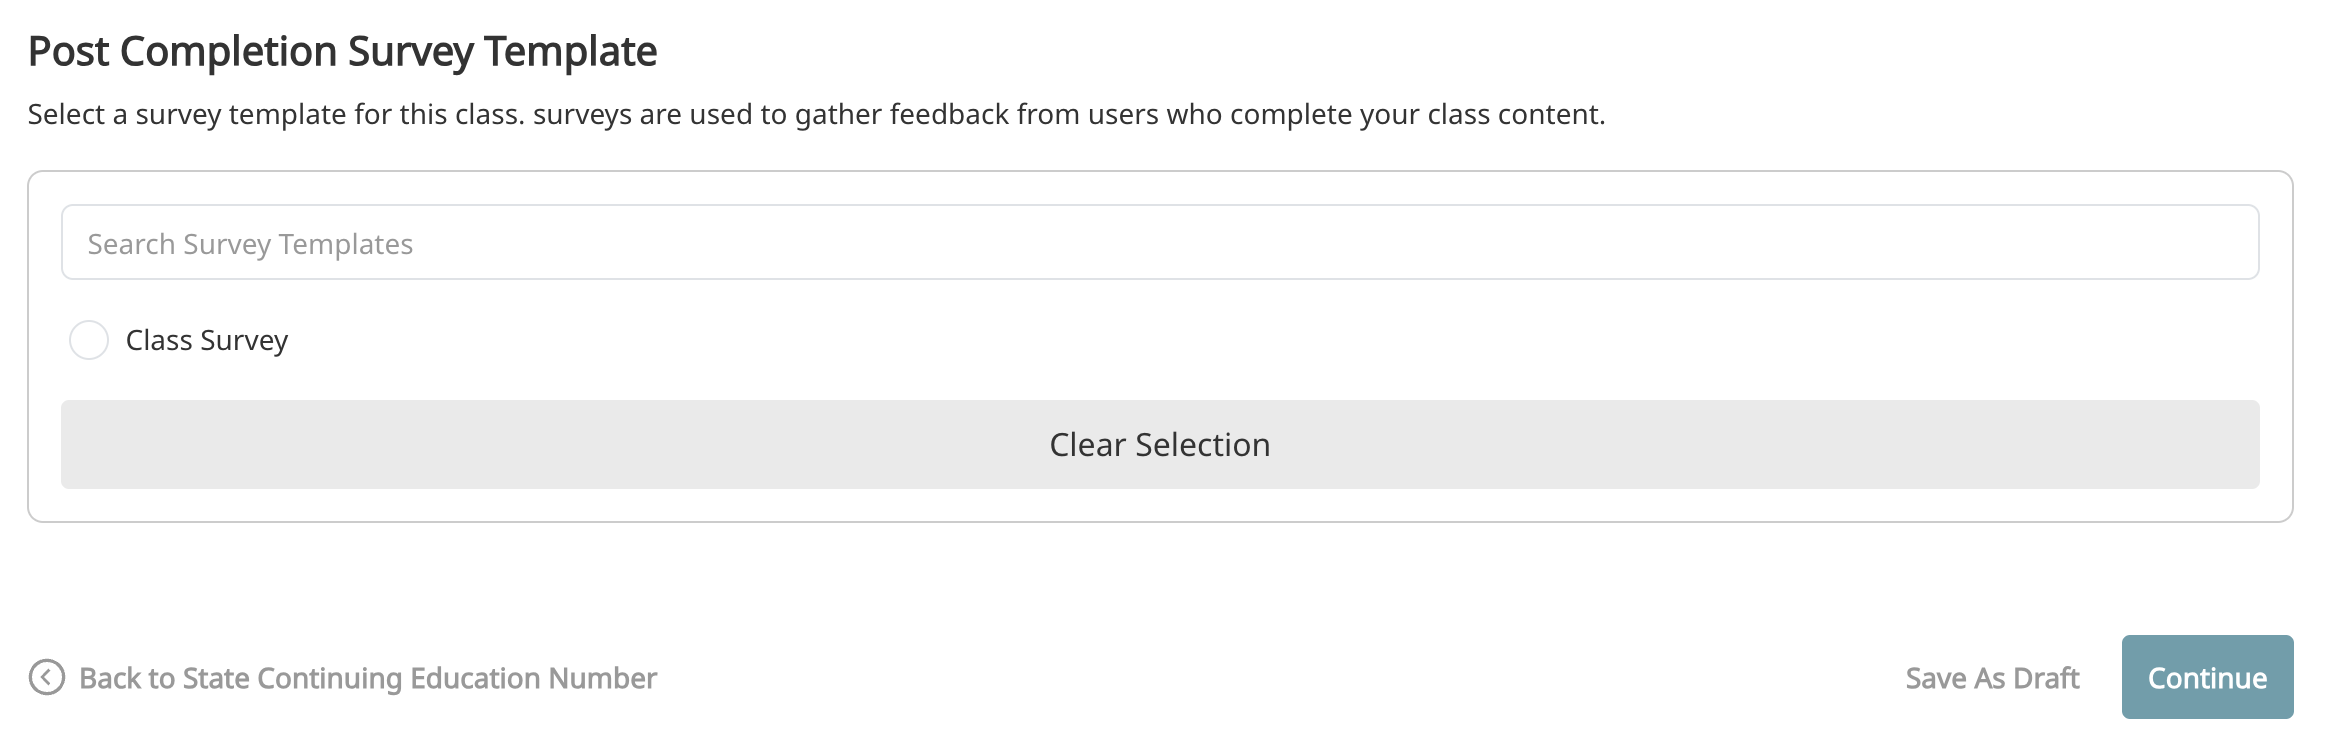
Post Completion Survey Template
You can associate a survey with each class. The surveys are built using our survey builder and can be used in multiple classes. You are not required to associate a survey with each class.
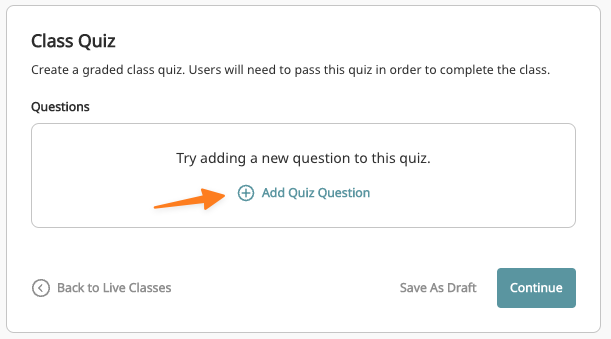
Class Quiz
The final step in creating a class is making a quiz. Each class will need a quiz at the end that the user will need to pass in order to get through the class. If you are building a class but don’t specifically need a graded quiz, you can add an attestation where the user selects “Yes” to a question about completing all the material. All of the quiz setting you will see here can also be applied to check in quizzes. To get started, click Add Quiz Question.
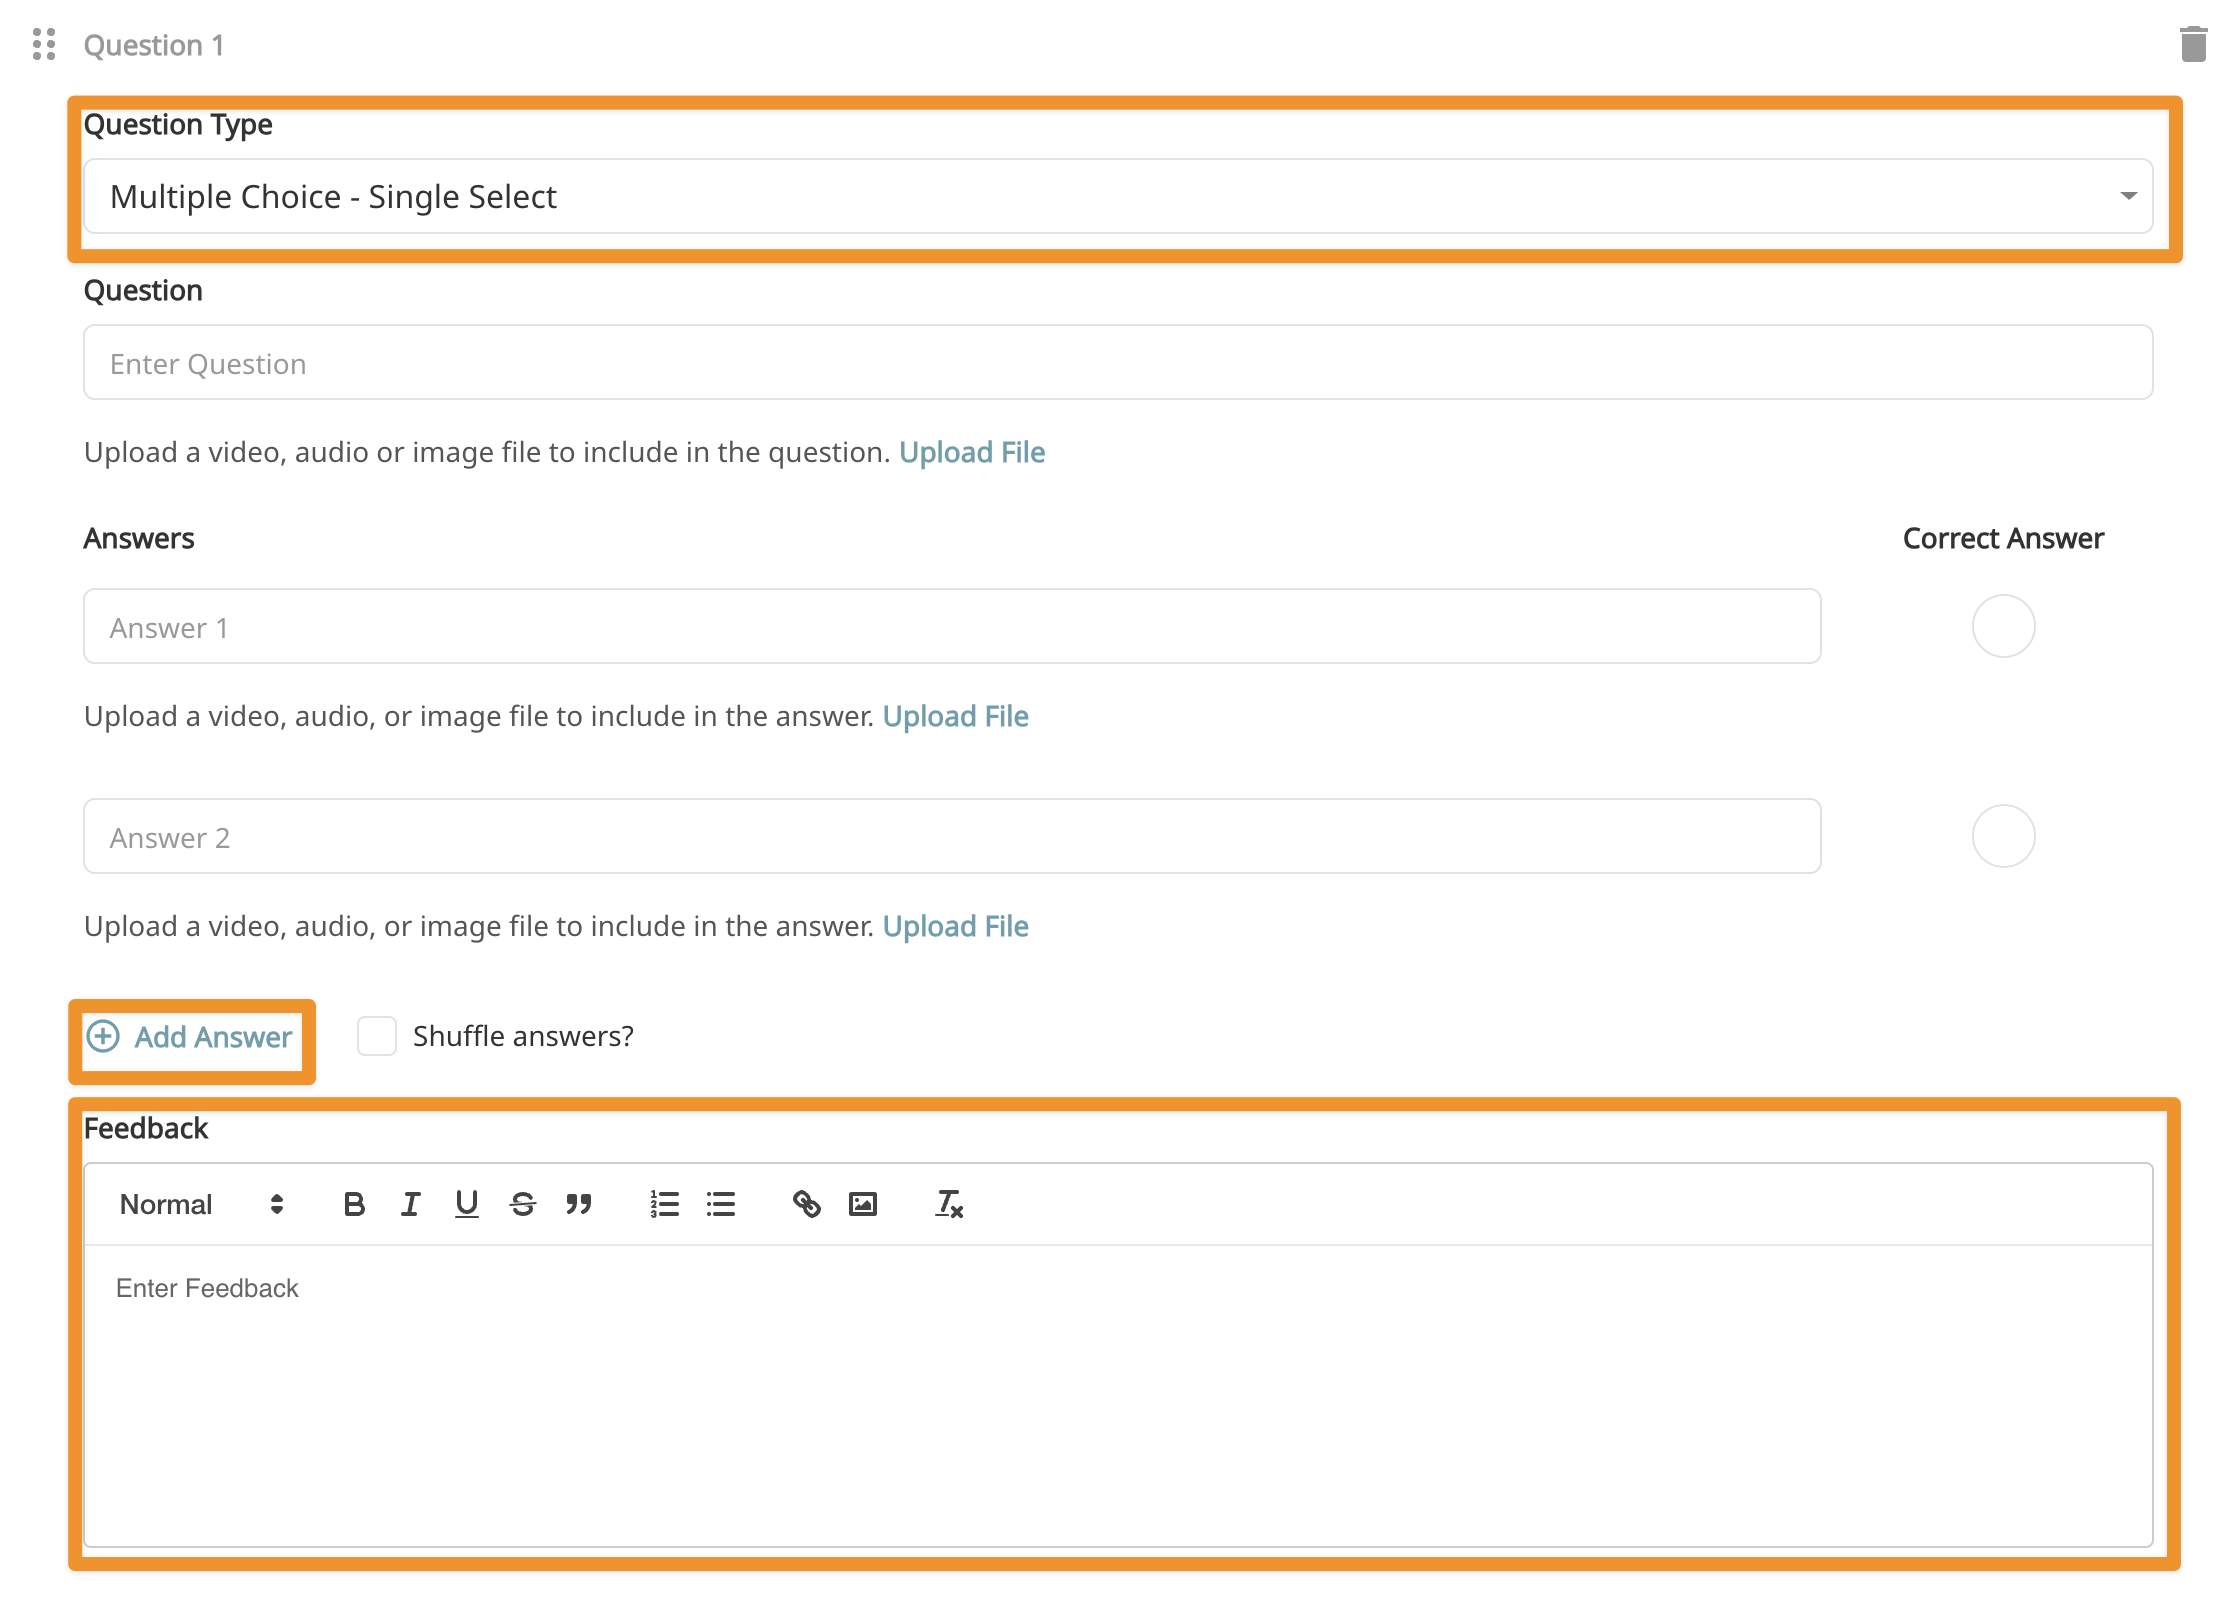
Add Question
Each question will have several options you can select to help build a quiz. For multiple choice, 2 answer options will automatically populated add more by clicking the Add Answer button.
Question Types
- Multiple Choice - Single Select - You can add as many potential answers as you like and only 1 will need to be select as the correct answer.
- Multiple Choice - Multi Select - You can add as many potential answers as you like and can choose multiple correct options.
- True or False - You will enter the question and select either true or false as the correct answer
Adding Images and Videos
You can add images and videos to a question as well as the answers. Click the Upload File button to upload. These are great ways to enhance a question and make a quiz more dynamic.
Feedback
The feedback section allows you to add in information that will be presented to the users after the quiz is complete. This information will be presented regardless of whether they responded correctly. Many systems will only display this information if the student gets the question wrong, but we want all users to understand why you selected a particular correct answer. This is a rich text area and can include links, images, and formatted text.
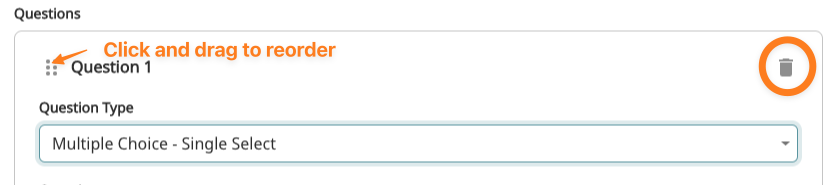
Editing Questions
To reorder questions, grab the area next to the question number and drag and drop the questions in the correct order. There is a trashcan icon in the top right which is used to delete a question.
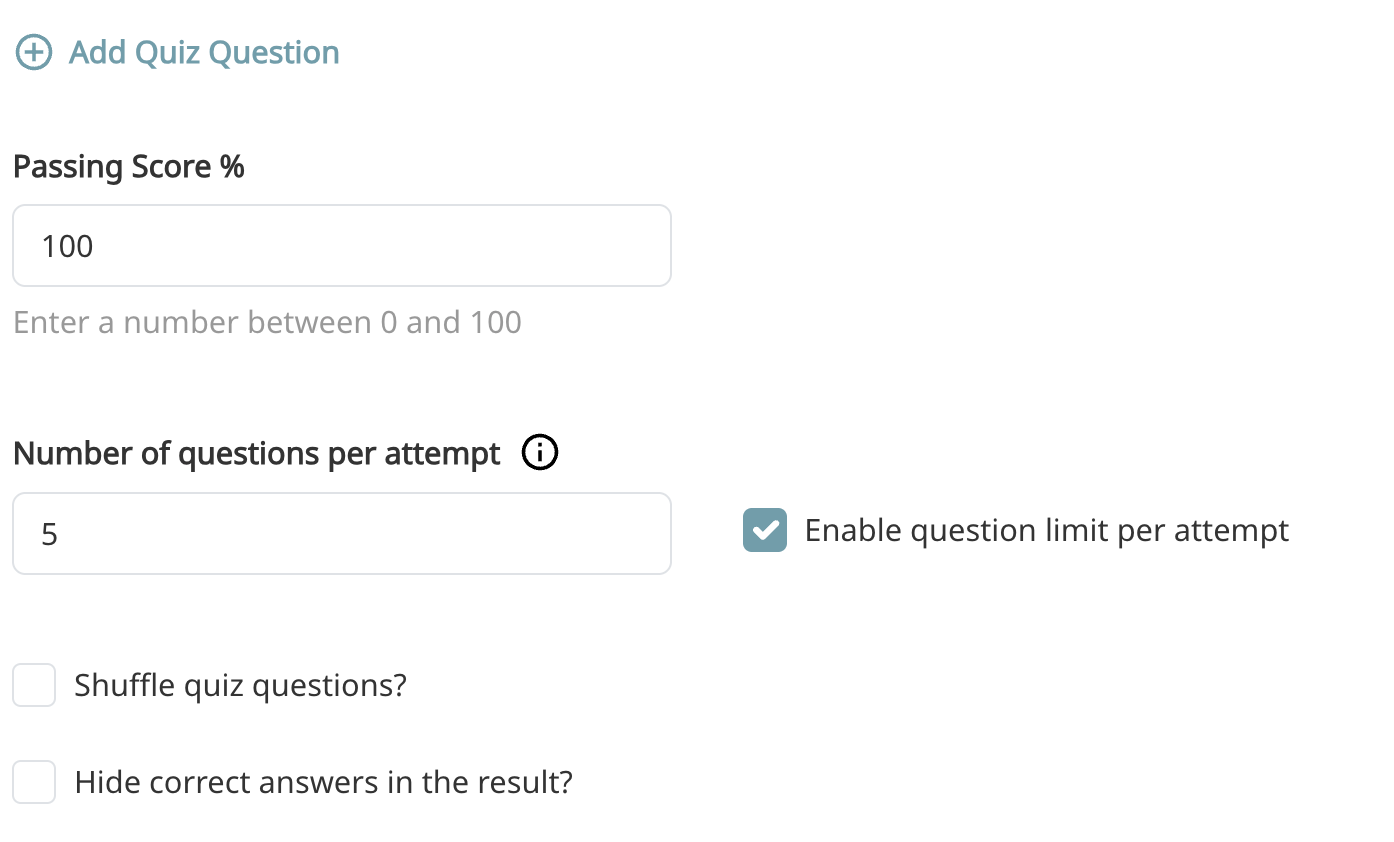
Quiz Options
To add a new question, click the Add Quiz Question button. The Passing Score represents the required total score for a user to pass a quiz, the default is 80%. If you want each user to see the questions presented in a random order, click the Shuffle Quiz Questions option. If you choose Hide correct answers in results, the student will see their score but not the correct answers.
Quiz Bank
If you check the Enable question limit per attempt the system will randomly generate a quiz using the number of questions entered in the Number of questions per attempt box. If this is left unckecked, the quiz will include all questions
Quiz Validation
When you publish a quiz, we will run validation to make sure the quiz meets certain criteria. There are 2 errors that we see commonly. Correct answer index must be set for multiple-choice - This is caused when you have not selected a correct answer for a question. Every question must have unique answers - You cannot have the same possible answer twice on a question.
Publishing a Class
After everything has been added, simply pushing the Continue button on the quiz page will bring up the publish option and the class will be live in the catalog.