Account Management
Managing Users
The Users section of your training officer account gives you access to everything you need to manage your department's staff, from inviting new users and importing them in bulk to viewing individual training records and managing group assignments.
To get started, click Users in the left sidebar of your training officer account.
Department Users

The Department Users tab shows a table of all users currently in your department. Each row displays the user's name, employee ID, phone, email, role, and status. You can sort the table by clicking on any column header.
Use the filters at the top of the table to narrow down your view. You can filter by Status (Active or Inactive), User Role (General User, Training Officer, or Admin), and Groups. Click the refresh button to reset your filters. To download the current filtered view as a CSV, click the Export button in the top right corner of the table.
Click on any user's name to open their individual user record.
Adding Users
There are several ways to add users to your department. If you have questions about the best option for your organization, we are happy to help get you started.
Want this fully automated?
If your organization uses an HR system, SFTP User Sync can create, update, and deactivate users automatically from a scheduled CSV export, no manual uploads needed.
Invite Users

Click the Invite Users button in the top right of the My Users page. Enter the email address in the To field. You can add multiple emails at once by pasting a list, and each one will appear as a separate email in the field.
Select a User Role from the dropdown (General User, Training Officer, or Admin) and click Send Invite. Each user will receive an email asking them to join your department. If they don't already have a Prodigy account, they will be prompted to create one. If they already have an account, even with a different email address, they can connect it to your department.
Copy Invitation Link
The Invite Users modal also includes a Copy Invitation Link option. This generates a link that anyone can use to register and join your department. The link can be used multiple times and doesn't expire for a year. We recommend using direct invitations whenever possible for better control over who joins your department.
Invitations Tab
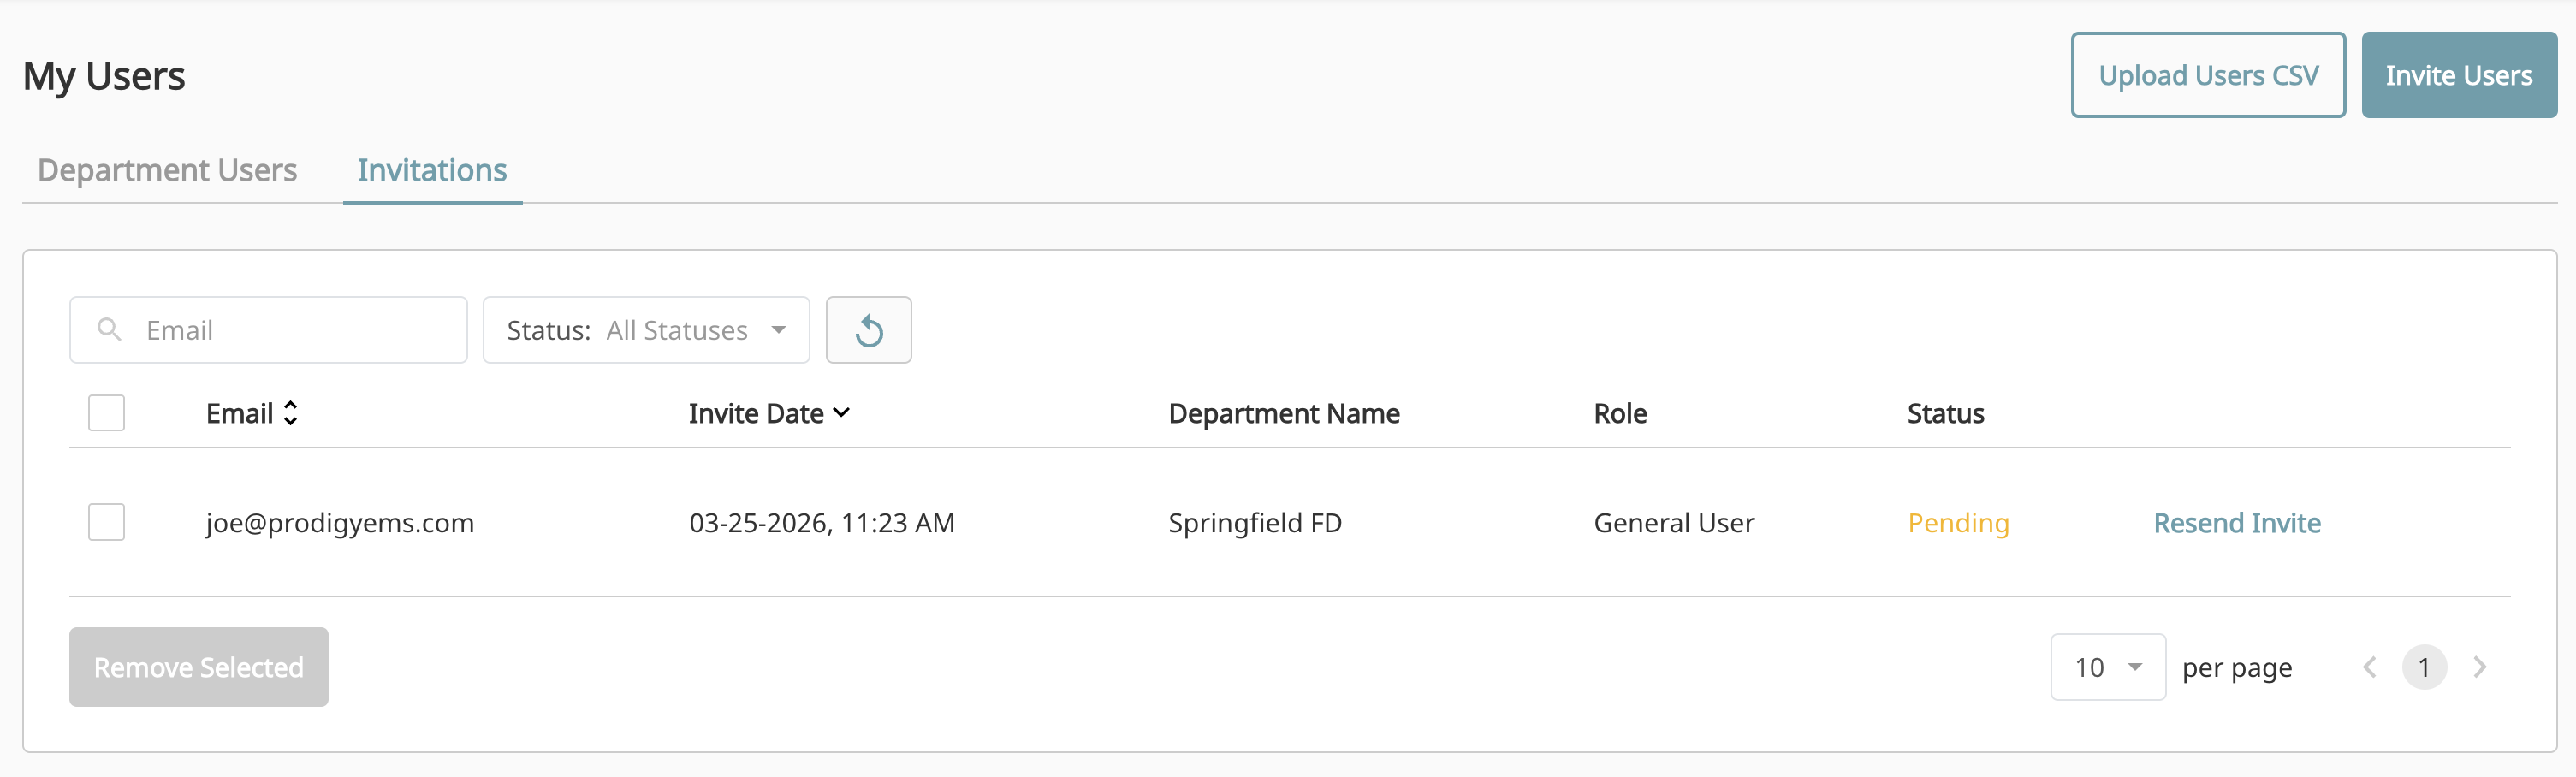
After sending invitations, switch to the Invitations tab to track their status. Each invitation shows the email, invite date, department, role, and current status. Pending invitations will show a Pending status along with a Resend Invite link if you need to send the email again.
Once a user accepts their invitation, they will be moved to the Department Users tab and the invitation will be removed from this list. If you need to cancel an invitation, select the checkbox next to it and click Remove Selected.
You can search invitations by email and filter by status using the controls at the top of the table.
Upload Users CSV

For adding multiple users at once, click the Upload Users CSV button from the My Users page. If you need help with the file format, click Download a sample CSV to get a template.

Your CSV file should include the following columns: firstname, lastname, email, role, and employee_id. The role column should contain one of the three available roles: general user, training officer, or admin. The employee_id column is optional. Drag and drop your file or click to upload. The file must be a .csv under 25 MiB.
Review and Confirm
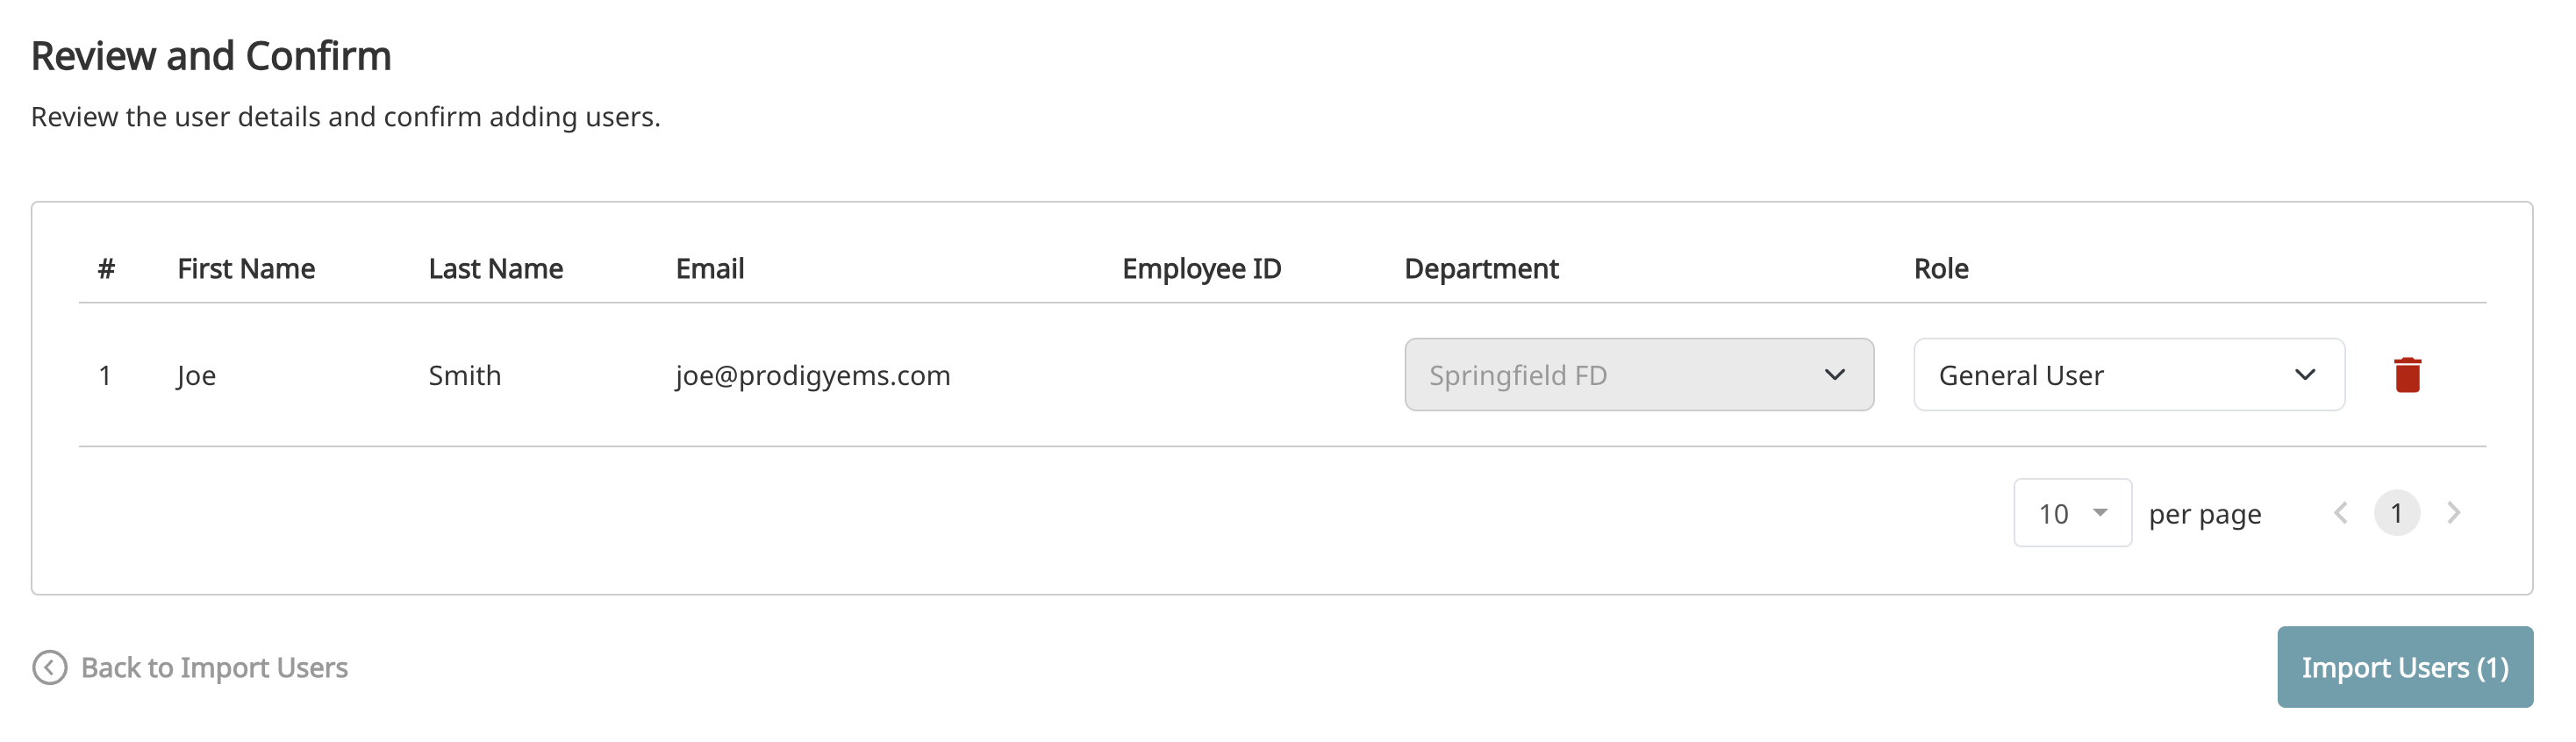
After uploading, you will see a Review and Confirm screen showing each user that will be imported. The Department and Role columns are dropdowns, so you can update them here before importing. You can also remove any users you don't want to import by clicking the trash icon.
When everything looks correct, click Import Users to complete the process. If you need to make changes to your CSV, click Back to Import Users to start over.
Import Summary

After the import completes, you will see an Import Summary with four tabs:
- Created - Brand new users who did not have a Prodigy account. These users are added directly to your department and will receive login credentials via email.
- Updated - Existing users in your department whose information was updated based on the CSV.
- Invited - Users who already have a Prodigy account but are not in your department. These users will receive an invitation email and will see the invite on their dashboard when they log in.
- Skipped - Users who could not be imported. Click this tab to see details on why they were skipped.
You can search by email within each tab to find specific users. Click Got It when you are done reviewing.
Existing Email Addresses
If an email address is already in use on Prodigy, even if not in your department, the system will not create a new account. Instead, that user will receive an invitation to join your department.
Individual User Records
Click on any user's name from the Department Users tab to open their individual record. The user record has three tabs: User Profile, Training Plans, and Transcripts.
User Profile
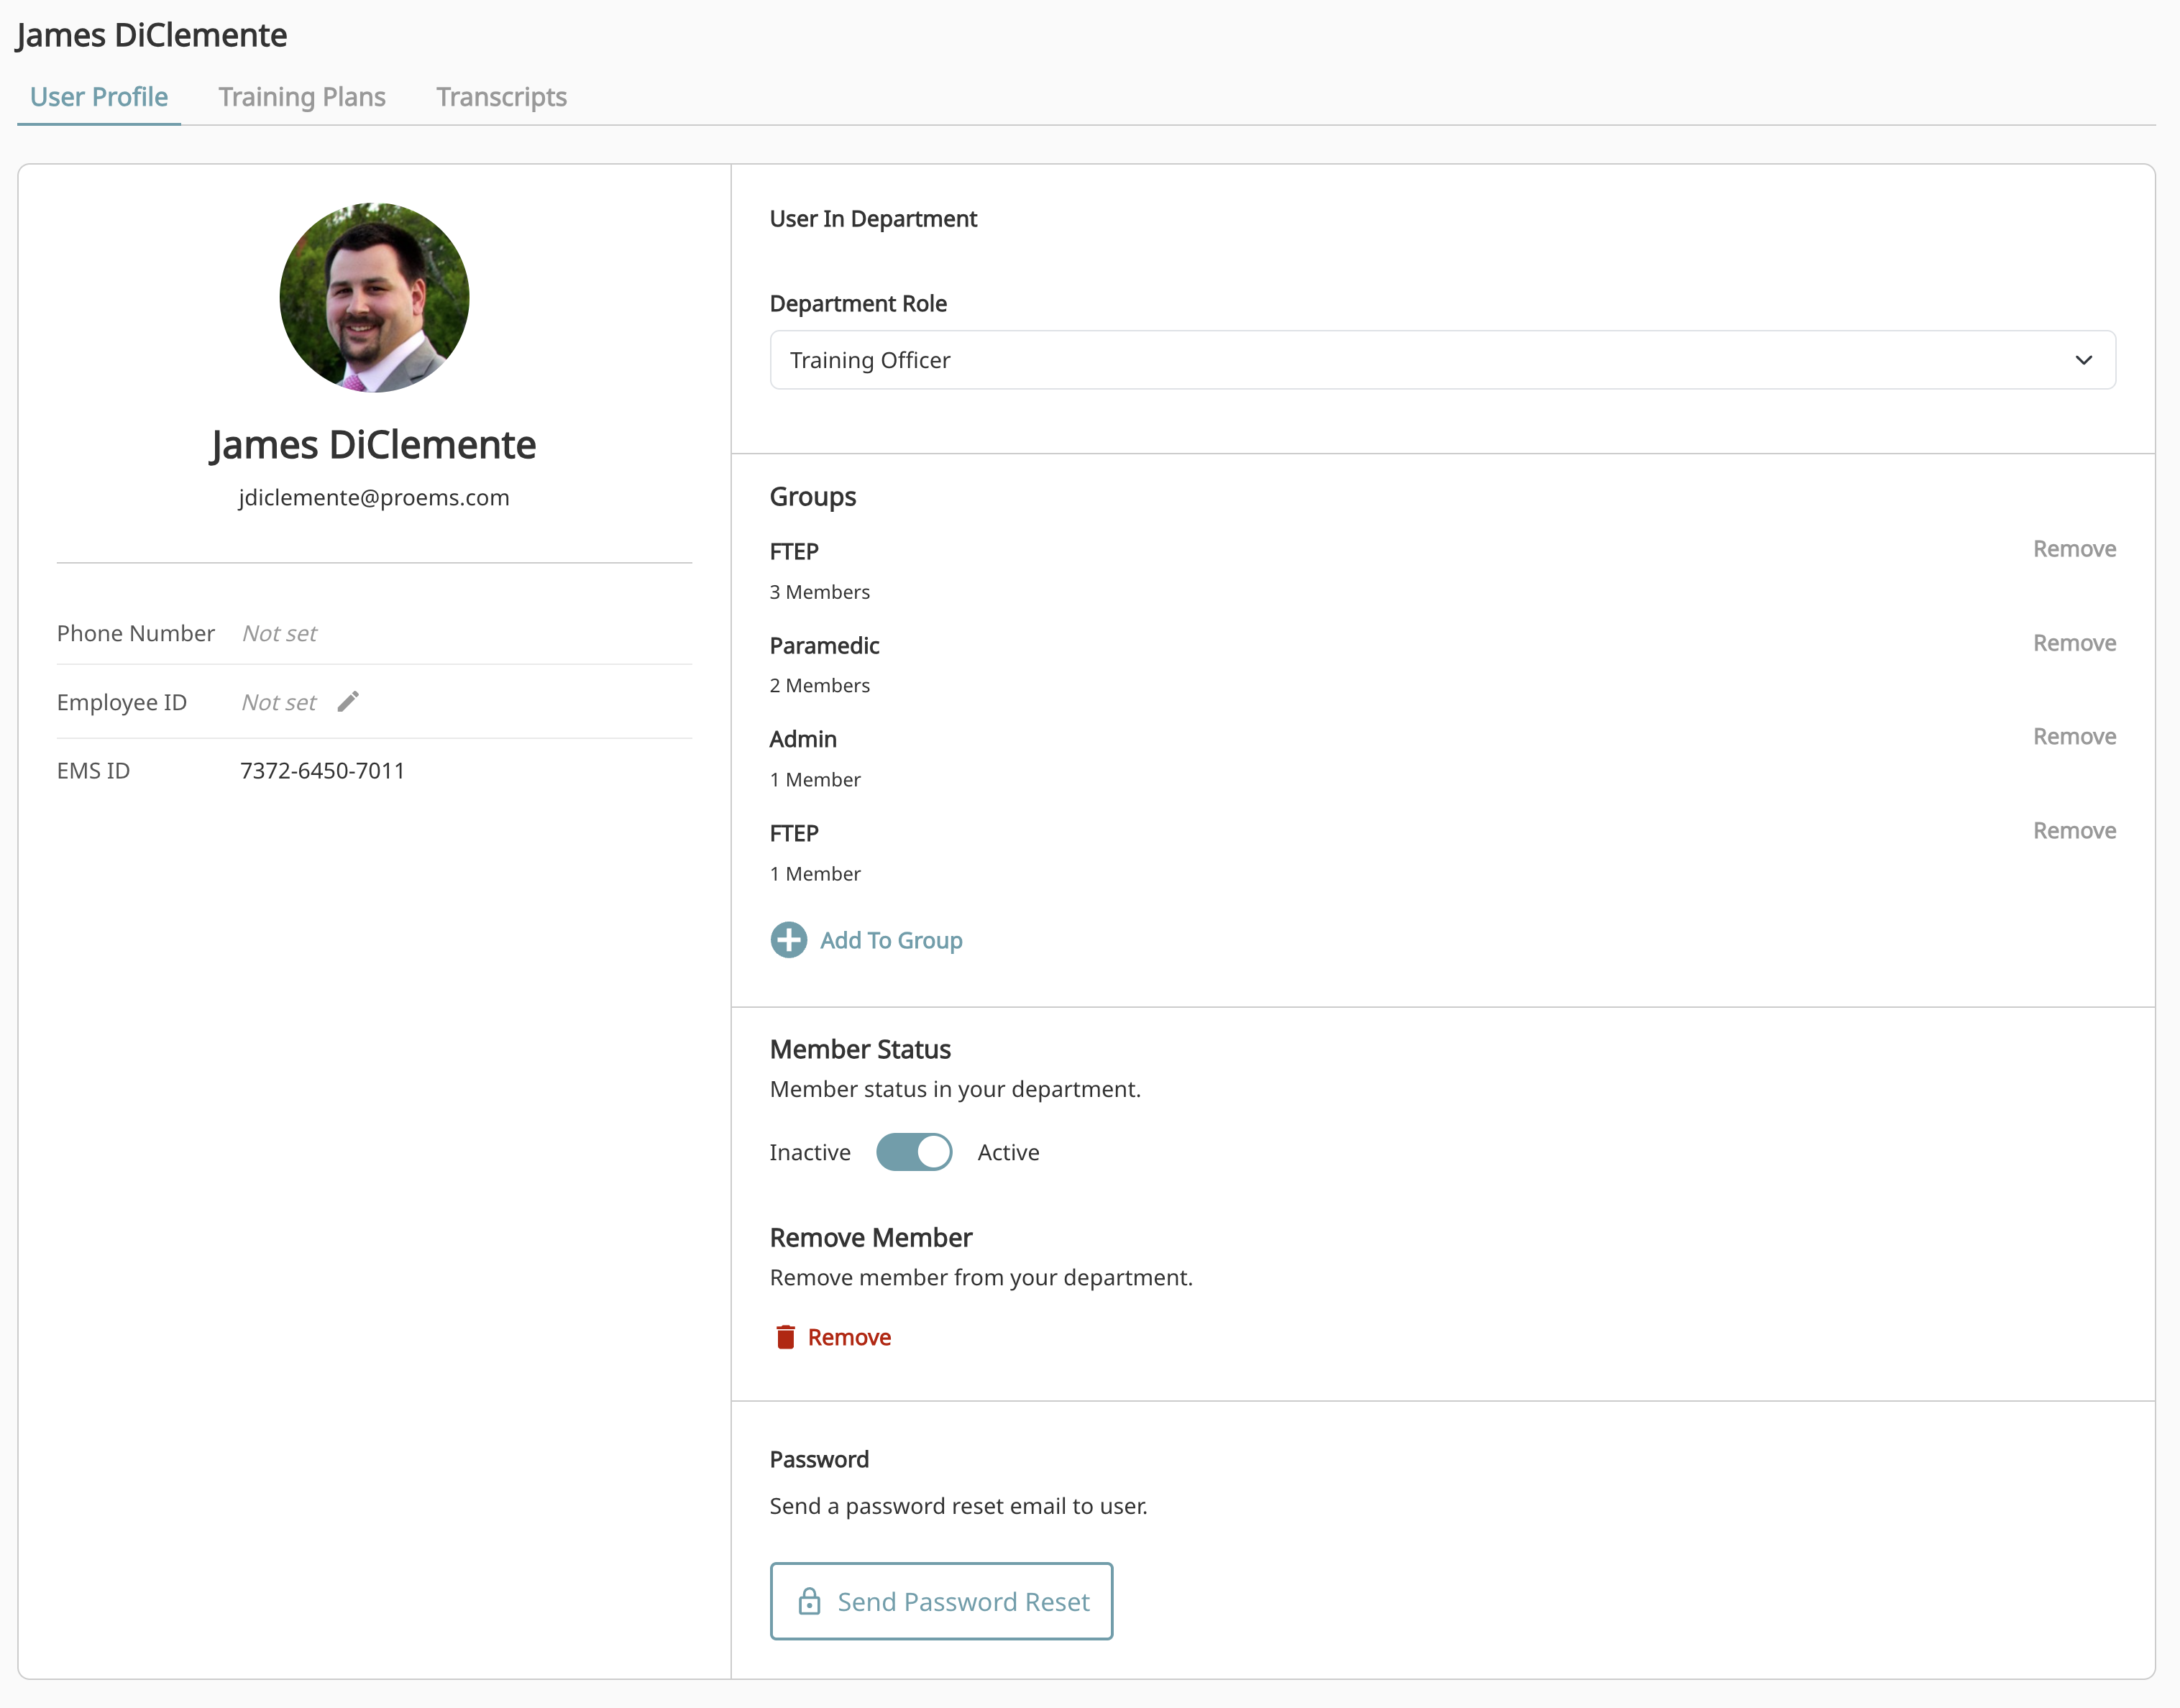
The User Profile shows the user's basic information on the left side, including their name, email, phone number, employee ID, and EMS ID. Phone number and EMS ID are set by the user on their own account and cannot be edited by training officers. Employee ID can be edited by clicking the pencil icon next to it.
On the right side, you will find several management sections:
Department Role allows you to change the user's role within your department using the dropdown. The available roles are General User, Training Officer, and Admin.
Groups shows which groups the user belongs to. Groups are created by your department and can be used to organize users for reporting and assignments. Click Add To Group to add them to a new group, or click Remove next to any group to take them out.
Member Status controls whether the user is Active or Inactive in your department. Toggling a user to Inactive removes their access to Prodigy and removes them from billing. This is designed for temporary leave situations like military deployment or extended time off, since you can toggle them back to Active at any time to restore access.
Remove Member removes the user from your department entirely. This does not delete their Prodigy account. The user retains access to their personal records on Prodigy but will no longer be able to access department-specific data, training, or resources. They will need to purchase a bundle to continue using the system individually.
Accidental Removal
If you accidentally remove a user, simply invite them back to the department and no records will be lost.
Password allows you to send a password reset email to the user by clicking Send Password Reset.
Training Plans
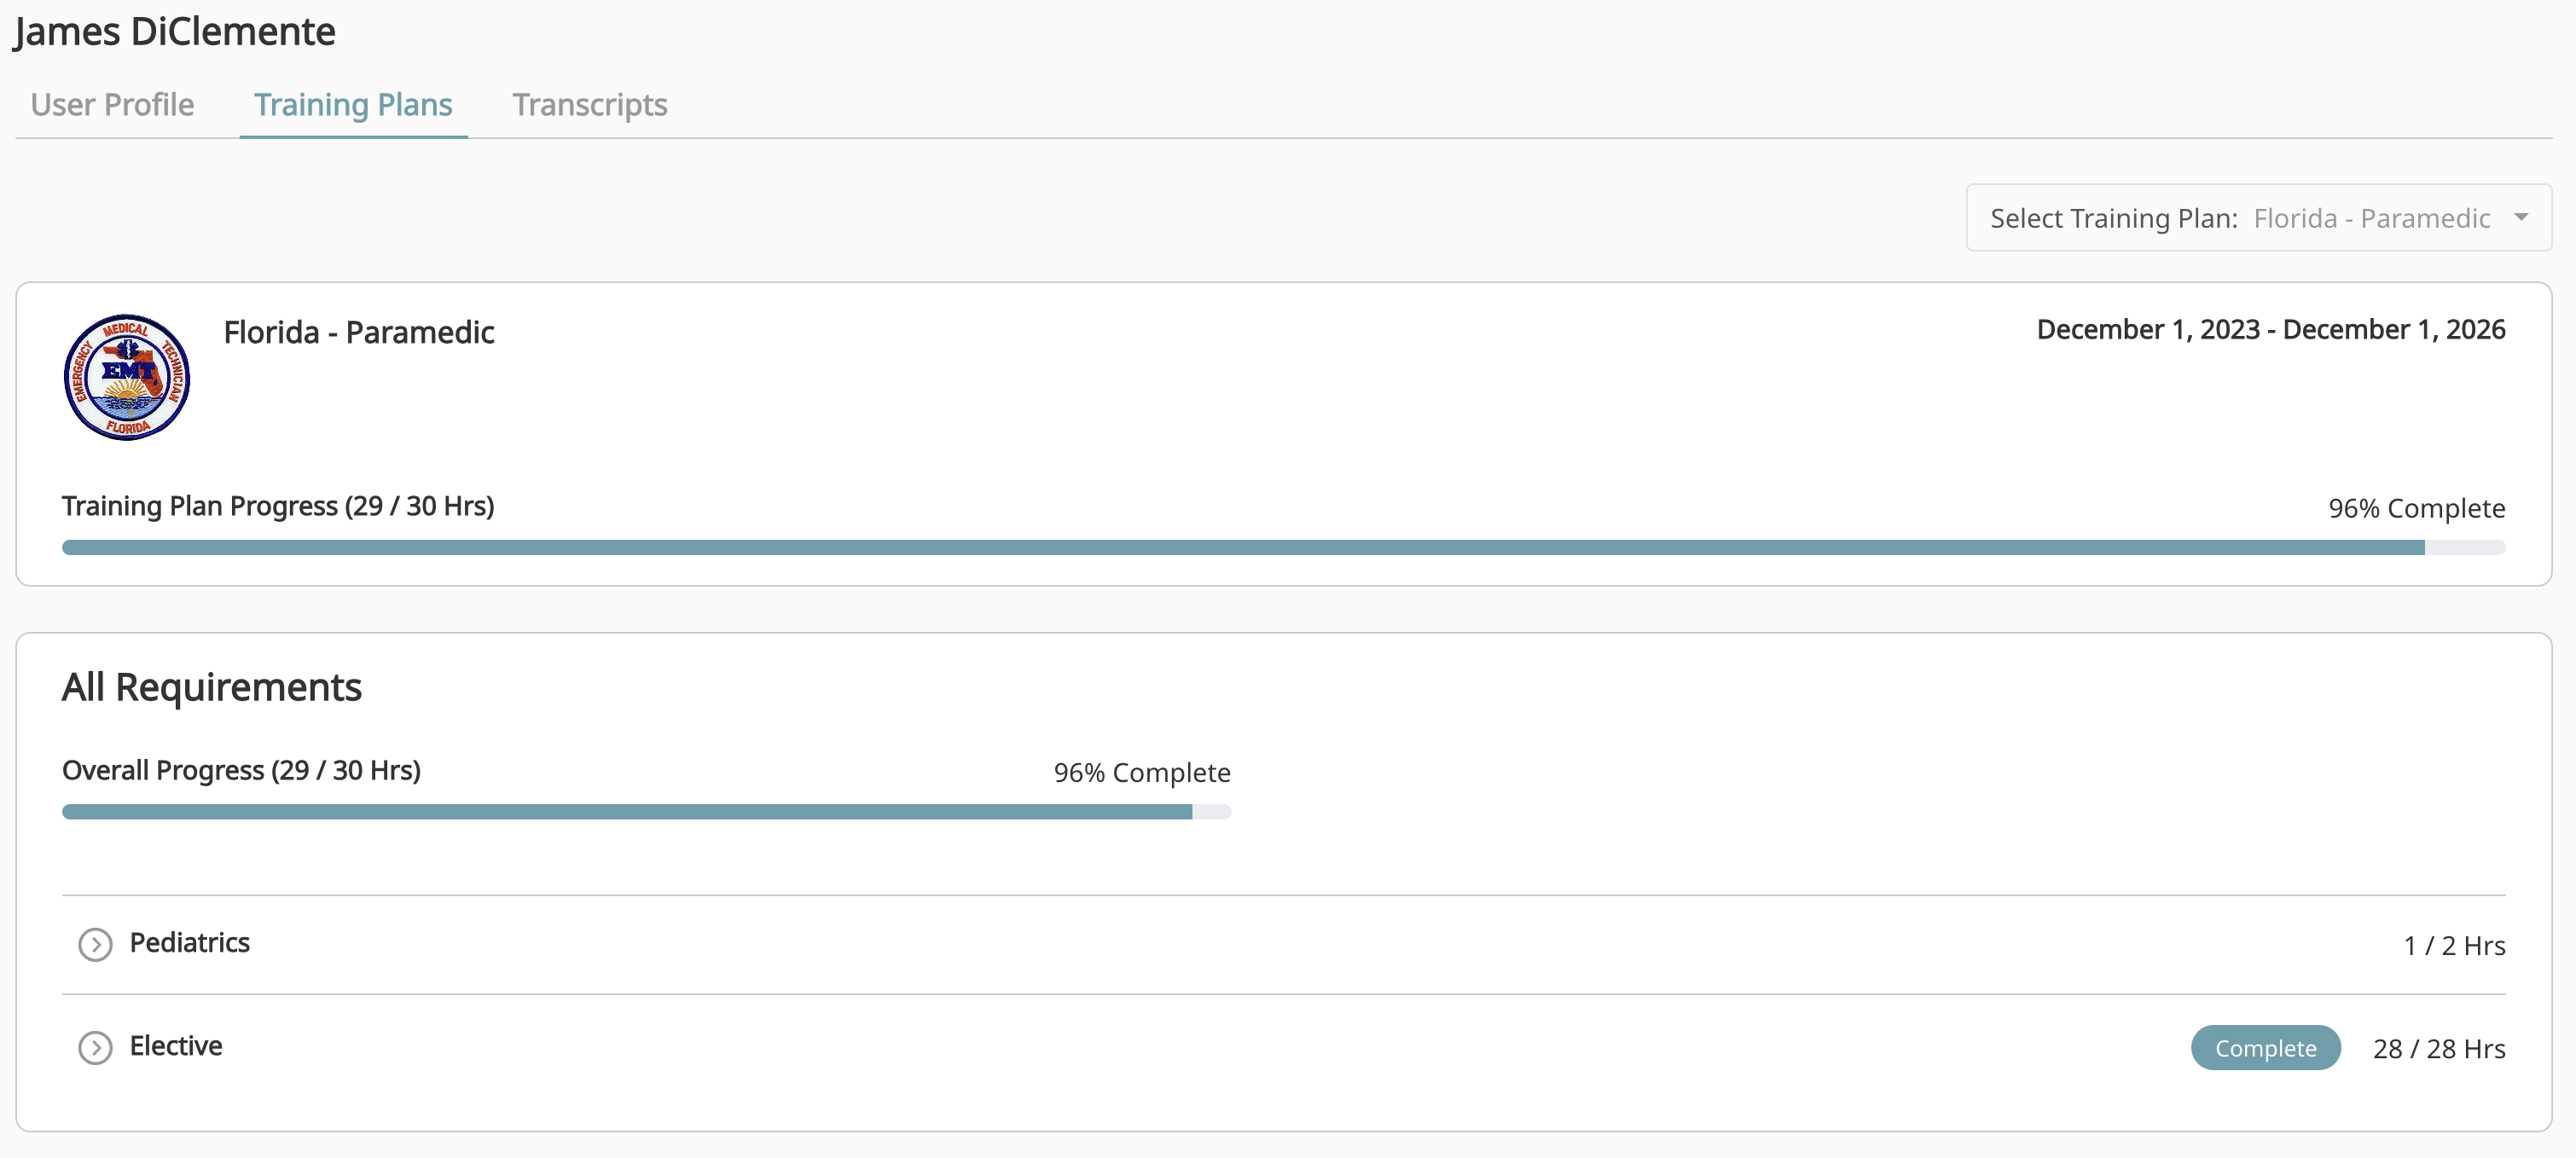
The Training Plans tab shows the user's progress on any assigned training plans. If the user has multiple training plans, use the Select Training Plan dropdown in the top right to switch between them.
Each training plan displays the plan name, certification period, and overall progress as both hours completed and a percentage. Below that, the All Requirements section breaks down progress by requirement category, showing hours completed toward each requirement group. Click on a category to expand it and see the individual classes counted toward that requirement.
Transcripts
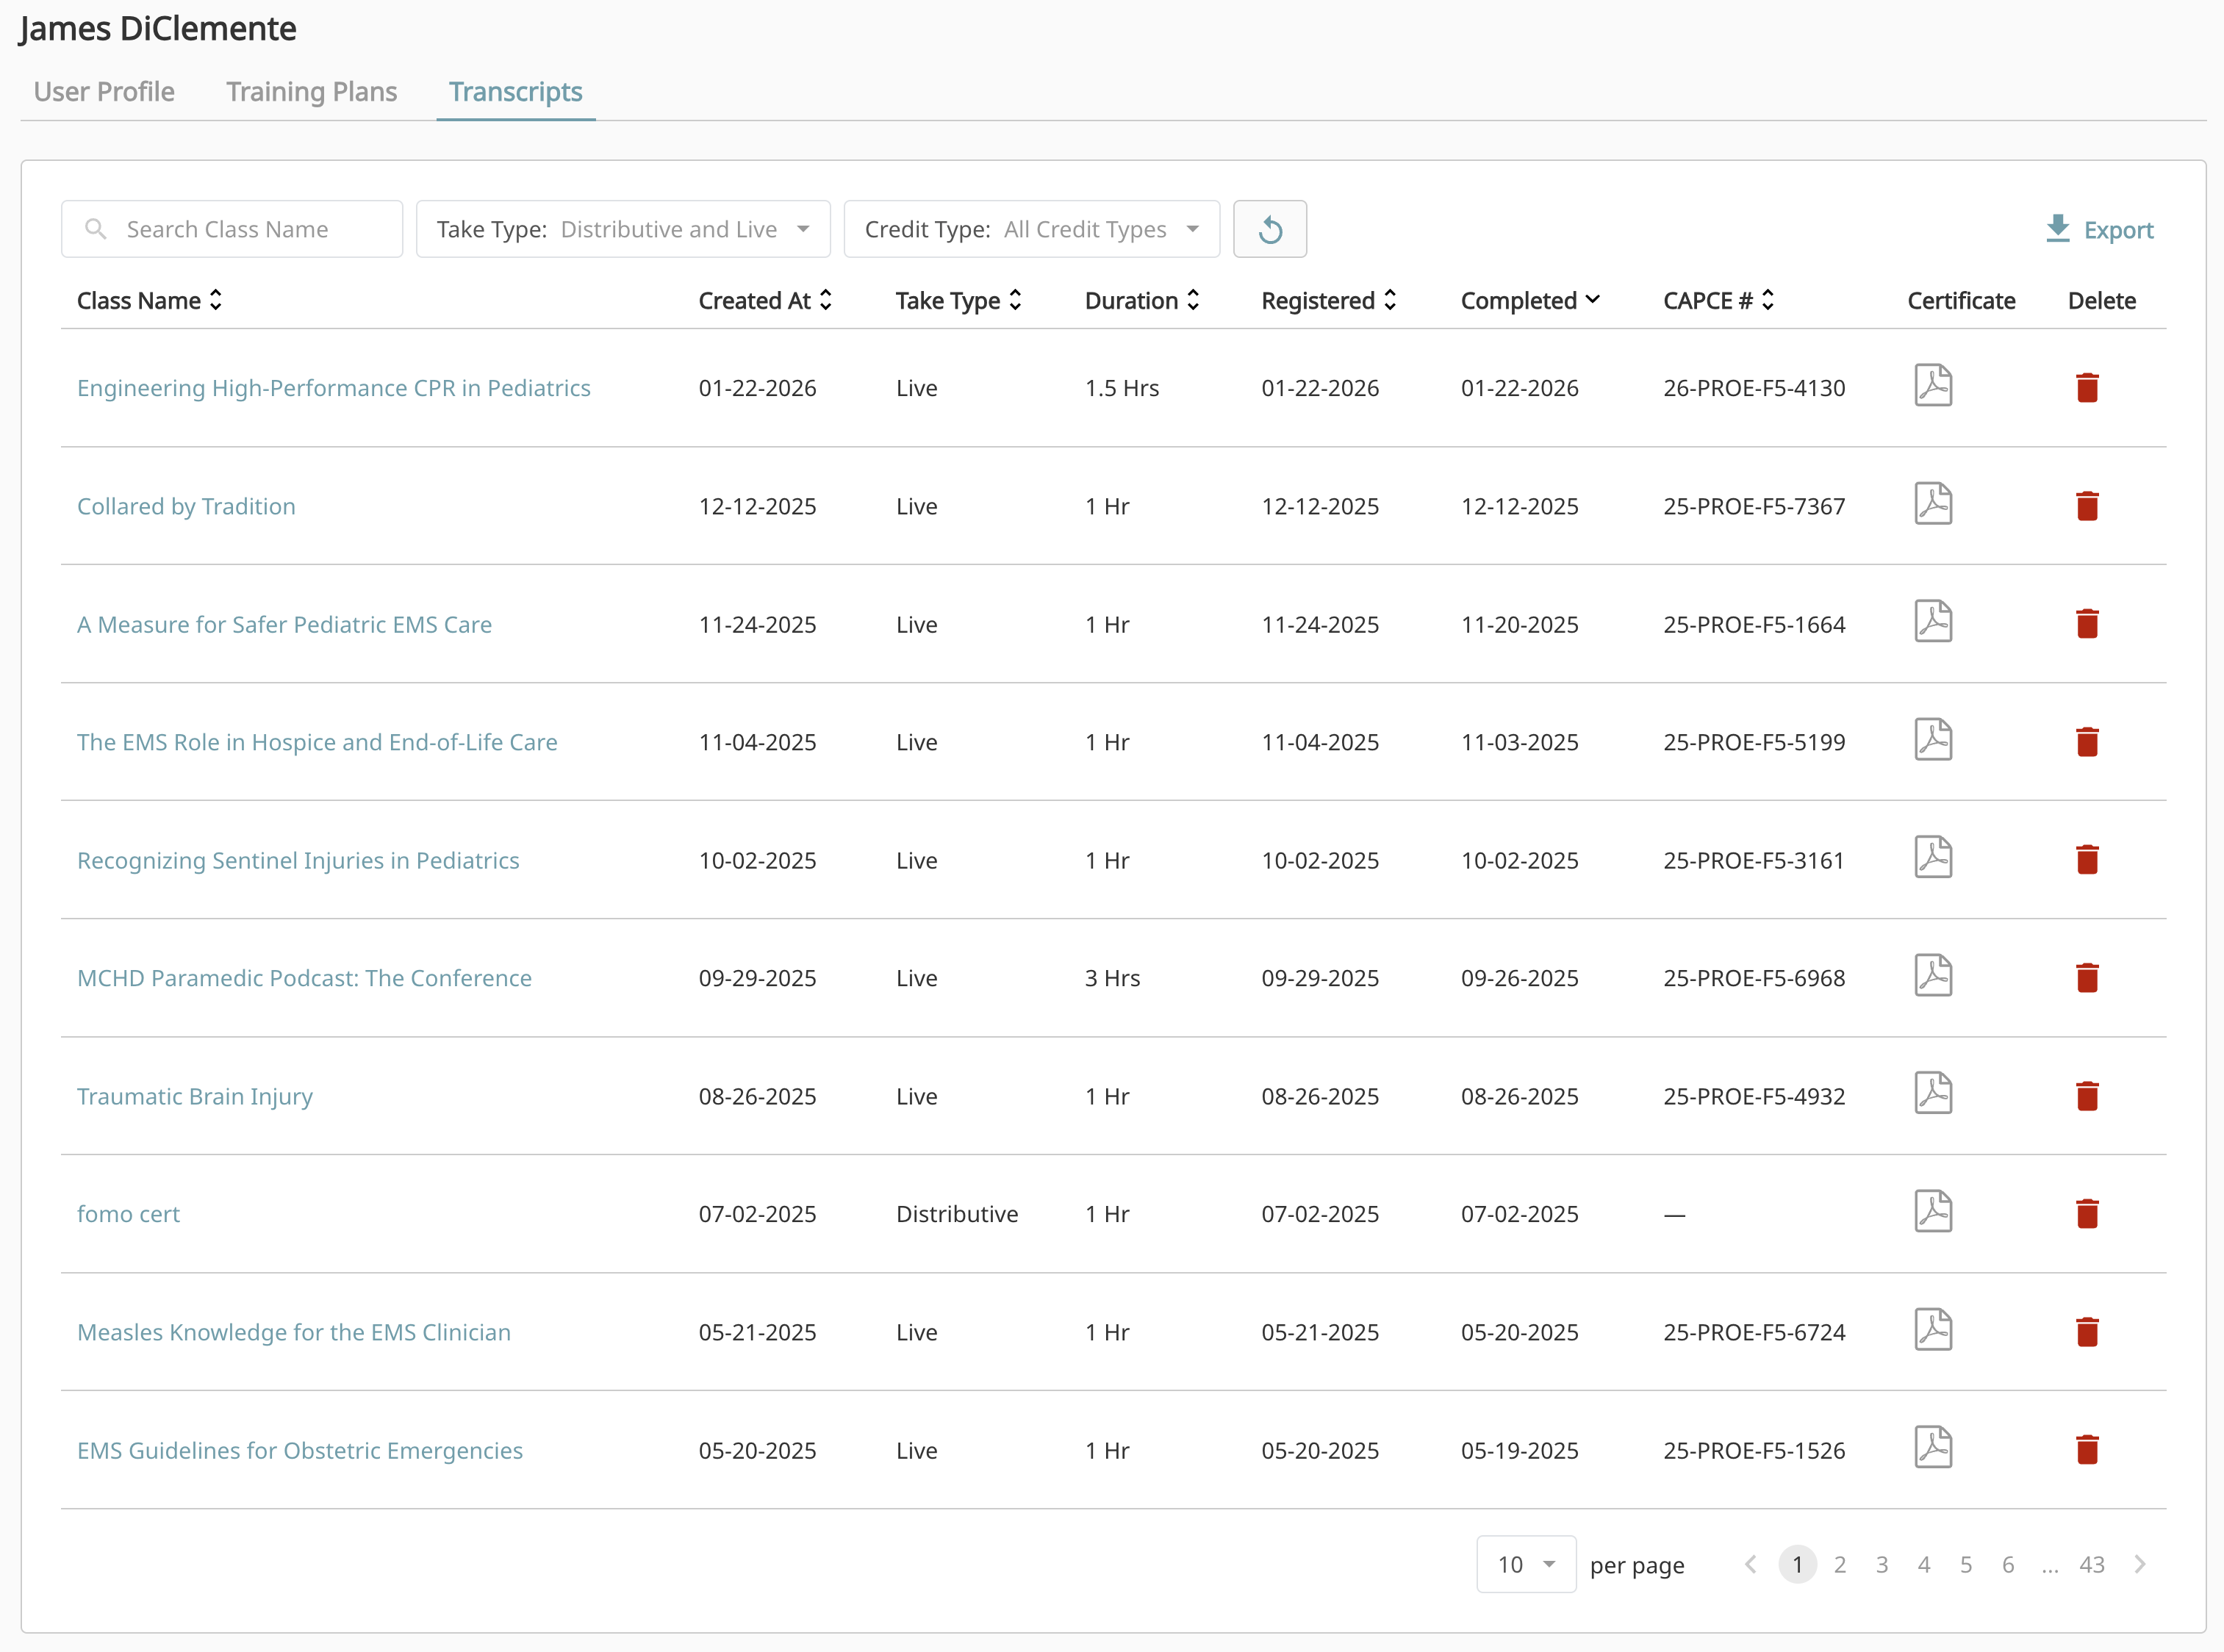
The Transcripts tab shows a complete record of the user's class completions. Each row displays the class name, creation date, take type, duration, registration date, completion date, and CAPCE number if applicable.
Use the filters at the top to narrow the list by Take Type (Distributive, Live, or both) and Credit Type. You can also search by class name. Click Export to download the filtered transcript as a CSV.
The Certificate column provides a PDF download icon for each completed class, allowing you to download individual certificates for your records.
Deleting Transcript Records
The trash icon next to each transcript row will delete that completion record from the user's transcript. Use this carefully. If a record is deleted by mistake, contact Prodigy support and we can restore it.