Purchasing Prodigy
Handtevy Department Management
If you are using Prodigy for your Handtevy online training, this article will walk you through the process.
Using Prodigy for Handtevy
Prodigy will be used for all aspects of the online Handtevy Certified Provider course. The online component consists of a 3 hour course with a BLS and ALS version available. The hands-on portion will be tracked through Prodigy where students will receive an additional 2 hours of CAPCE credit. Prodigy features a live registration system which can be used to manage the in person training, or you can use your own system and simply use Prodigy as the record management system.
Adding Users
There are several ways to add users in to your prodigy account, if you have questions about the best option, we are happy to help get you started.
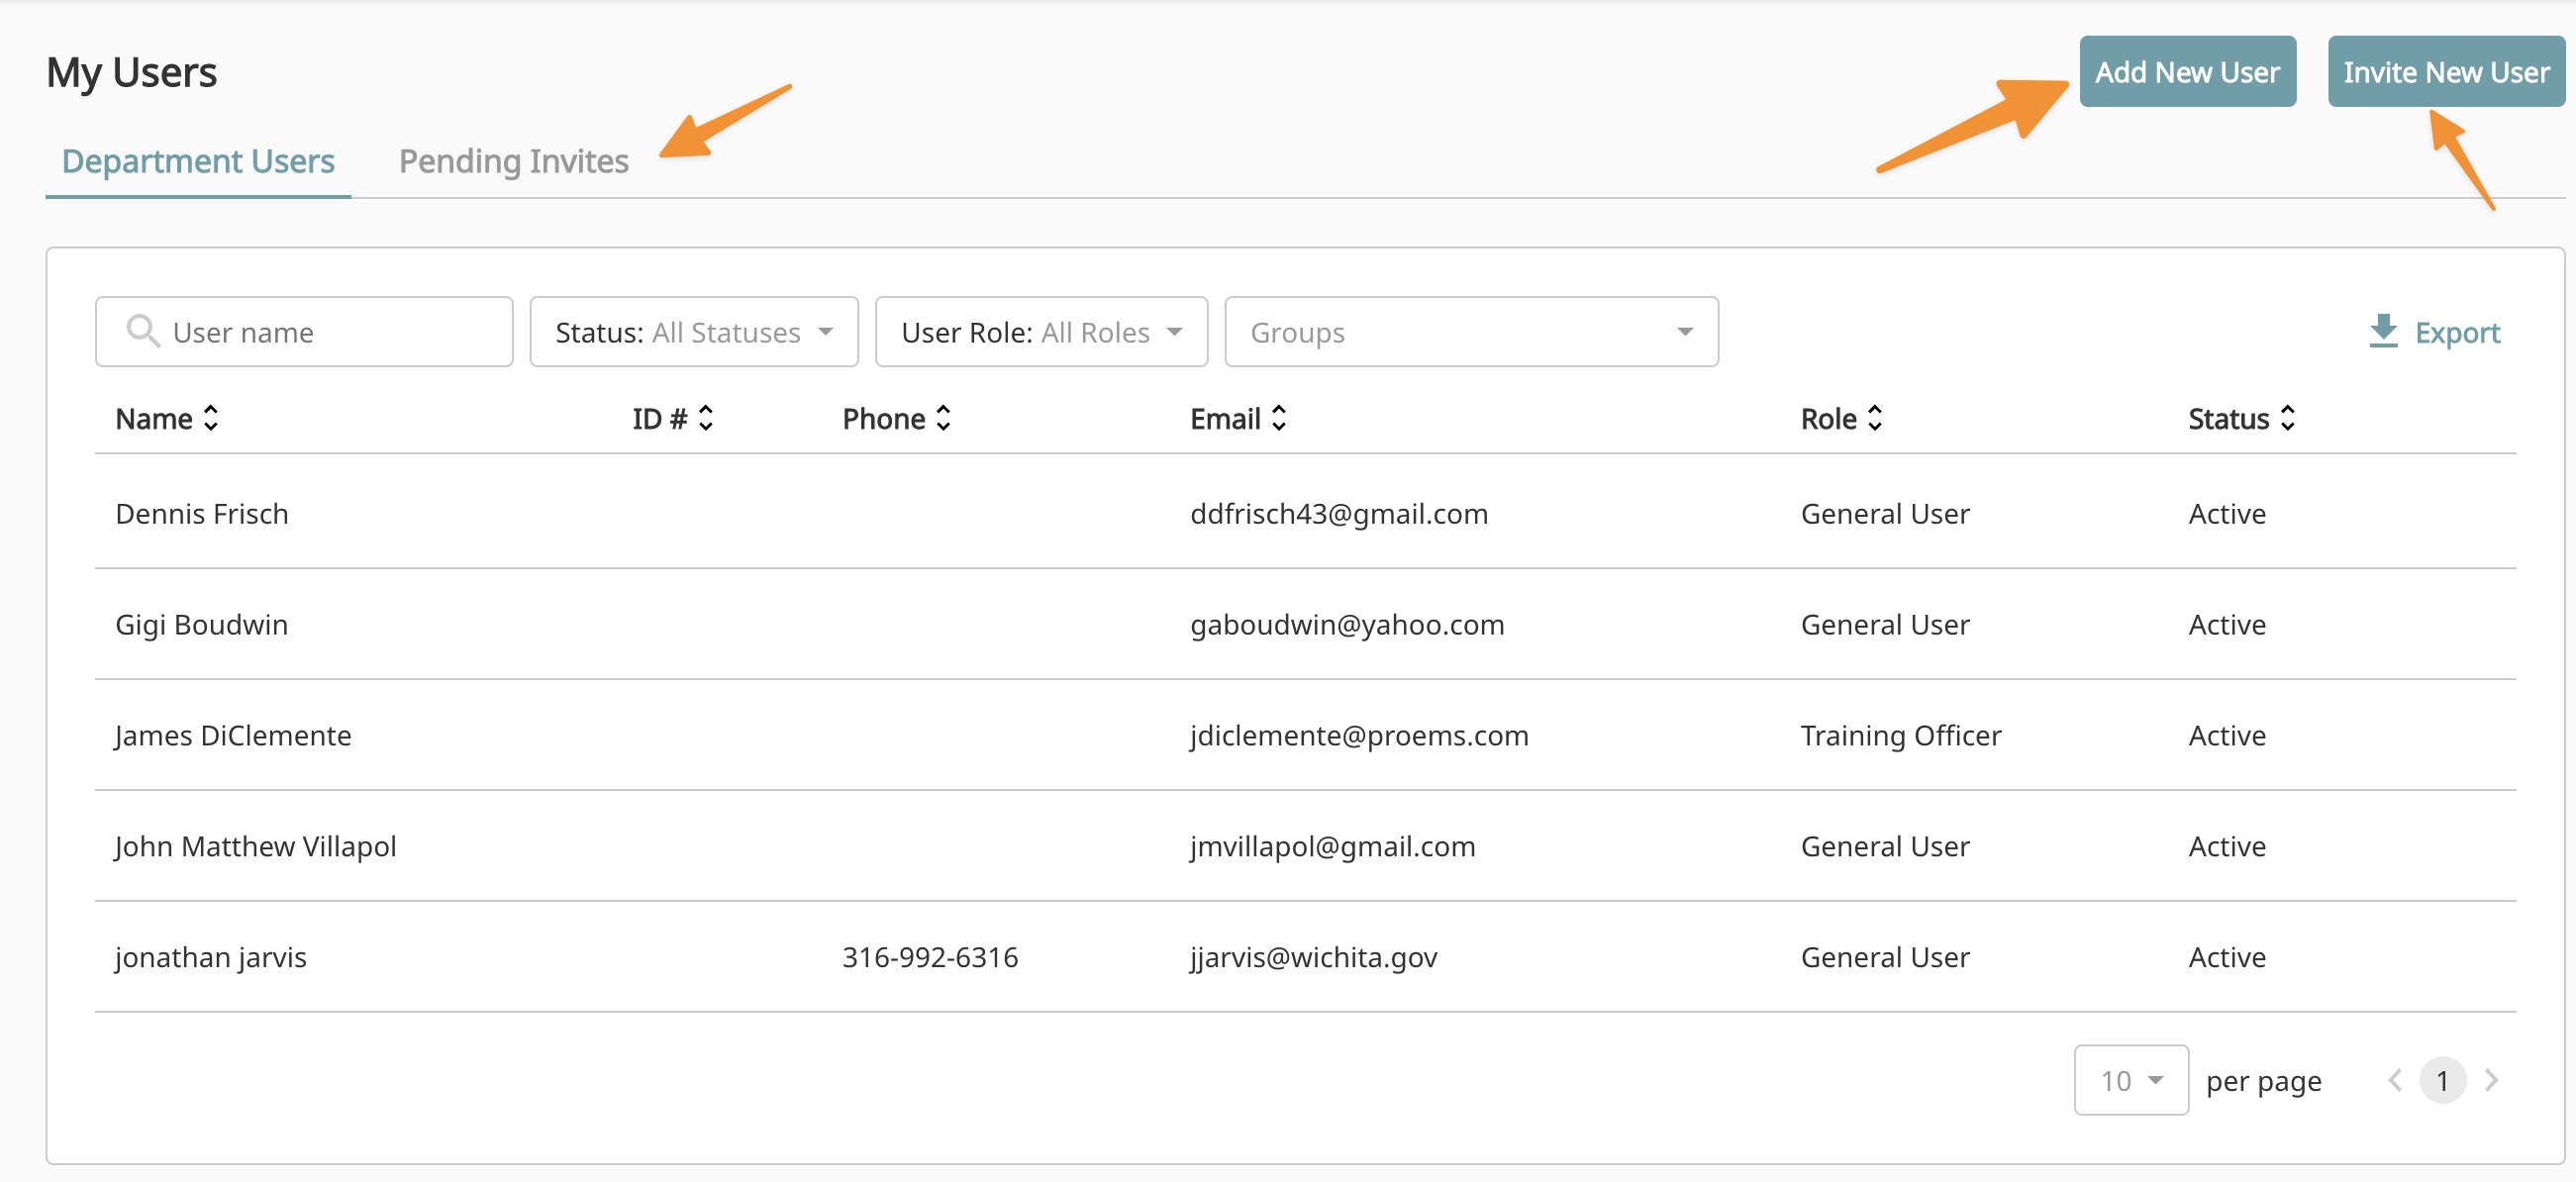
Invite users
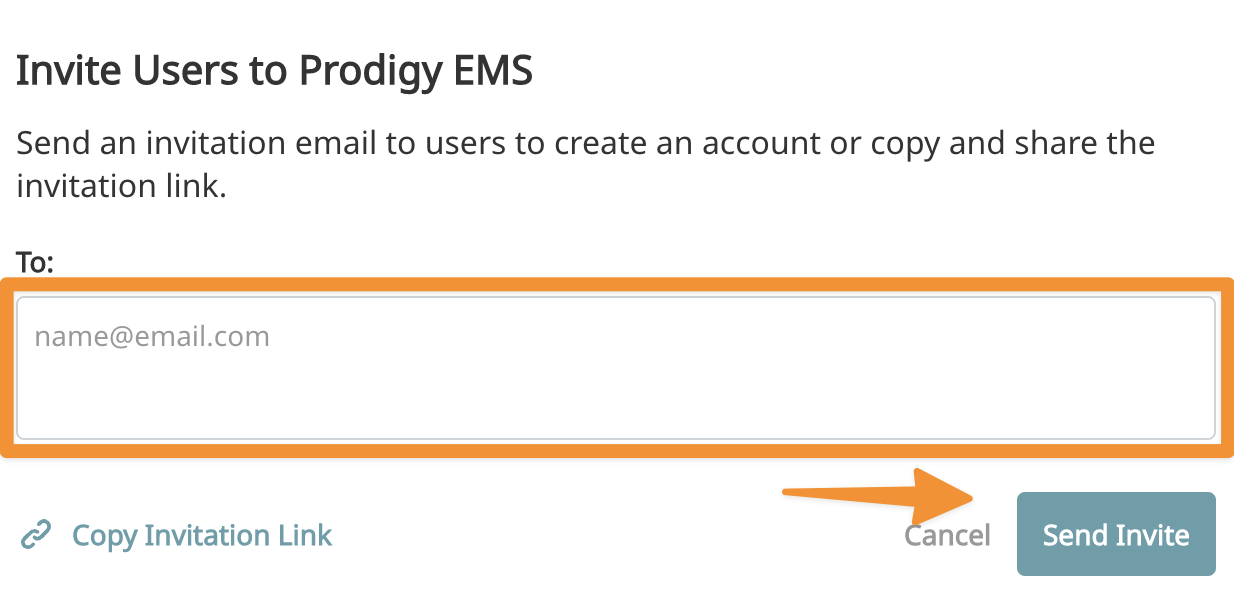
Our recommended option is to invite users individually to Prodigy. When you choose to invite users, they will receive an email asking them to join your department. If they don’t have an account they will be prompted to create one. If they have an account (even if it’s a different email address) they can connect it to your department.
Click Users -> Invite New User. You can paste multiple emails in this box. If you have a list of email addresses, just copy and paste it here and they will all receive a separate invite. Once sent, click on the “Pending Invites” tab to see who hasn’t been accepted yet and send reminders. If you invite a user who is already in your account, they will not receive an invite.
Add individual users
You can add a user in directly as long as their email address is not already in use. Click on Users -> Add New User. We only require a name, email, and user role to get them started. The user will receive an email with their login credentials.
Bulk upload
When we first set your department up, we can bulk upload all of your users. A form will be sent as part of your on boarding package that can be used for bulk upload. Once uploaded, all new users will get an email with their login credentials. We still prefer inviting users over bulk upload since inviting them allows them to set up an account with an existing Prodigy account.
Assigning Course
When you create an assignment each user will get an email alerting them of the assignment and letting them know who assigned it and when it is due. It will also add the assignment to their dashboard and to their assignment tabs. To create and manage assignments click the Assignments tab.
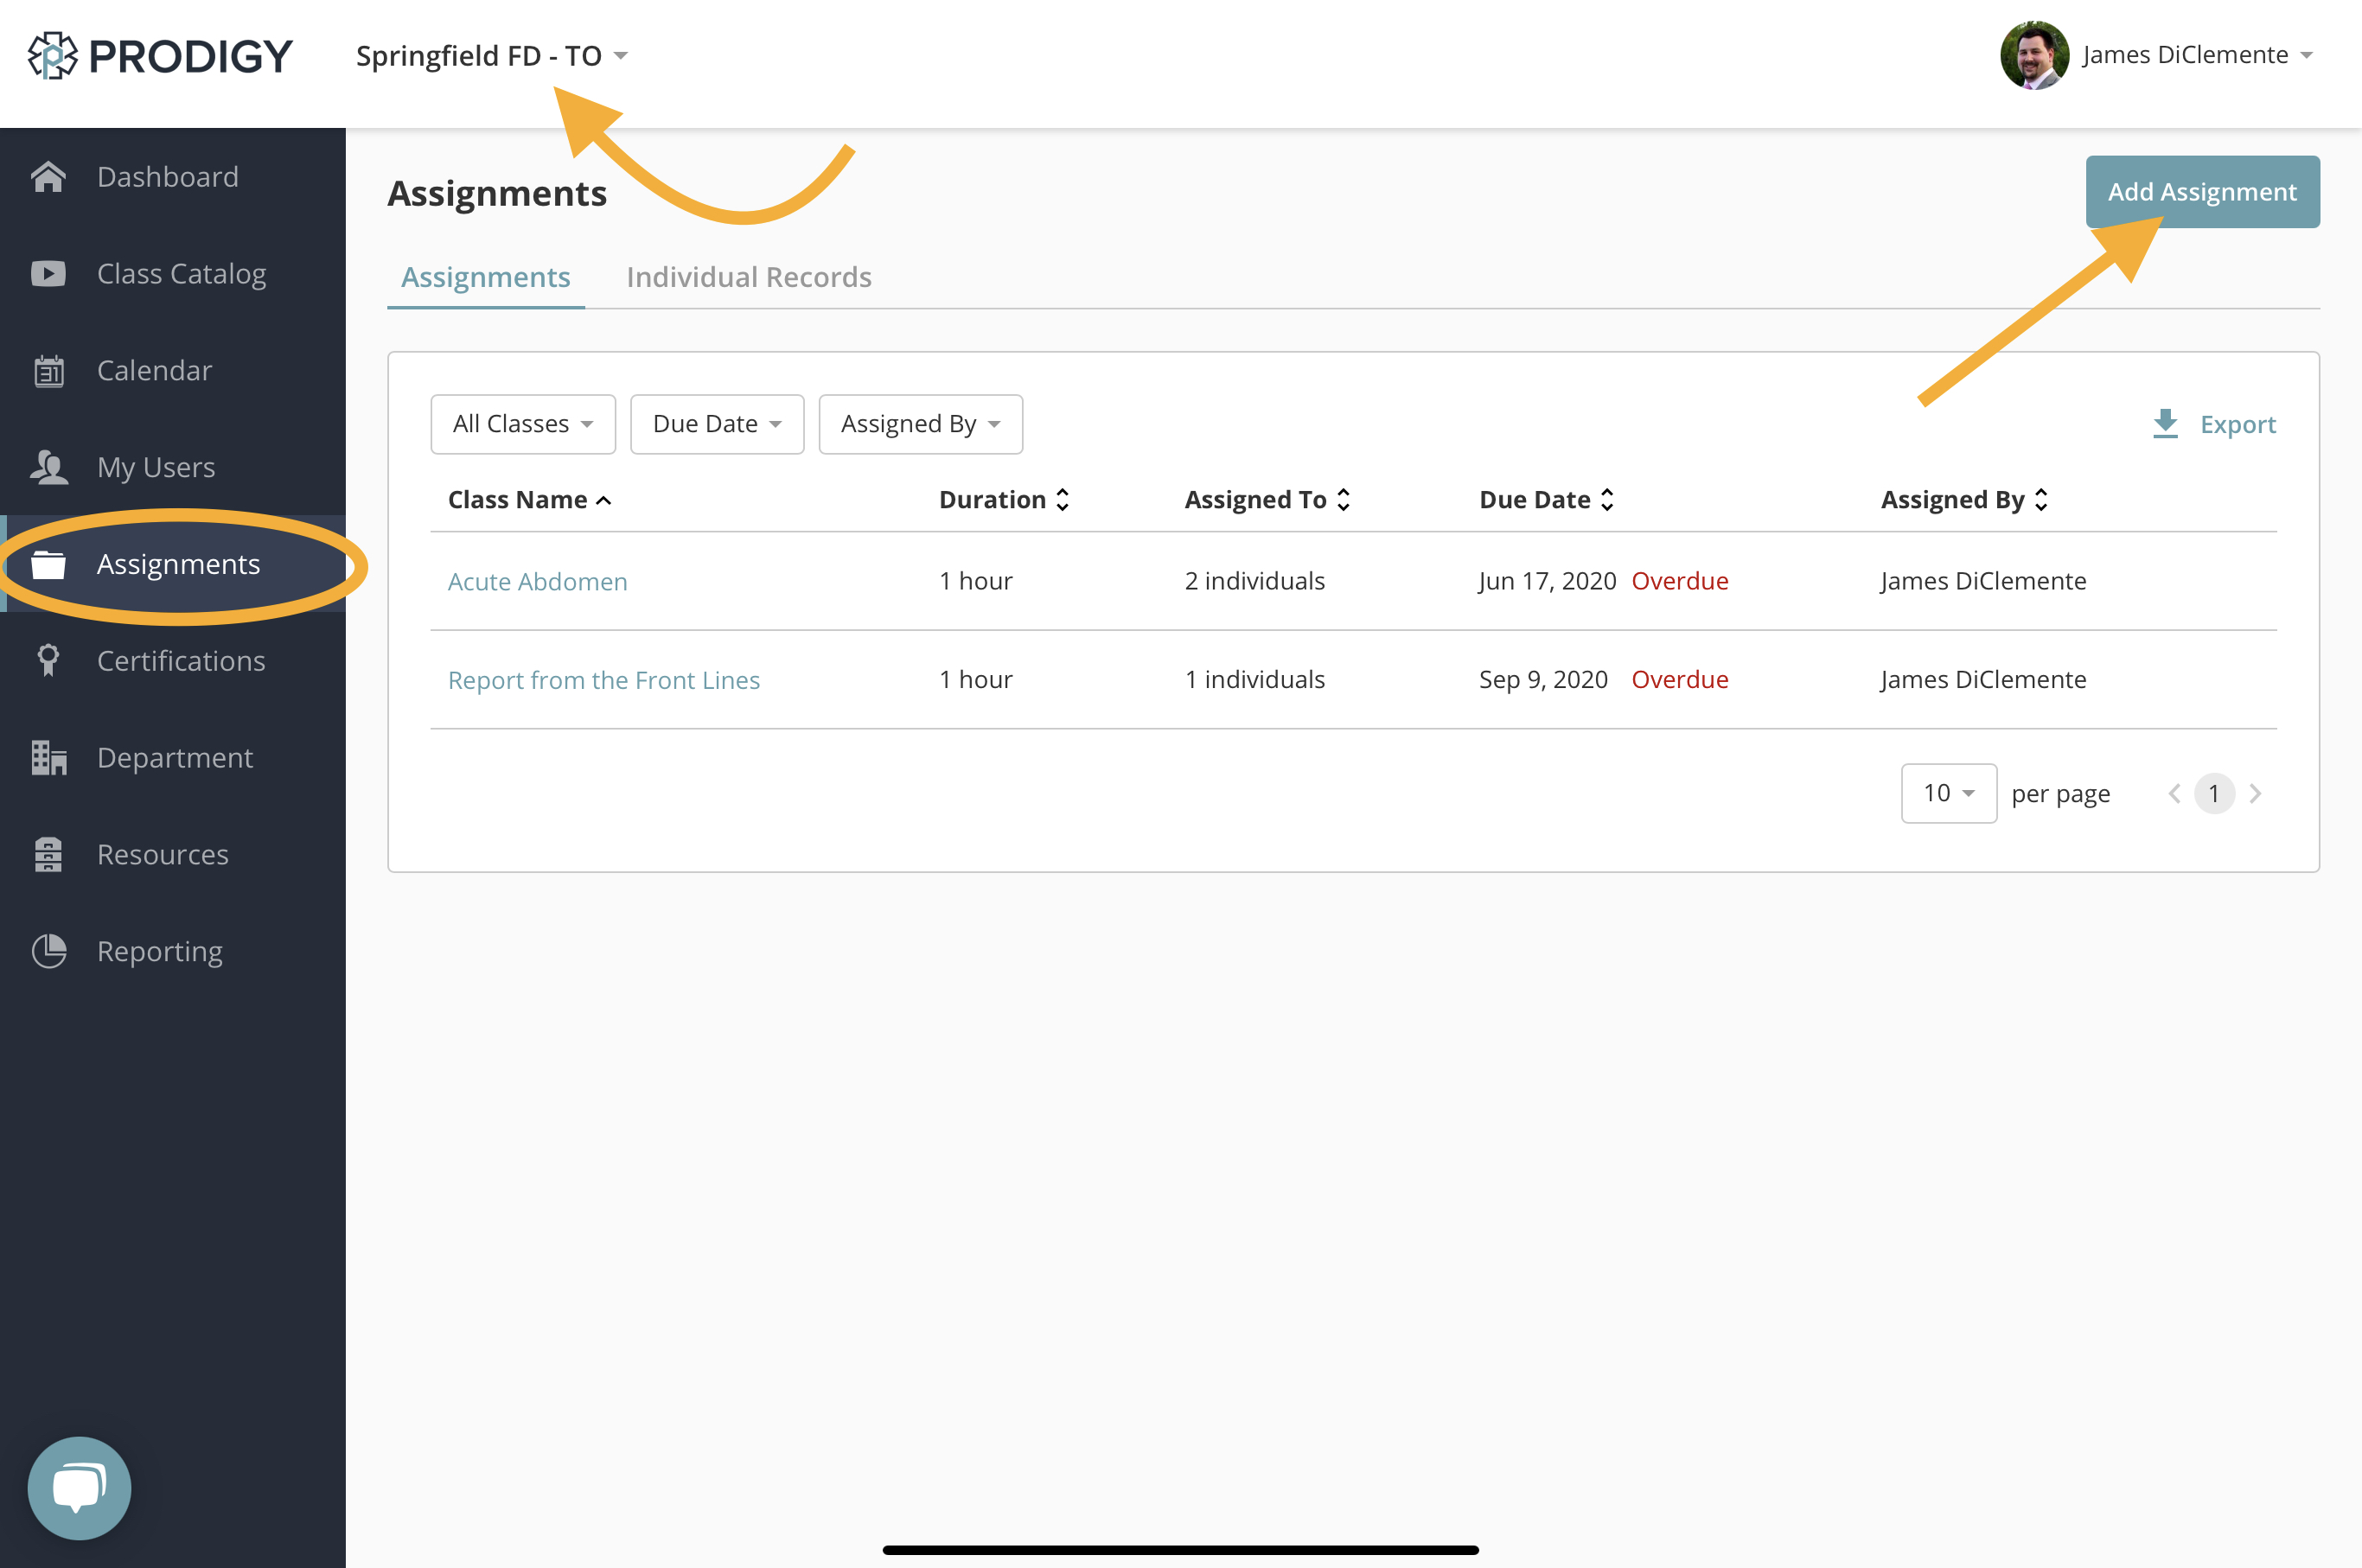
Adding New Assignment
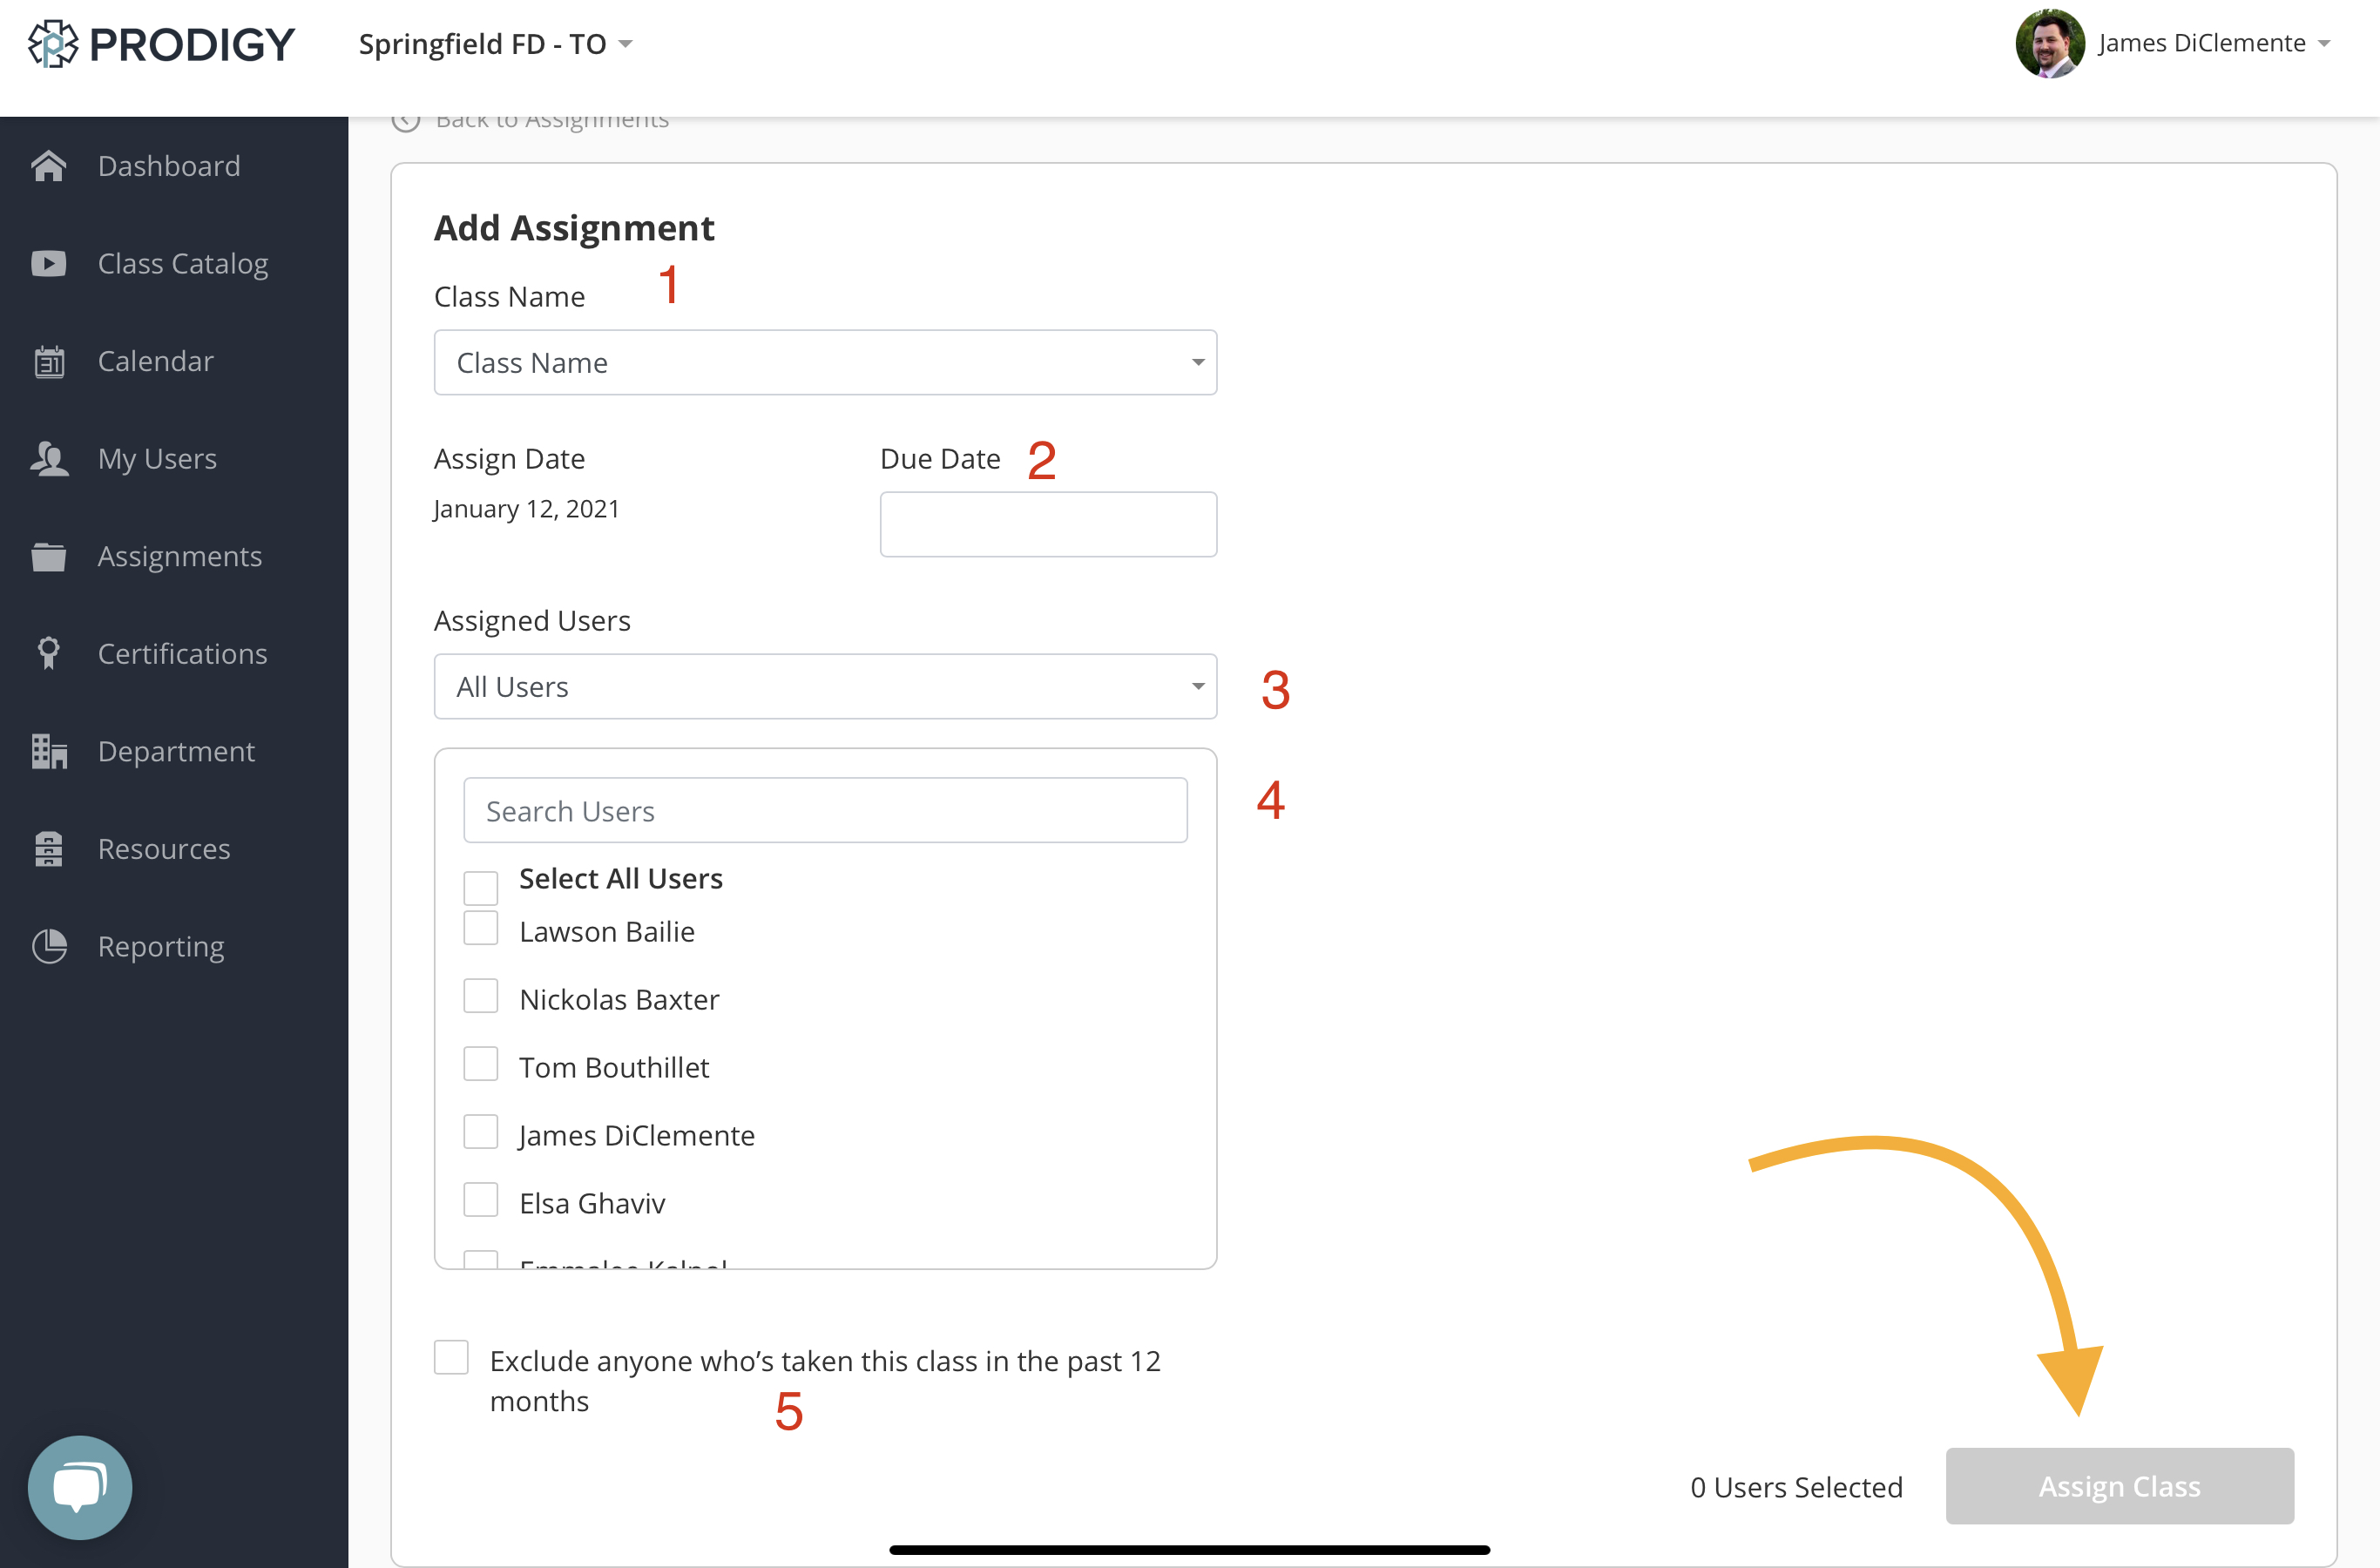
- Select the class you would like to assign
- Choose the date your assignment is due
- You can either pick from a list of all users or from specific User Groups
- You can select from individual users or all users, if using group selection, this would select all users in that group. You can also search for users.
- This box allows you to remove users form the list who have already completed the class in the last year.
Exclude Completions
The option to exclude users that completed in the last 12 months options filters the list that you see. You should check this box first and then select the users you want to assign the class to.
Managing Assignments
After an assignment is created, you can go back and edit dates and add users as well as delete the assignment. All of this is accomplished from the Assignments tab. There is also the option to export all assignments at the top of the page.

Edit an Assignment
To edit an assignment, click on the pencil icon next to the assignment and you will be brought back into the assignment builder. You can check and uncheck users as well as edit the date. Only users who are updated will receive emails, users who have already been assigned the class will not receive a new email alert for the assignment.
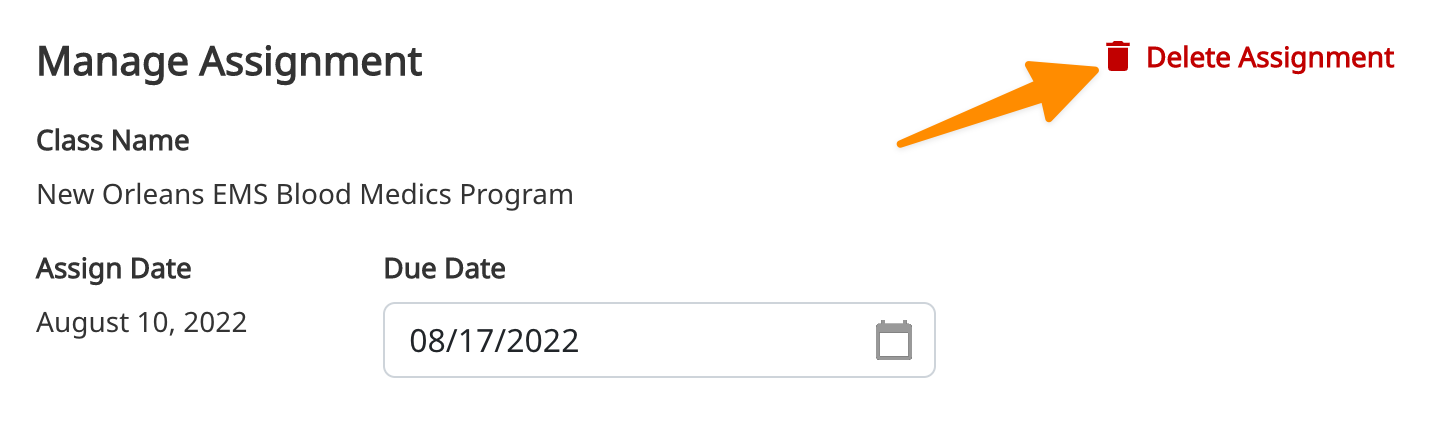
Delete Assignment
When you click to edit an assignment, you will be presented with the option to delete assignments in the top right.
Report on Assignments
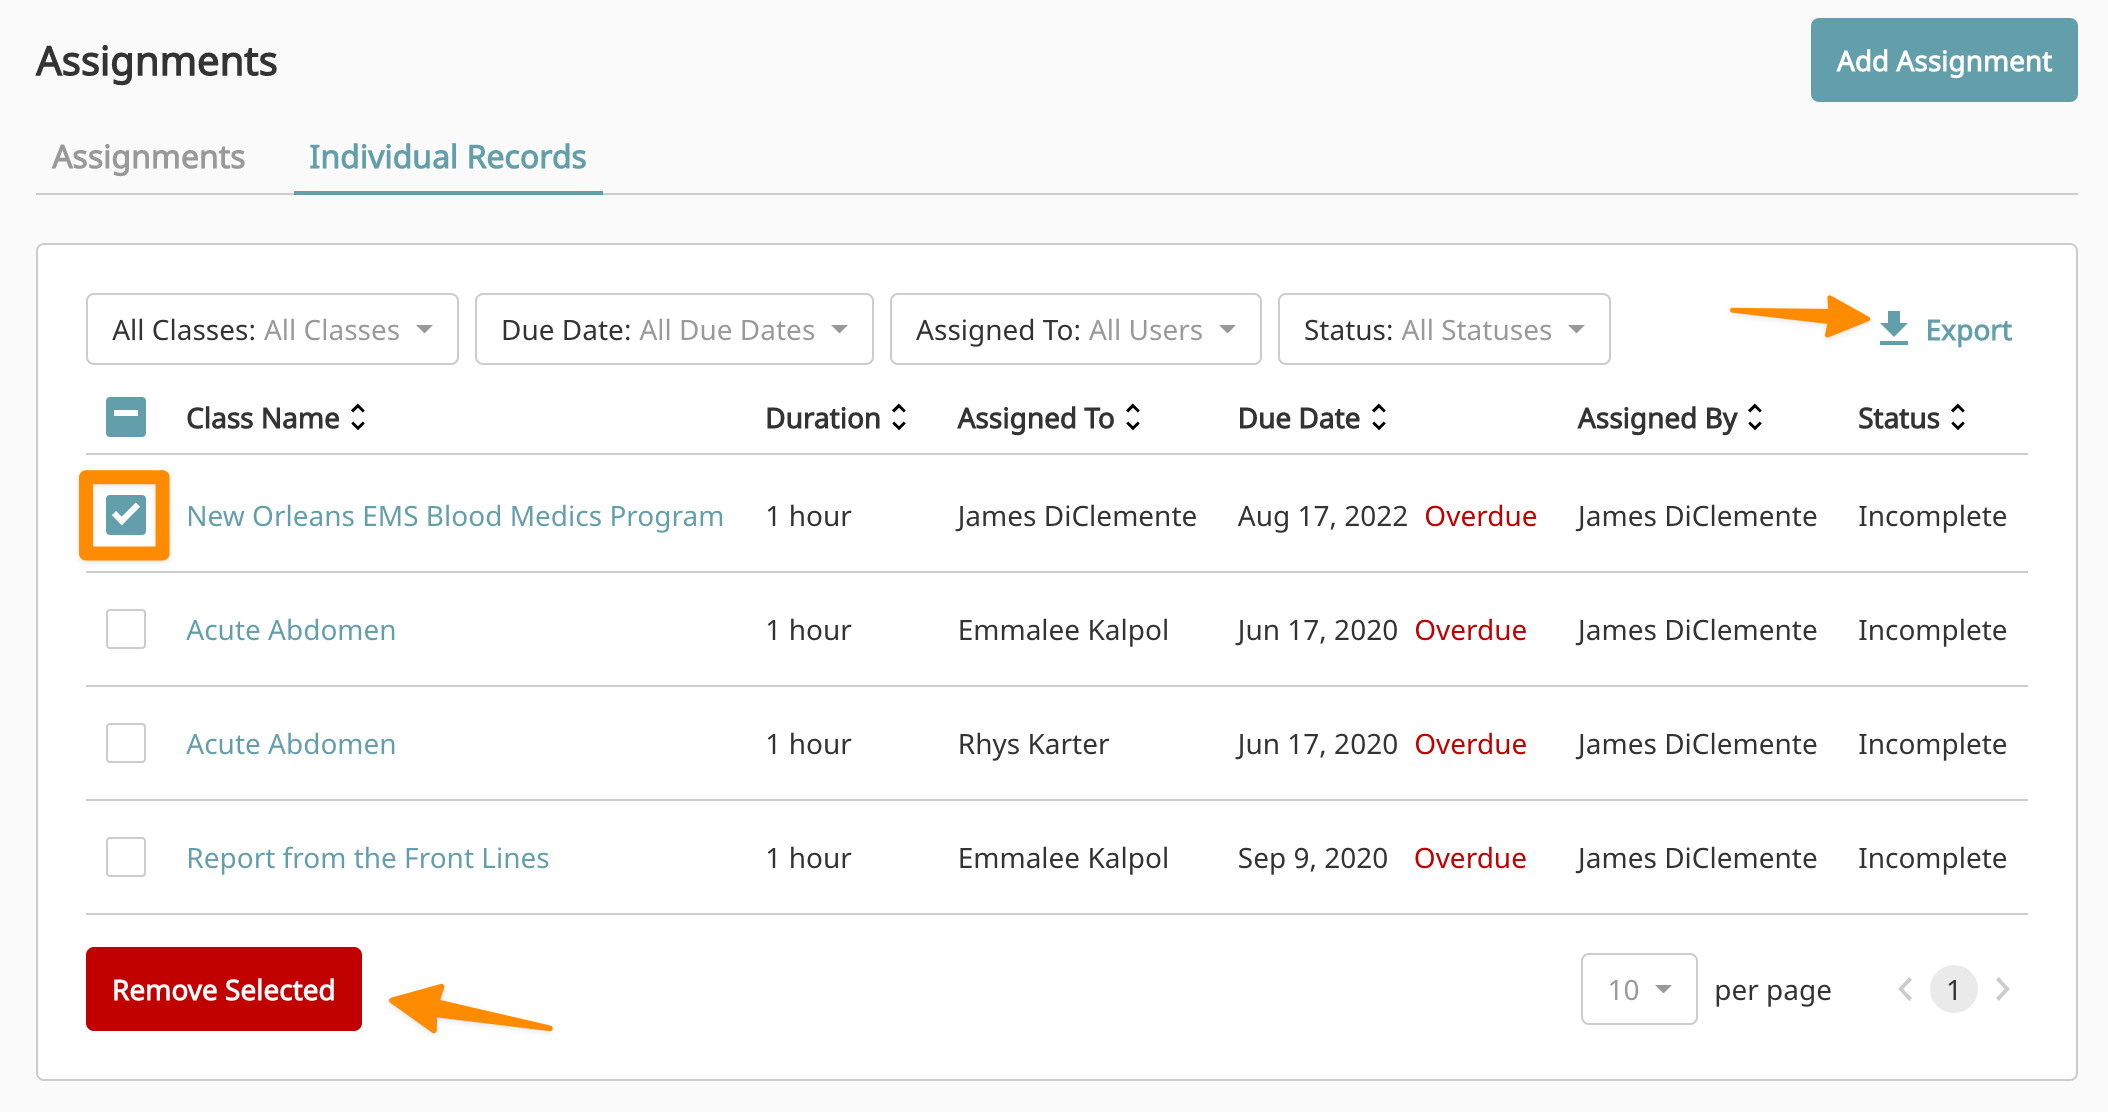
You can see individual assignment records by going to Assignments->Individual Records. This will bring up a list of assignment records for all users. You can sort the list by clicking on any of the column headers. You can also filter the list by Class, User, Status, and Due Date. If you click the checkbox next to individual assignment records, you will be given the option to remove those assignments. Finally, you can export the current list view by clicking the export button in the top right.
Live Sessions

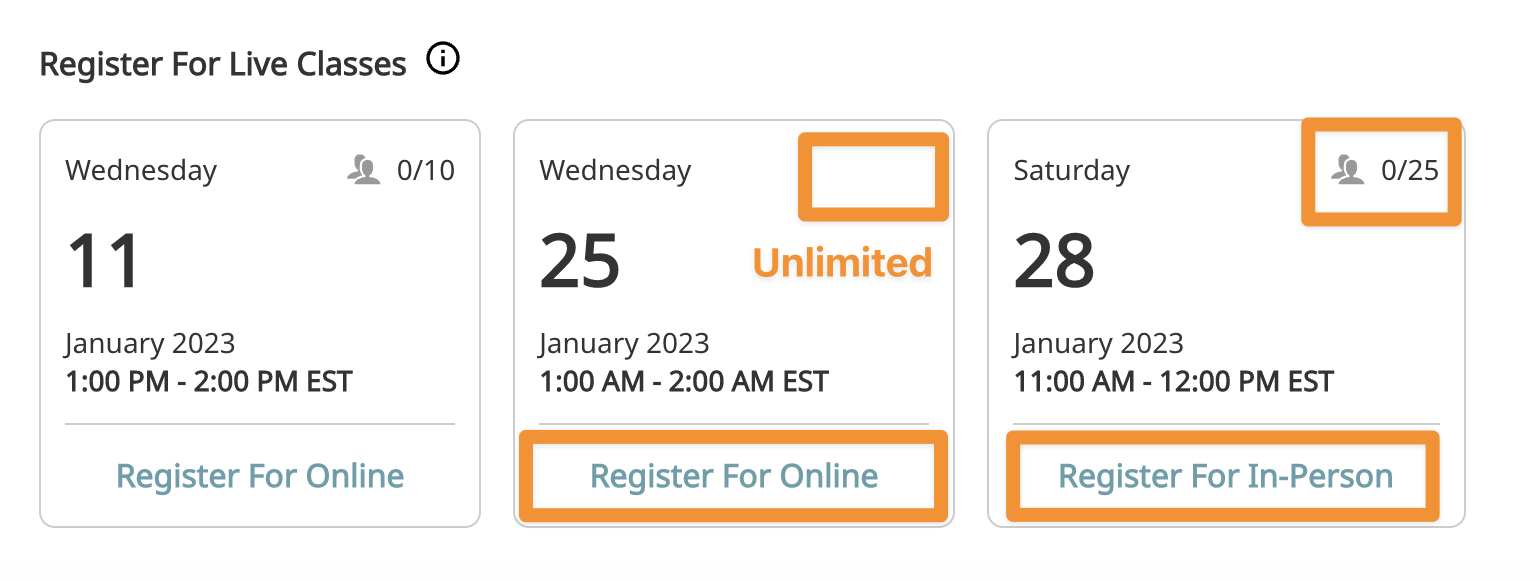
Prodigy supports scheduling both traditional in-person live classes as well as virtual live classes. The setting for both will largely be the same except for a few options. When registering, users will see the type of live class as well as remaining seats.
- Date - Date the class will be running
- Start - Start time of the class. The timezone will automatically be selected based on your local timezone. The users will see the class schedule in there local timezone as well.
- End - Automatically calculated based on the start time and class duration.
- Class Seats - Number of students allowed to register, the available seats will be displayed to the user. You can also allow for unlimited seats.
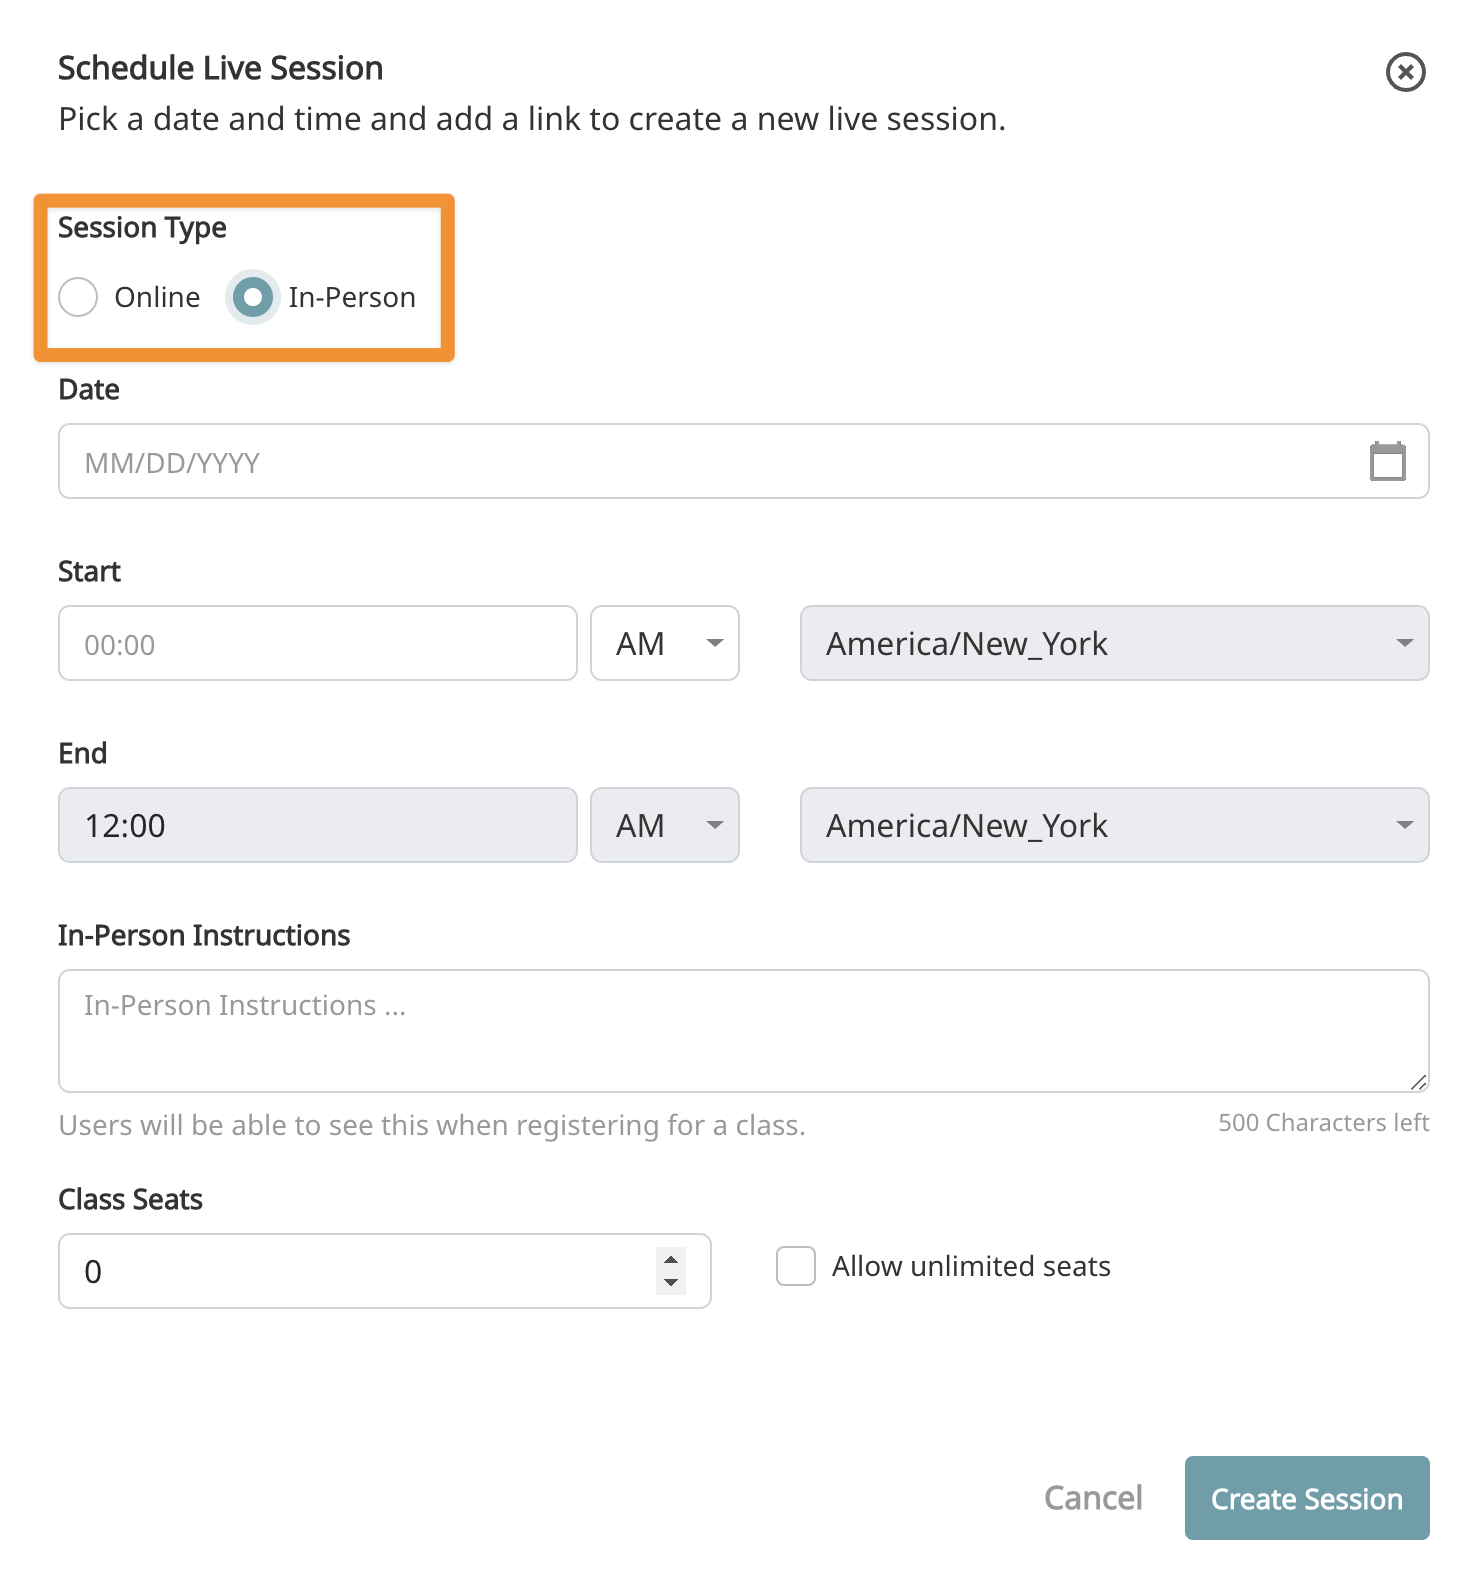
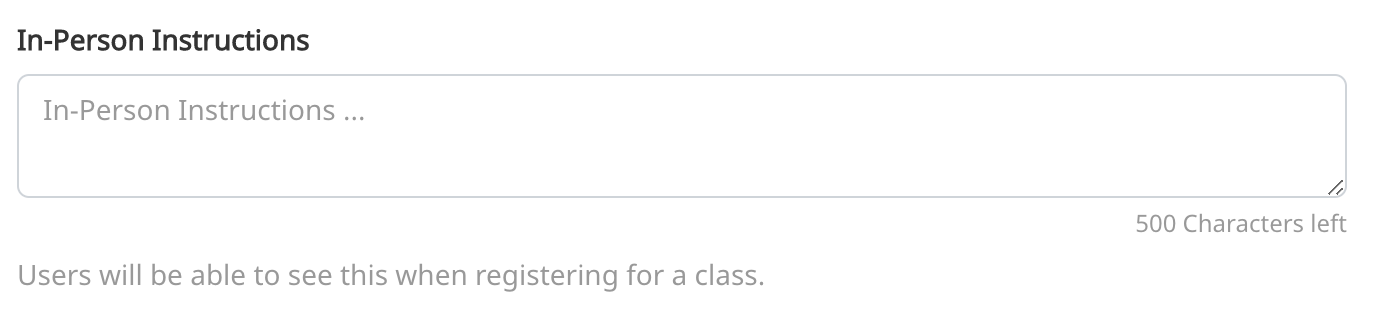
In-Person
When scheduling an in-person live class, the only change in options is the availability of an in-person instructions section and the elimination of the link section. The in-person instructions section can be used to give students instructions such as where the class is being held.
Editing Live Sessions
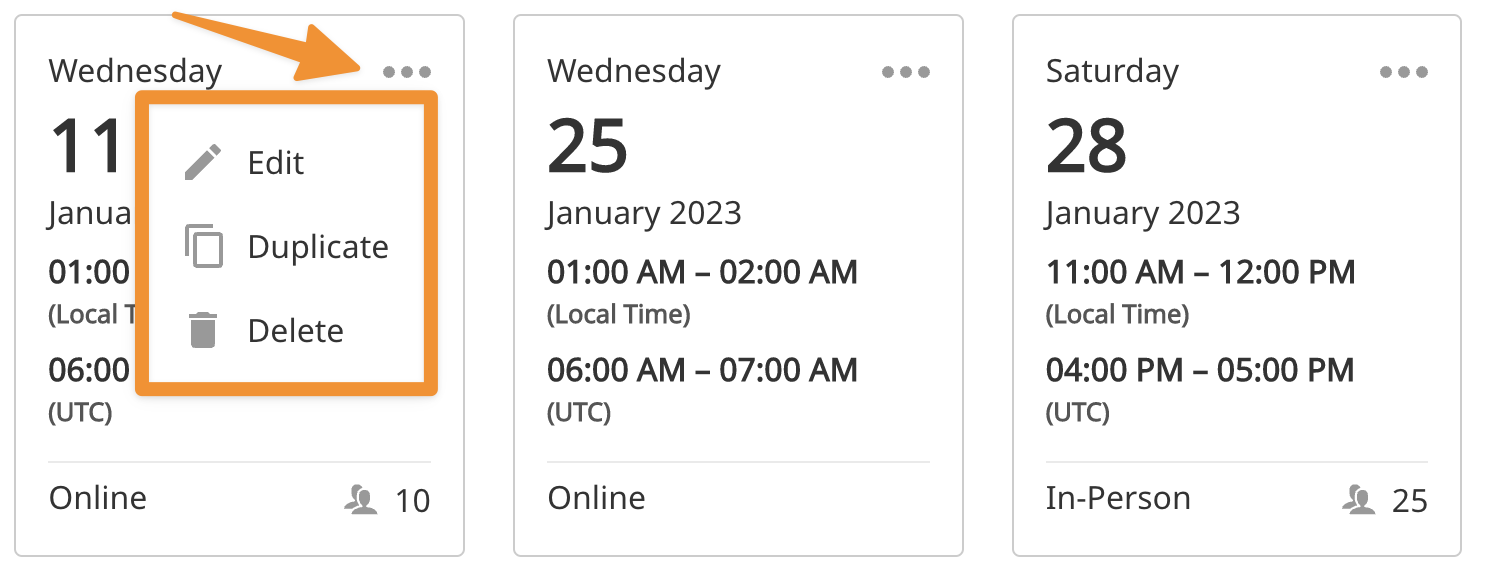
If you click the 3 dots on a live session card you will be given the option to edit, delete, or duplicate that session.
Complete a live Session
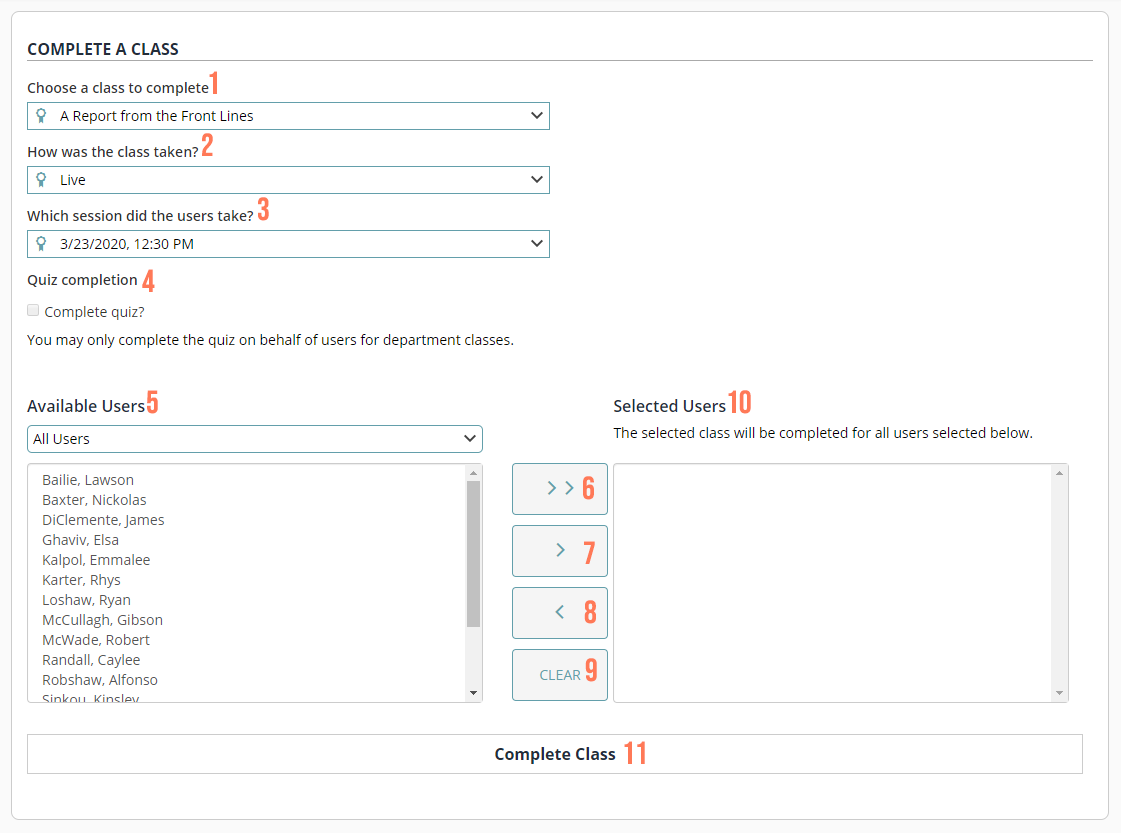
- Select the class to complete
- Select Live or Distributive as the completion type.
- Select session or Date complete.
- Check this box if you want to complete the quiz for them, if you do not check this box the user will still need to complete the quiz from the class page to get credit for the class.
- Select users, you can filter by croup or CTRL click to select multiple users.
- Move all users in view to selected.
- Move highlighted users to selected.
- Remove highlighted users.
- Remove all users.
- Selected users will have class completed for them.
- Triggers the completed class.
Reporting
Aside from reporting based on assignments, you can also report on the class itself regardless of the assignment status of the class. To access click on Reports from your training officer account and choose User Class Record.
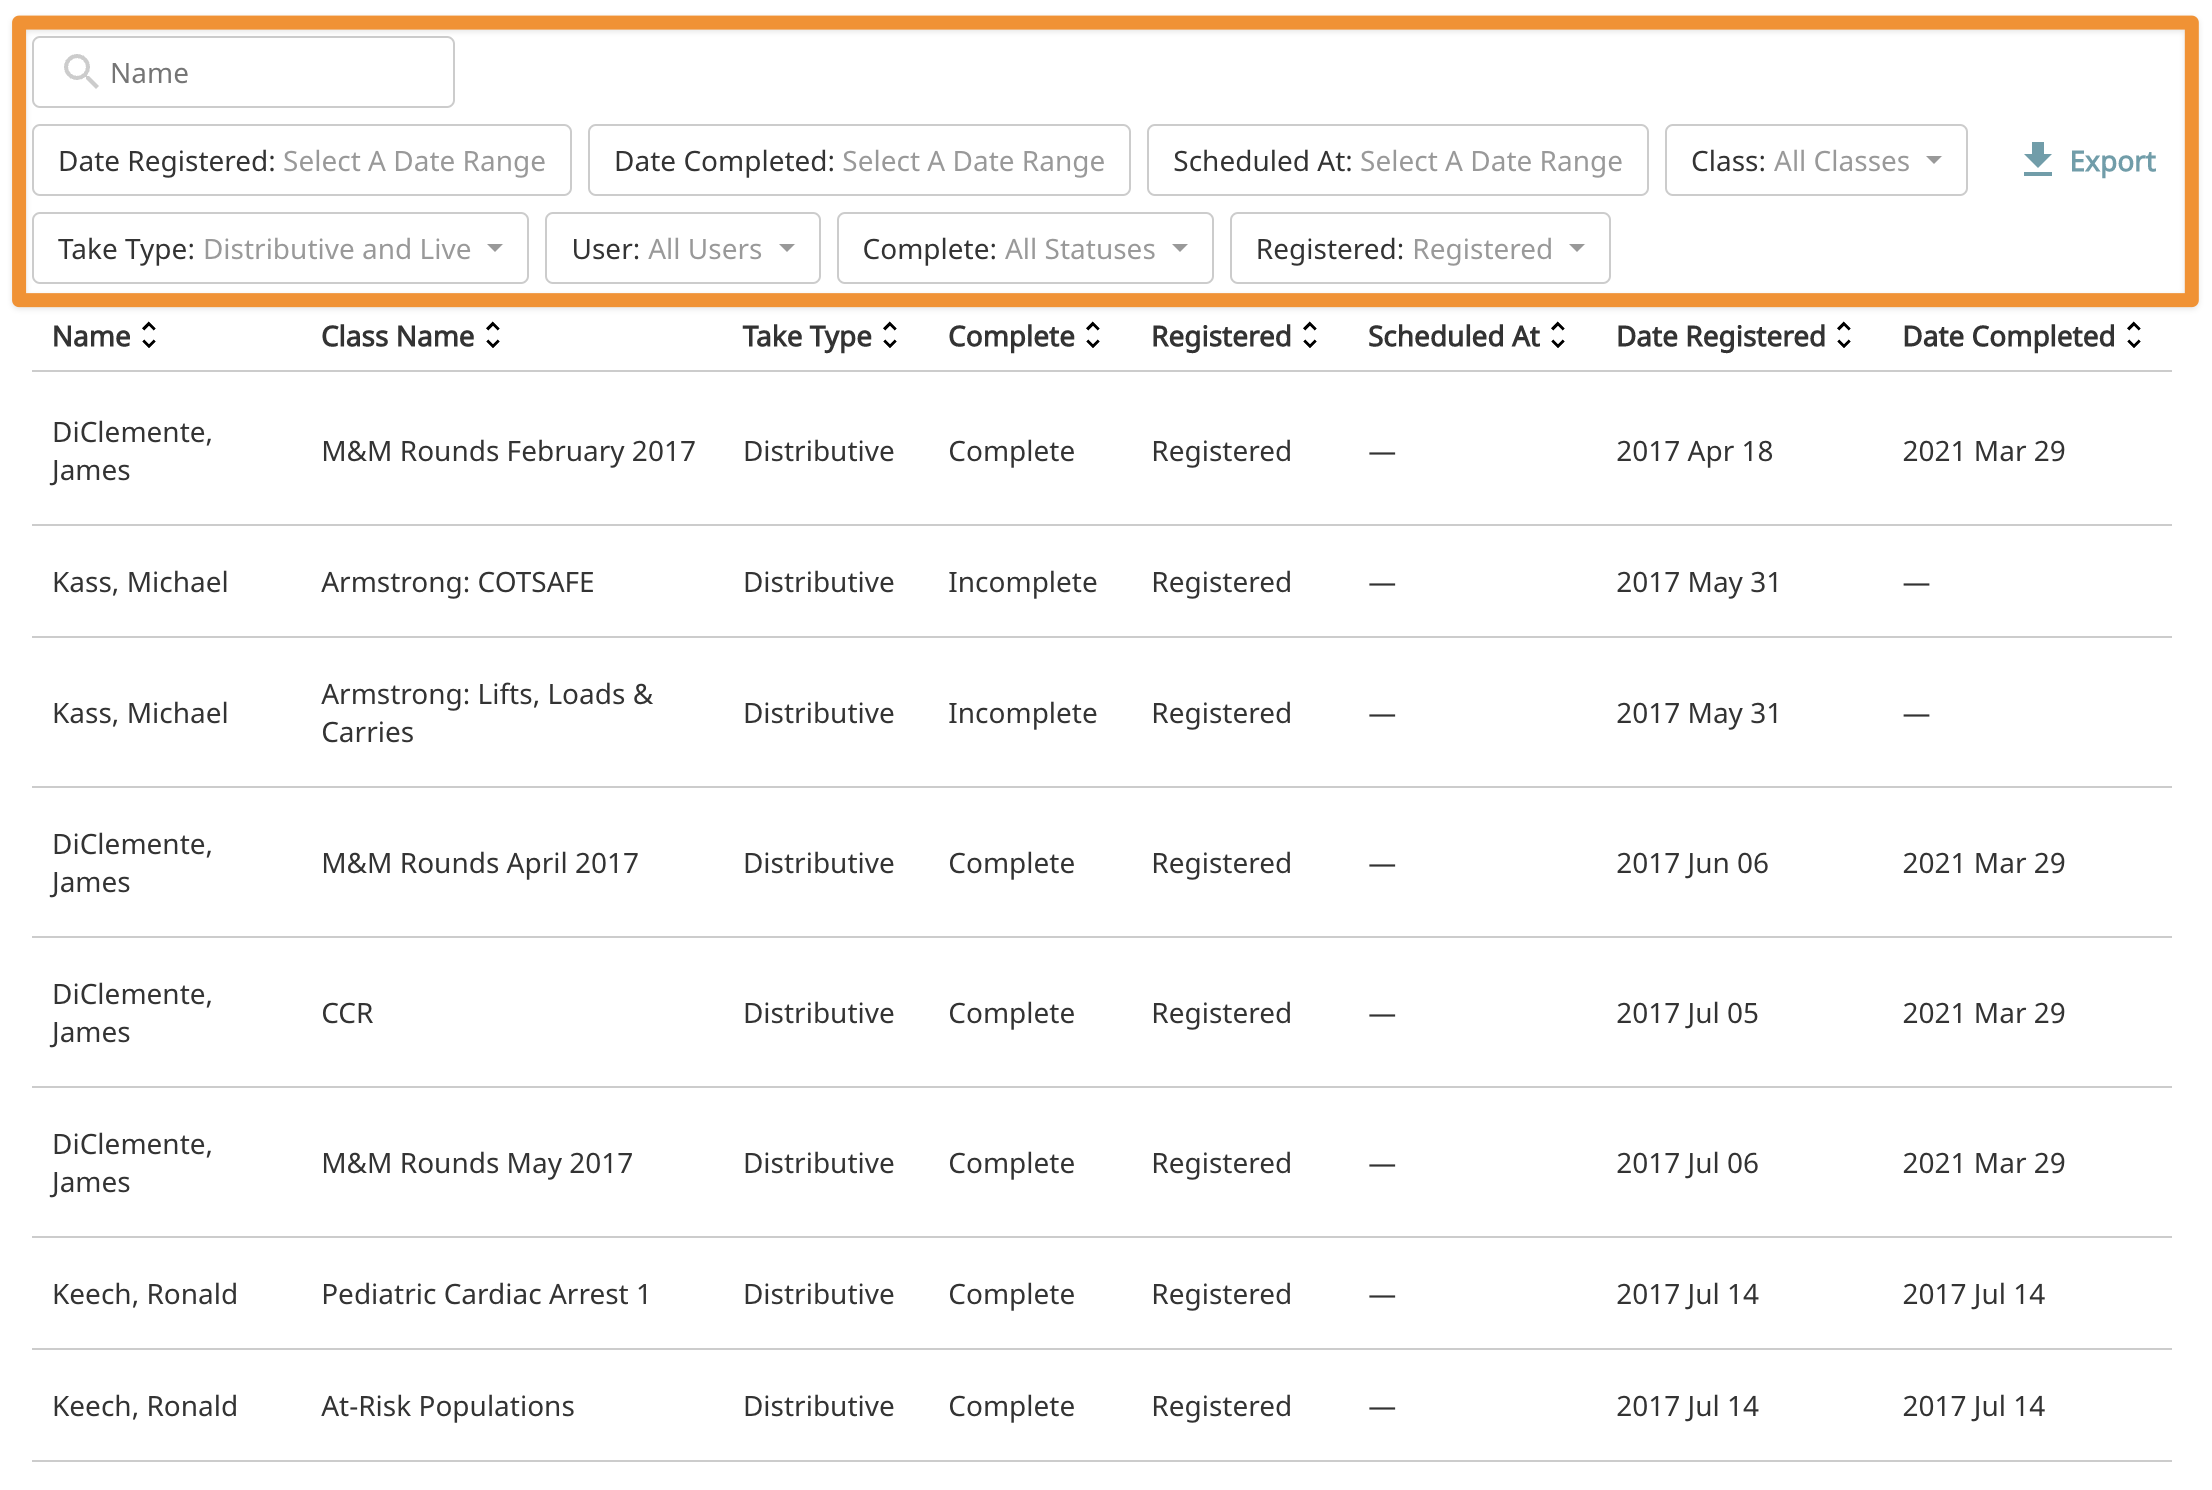
The options at the top will filter your results, you can also click on a colum to sort that data. Your current view can be exported to a CSV by clicking the export button in the top right.
To find an individual user, you can either use the text search for name at the top or use the user dropdown.
Each of the date options (Date Registered, Date Completed, and Scheduled At) with have a comprehensive date picker to allow you get exactly the data out that you need.