Training Management
Training Plan Builder
As a training officer, you will be able to create and assign custom training plans using a mix of Prodigy content and your own custom content.
Training Plan Section
Click on the Training Plan tab from your TO account to bring up these options
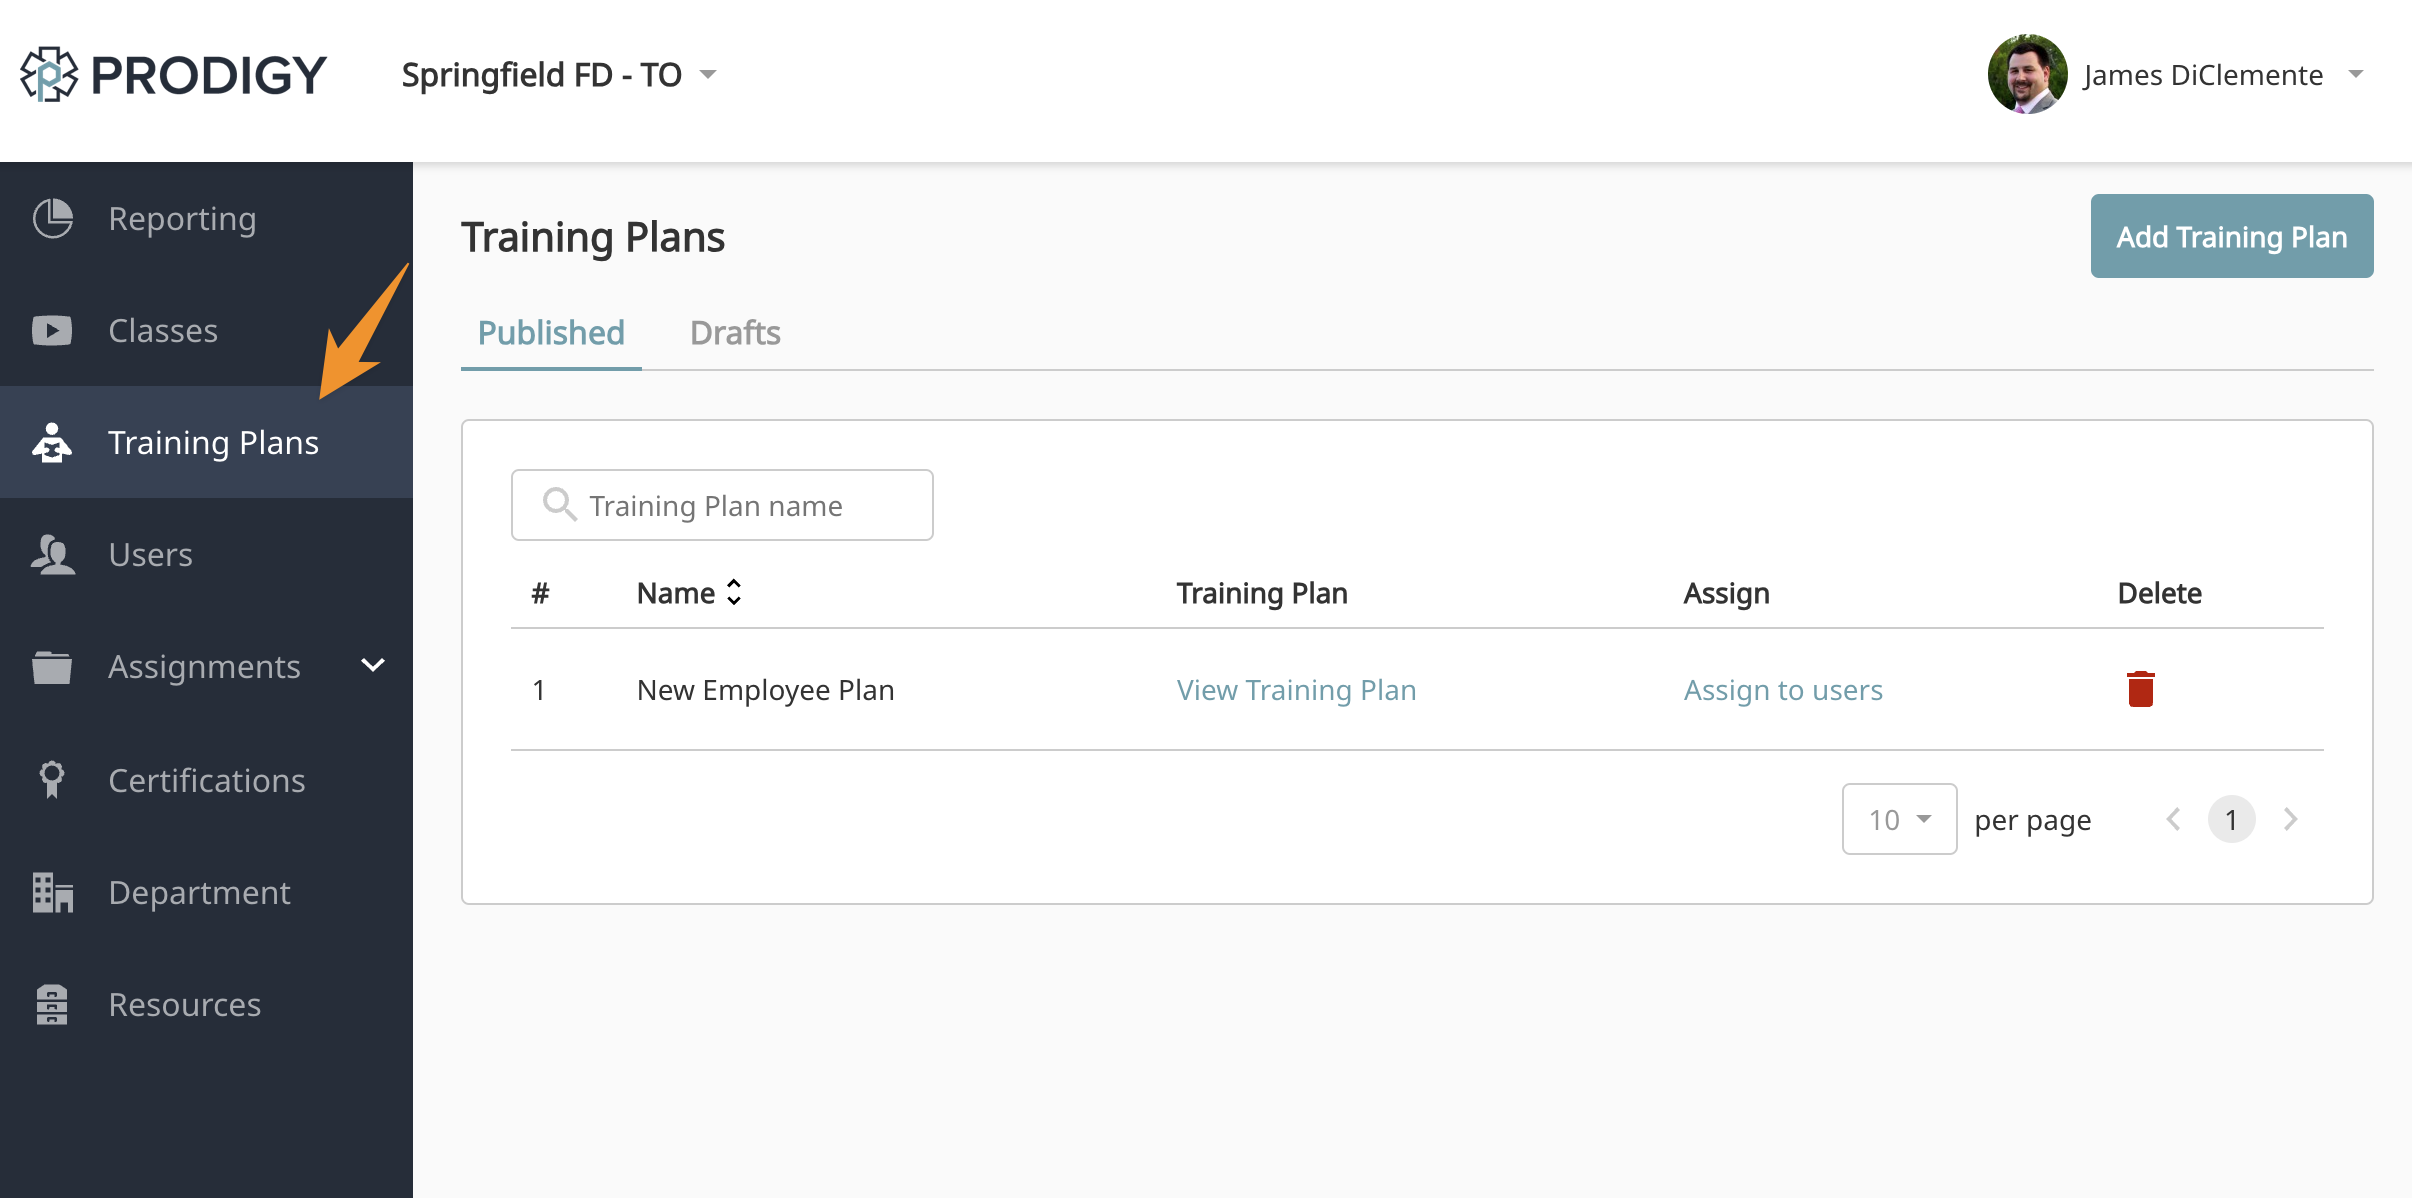
Available Options
- See published training plans
- See draft plans
- Add a new training plan
- Delete existing plans
Training Plan Management
Clicking on View Training Plan on the published table will bring up the editing function. Clicking on Assign to users will bring you to the assignment option for that plan.
Creating a new plan
Choose Add Training Plan option from the Training Plan menu

Add Training Plan
The first page brings up the basic options for the training plan.
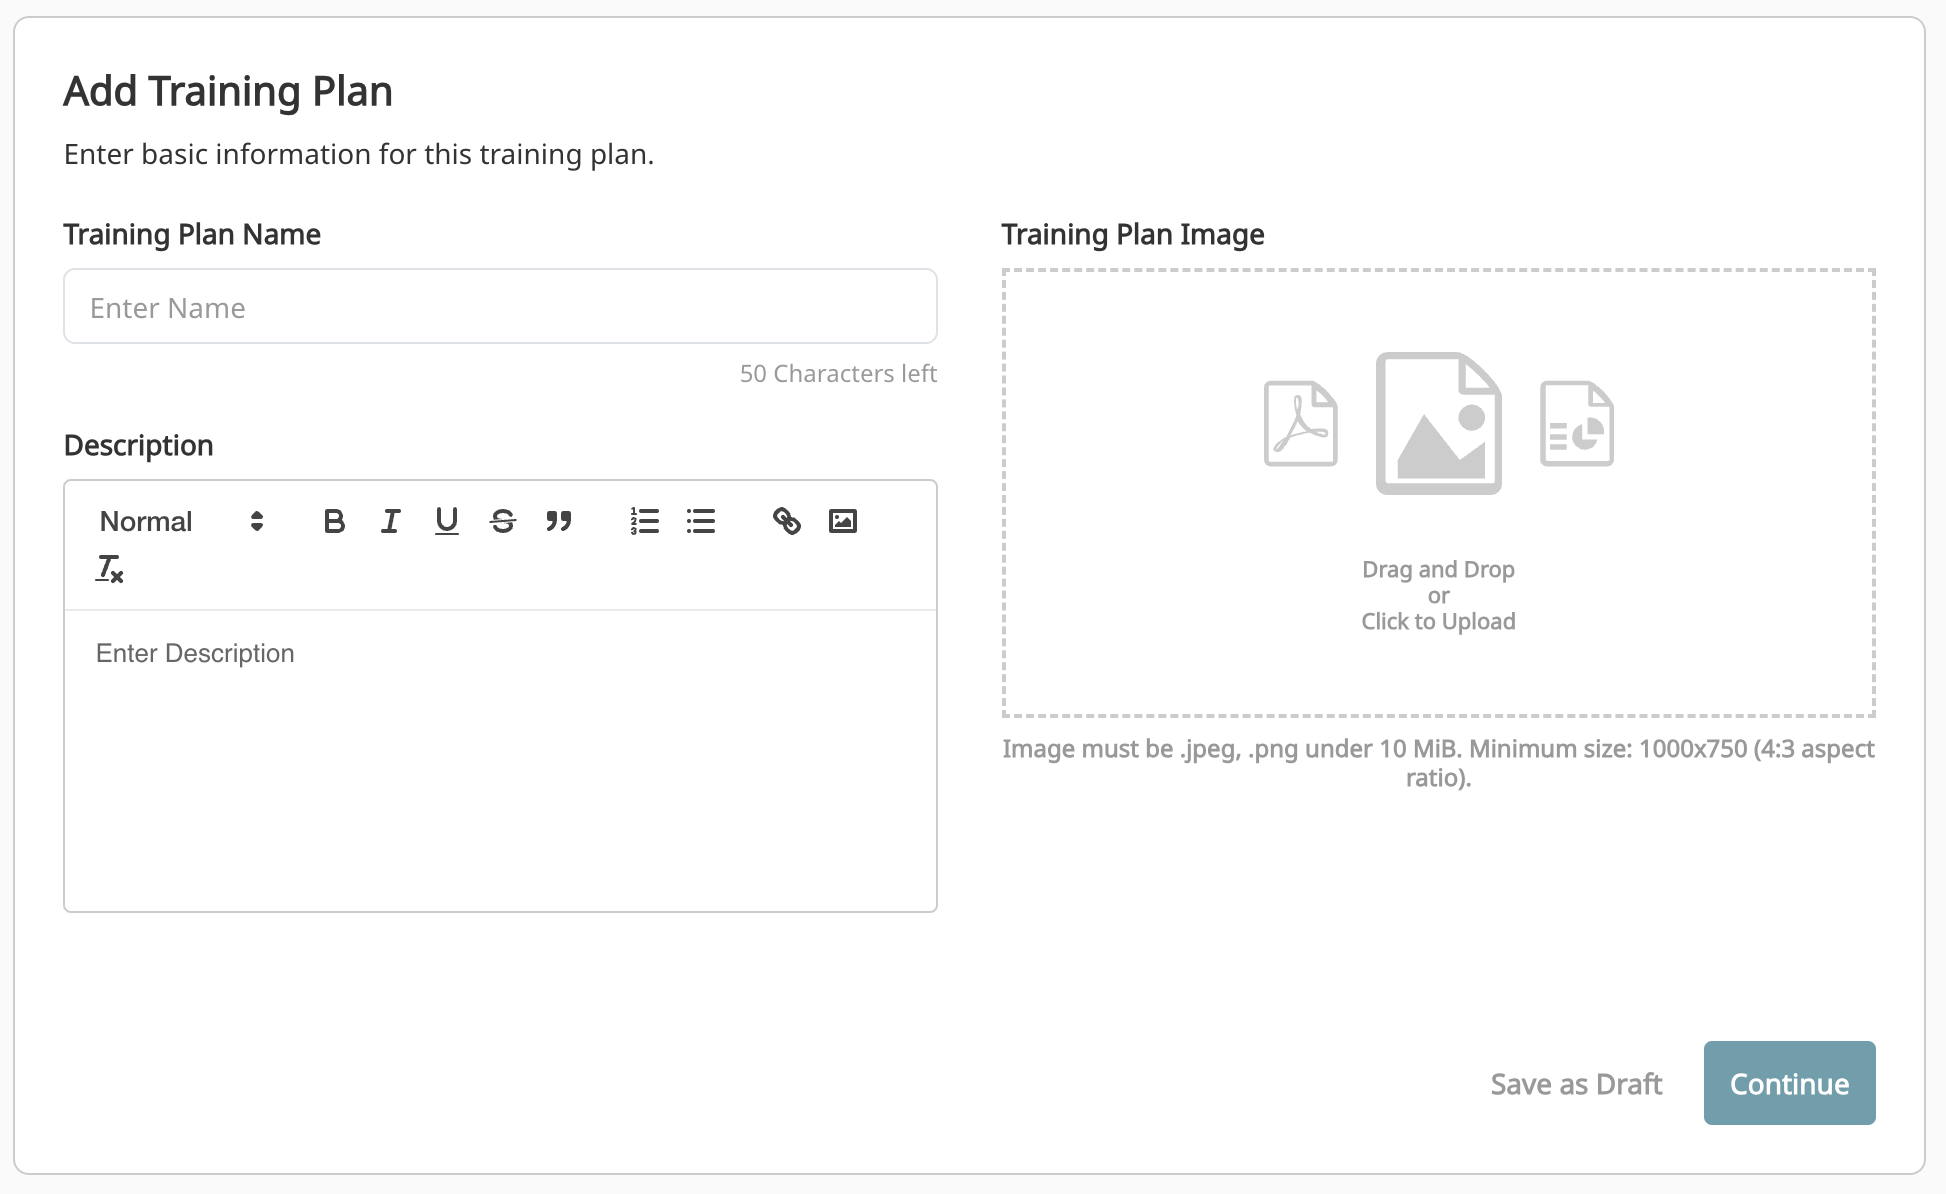
Training Plan Name
This is the name displayed to the user on the training plan details page and in the training plan dropdown, make it descriptive but keep it under 50 characters.
Description
The description is found below the training plan name. This can use rich text such as links, bolded text, and lists.
Training Plan Image
The image is option, this will show on the training plan details page. The image should be square with a recommended minimum for 1000 x 1000 px.
Setting Up Plan Content
The next section will allow you to add classes to your training plan and break them up in a way that makes the plan easy to navigate. You can add any number of groups and categories.
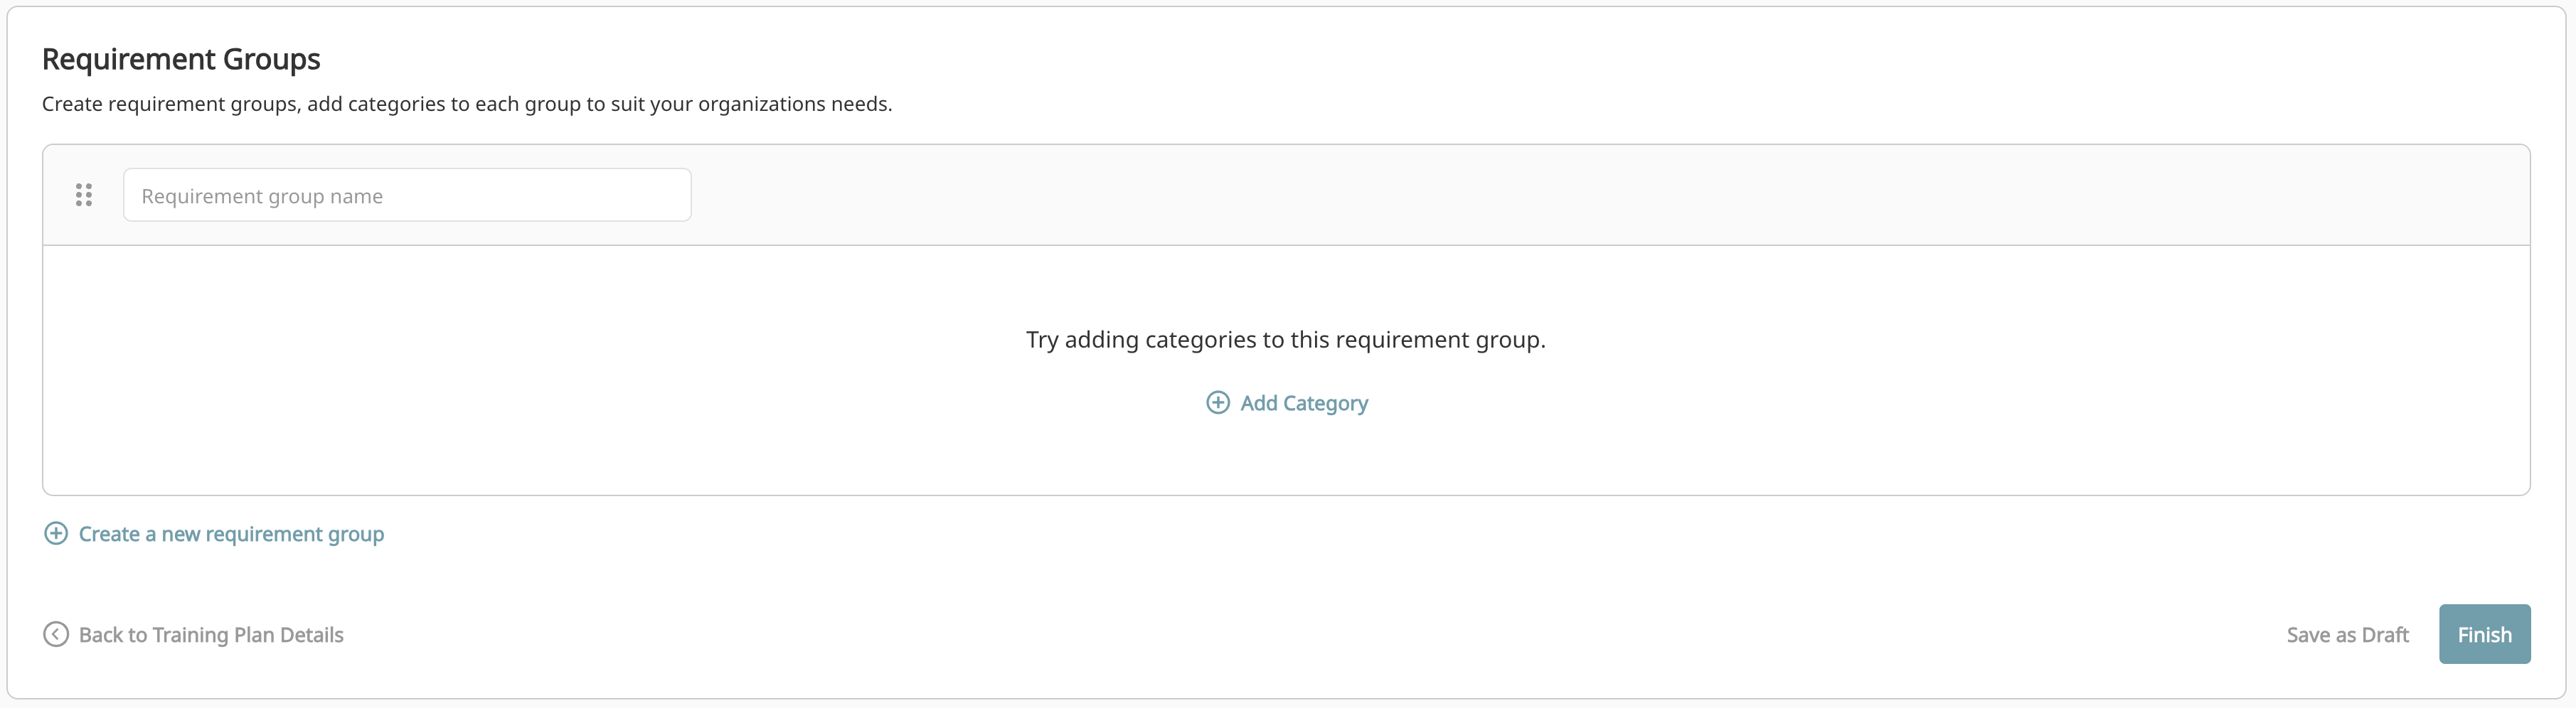
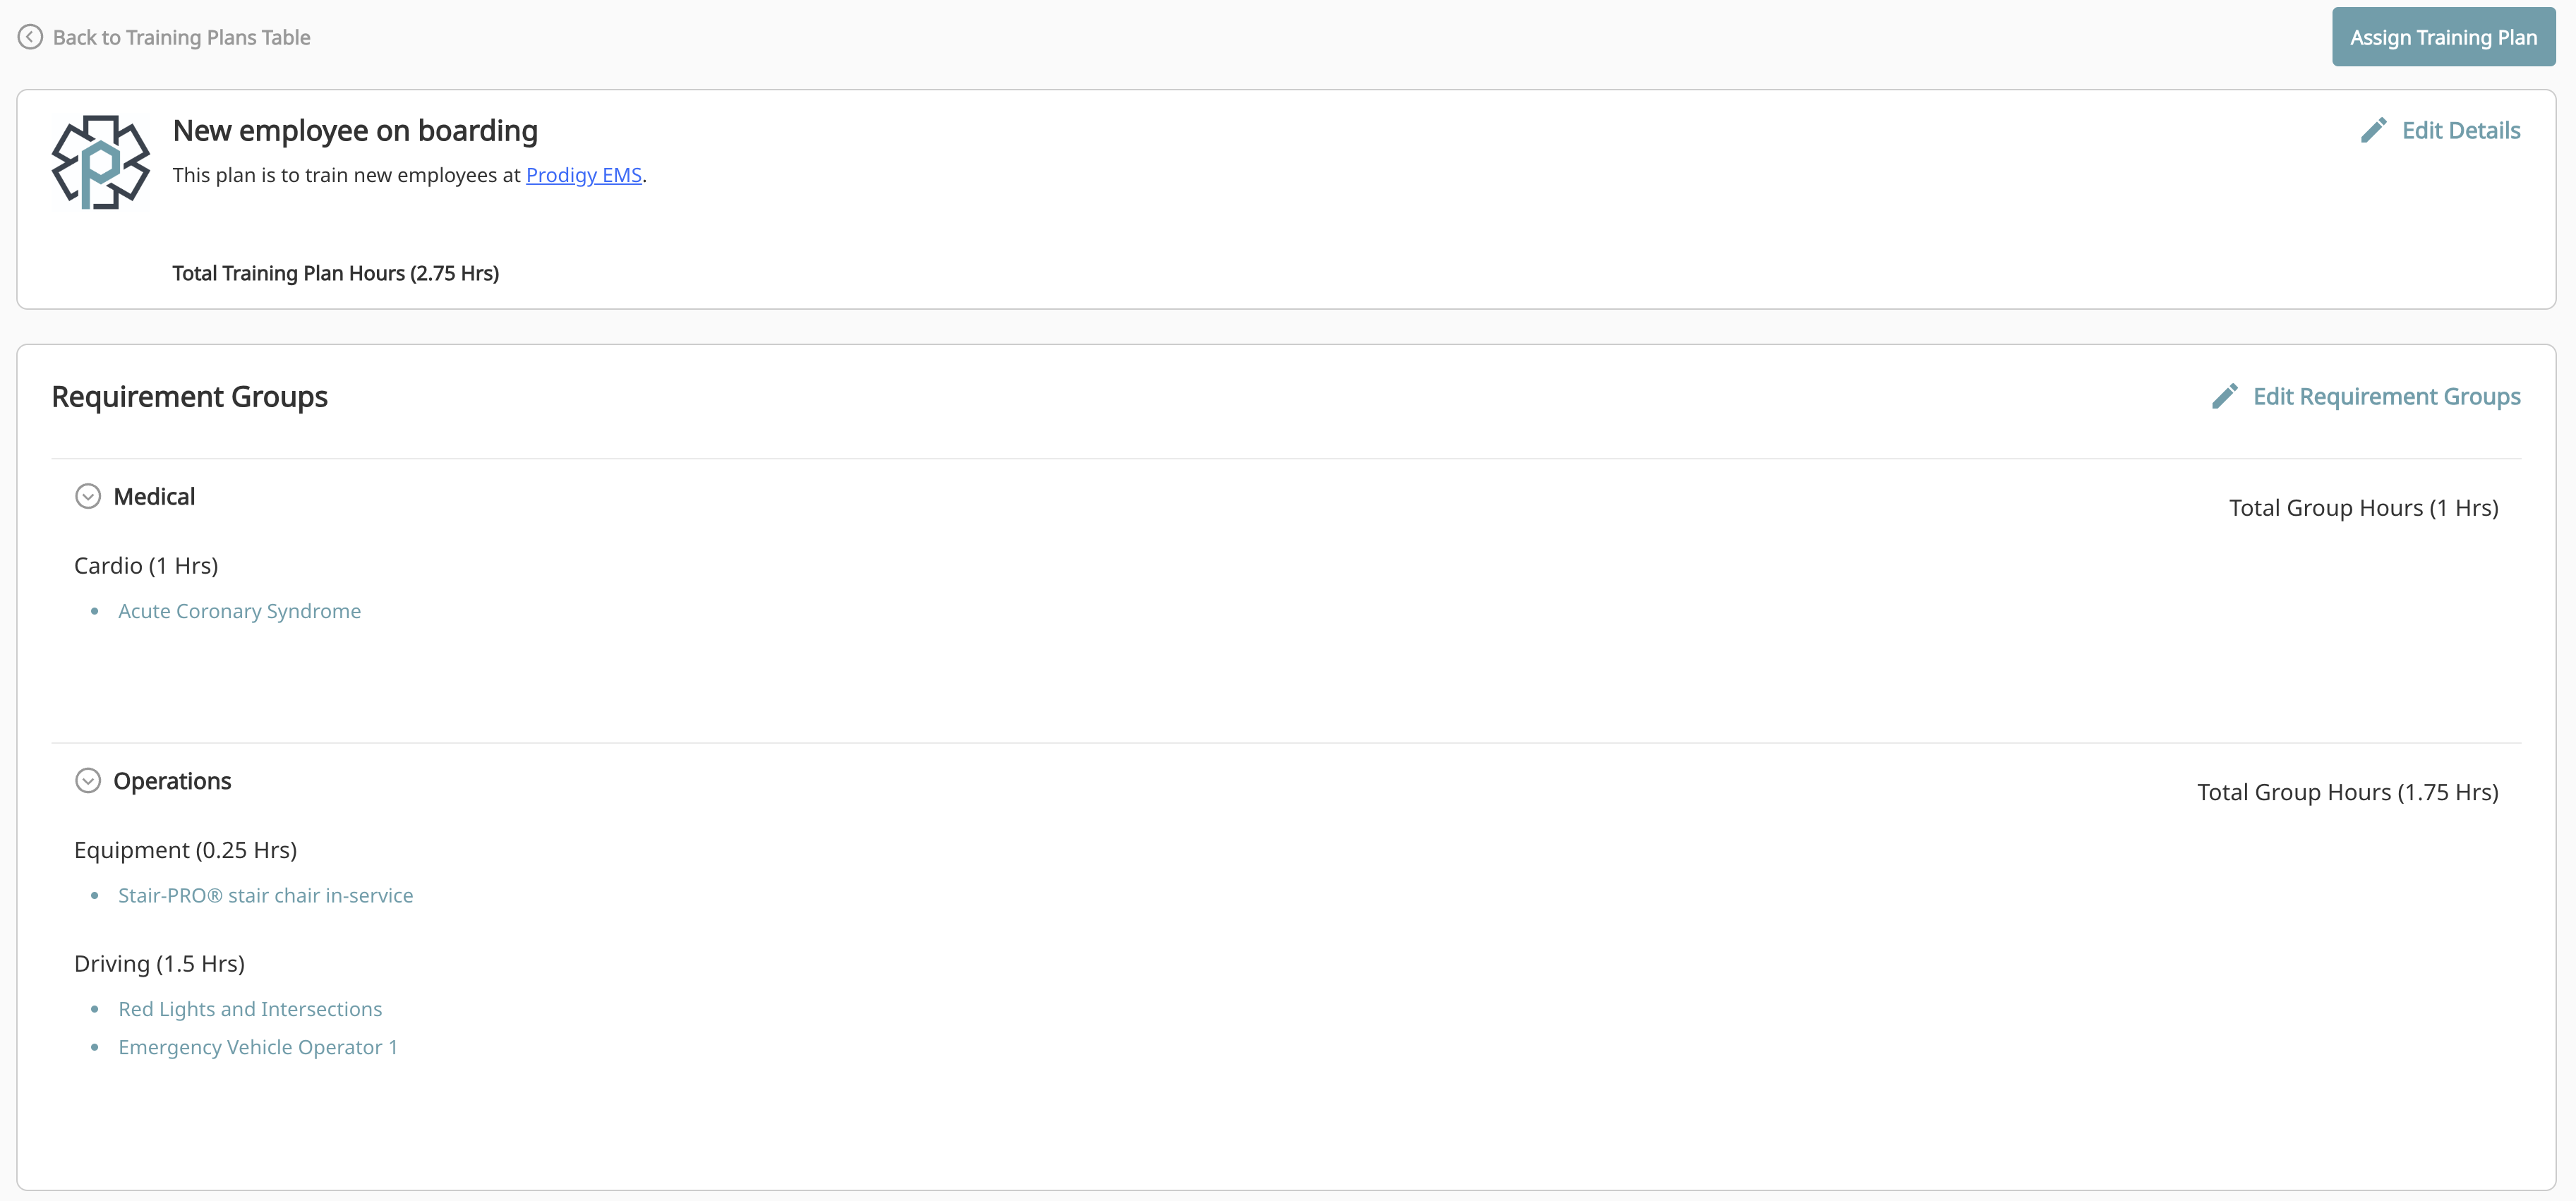
Requirement Groups
Groups are simply a way to add categories of classes and act as a method to organize the plan. In an NREMT training plan, the Groups would be National, Local, and Individual. There are no specific settings for a requirement group. Each plan must have at least one group. To add additional groups, click the Create new requirement group option at the bottom of the section.
Requirement Categories
After a group is added, click on the Add Category option. Each Group must have at least one category and you can add multiple categories to a group.
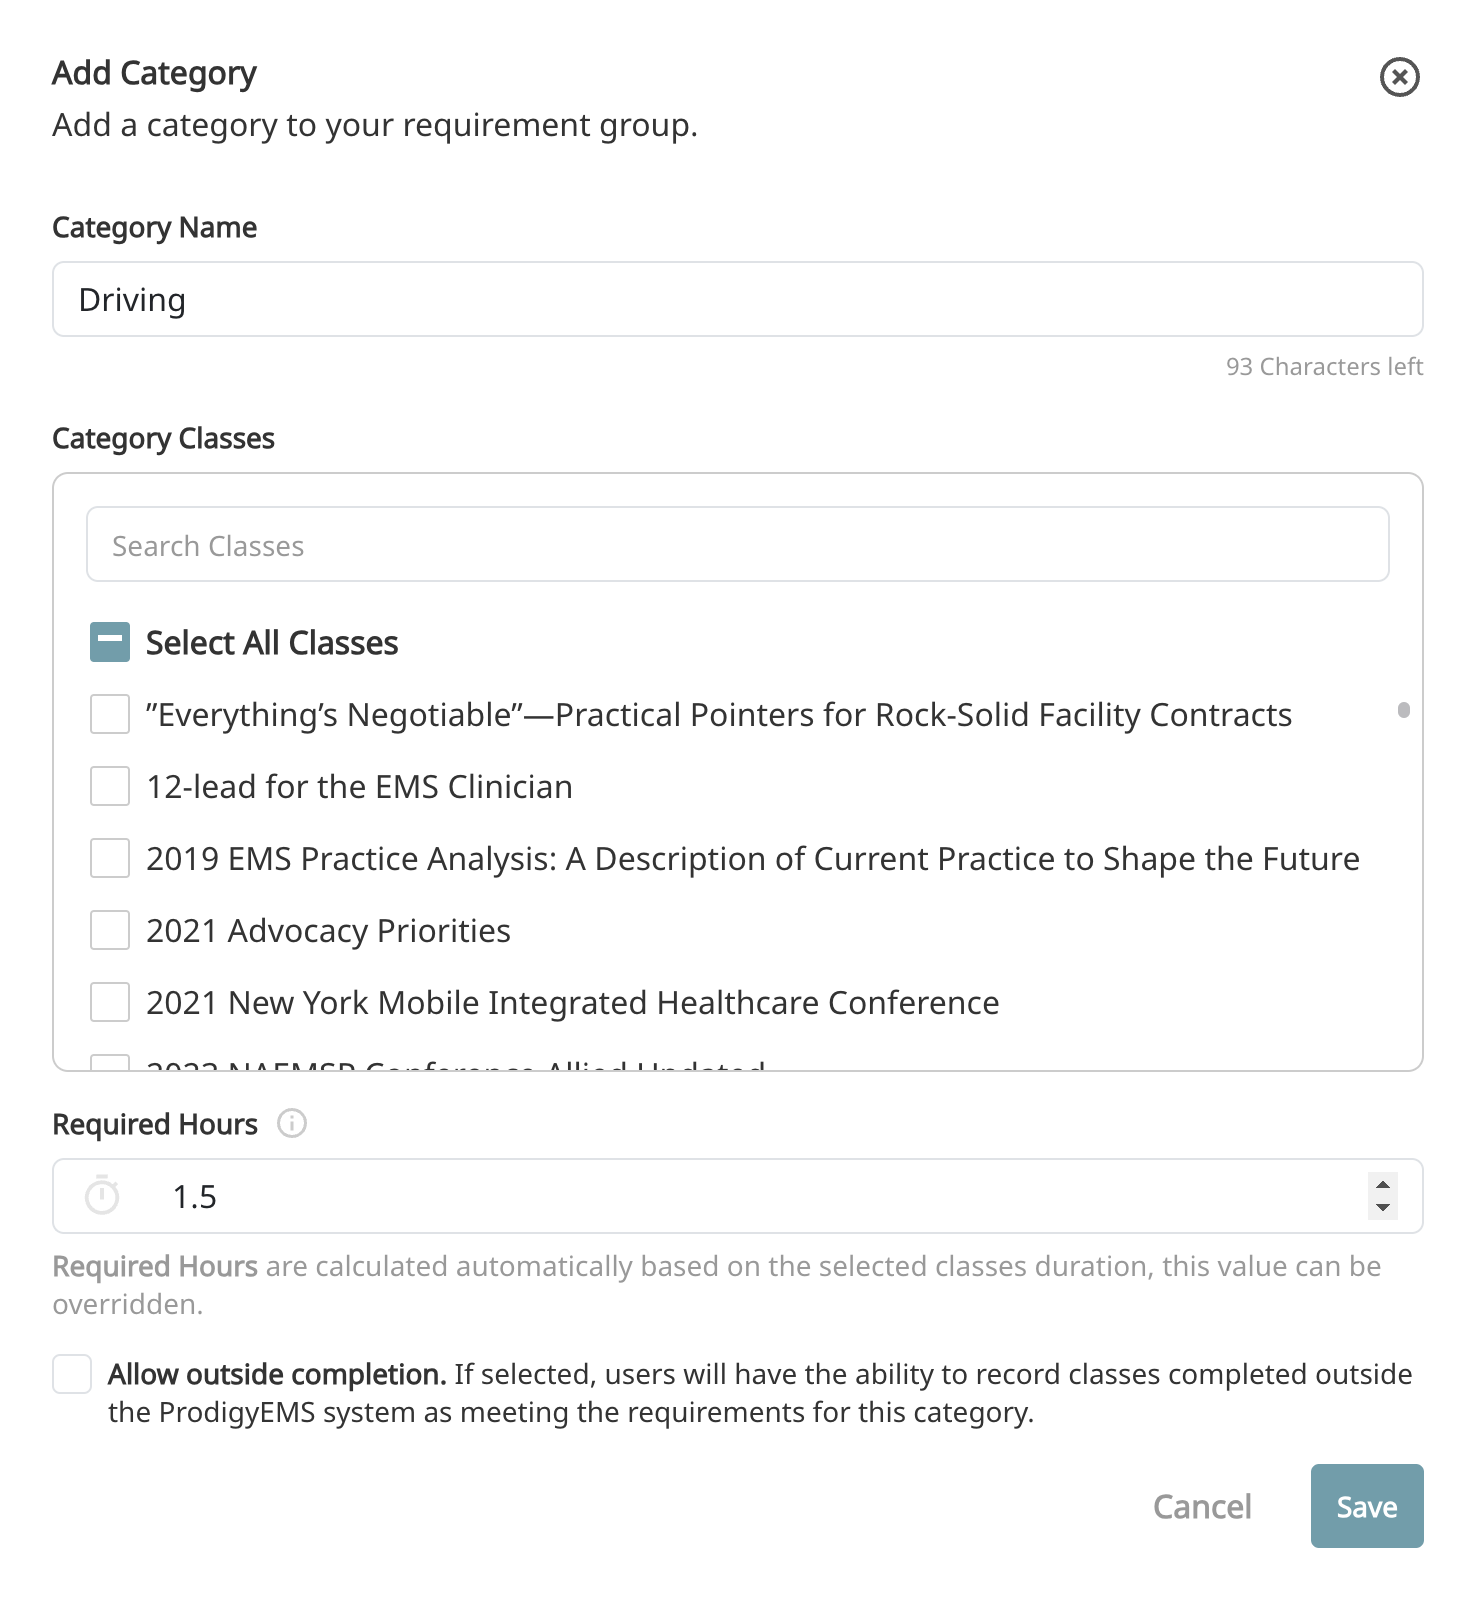
- Category Name - Give the Category a descriptive name
- Category Classes - You can select multiple classes, use the Search Classes option to find classes. You can select any class that is available to your organization whether it is a Prodigy system class or a custom class for your organization.
- Required Hours - This will default to the actual duration of the classes that you choose. You can override this and add more hours or fewer hours. You may want to add fewer hours if you are giving the user multiple options to fulfill a category. For example, they need to complete 3 hours of resuscitation training, but you give them 6 hours to choose from. In that case, make the required hours 3. You can also add hours to the requirement. This would either be done because there are classes outside of Prodigy they must complete or you will be adding more hours to this category at a later time and don't want the category to show as complete.
- Allow Outside Completions - If this is checked, a user may upload an outside class and have that count towards this requirement. We leave this unchecked by default which requires completions be done on Prodigy.
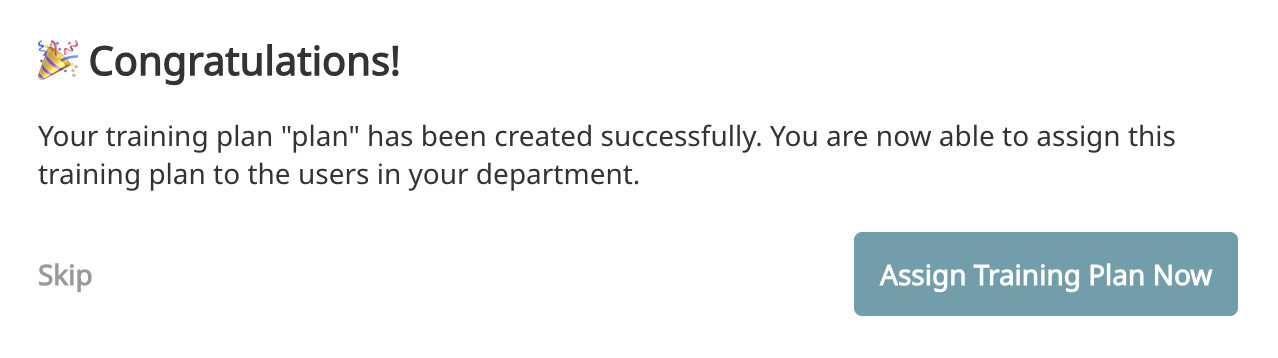
Finalize Plan
Clicking Finish will publish the plan and make it available for use. It will bring up a dialog box where you can either Assign the plan or Skip and just save it.
Editing Plan
Once a plan is finalized, you can edit it using the same building tool we used to create it. To start, click on View Training Plan next to the plan you would like to edit.

From this area you will have the option to edit and assign the plan. You can choose to edit the the plan details or the requirement groups. Click in the classes will bring you to the class page to review the plan.
Editing Training Plans
Remember, editing a plan will effect users already in progress. Adding a class may change the completion percentage for a user that has already started your plan.